background image

SWF EMBROIDERY MACHINE

   CONTROL MODULE -> JUMP MAI_MOTOR QAMP_X, QAMP_Y

   Check below;  

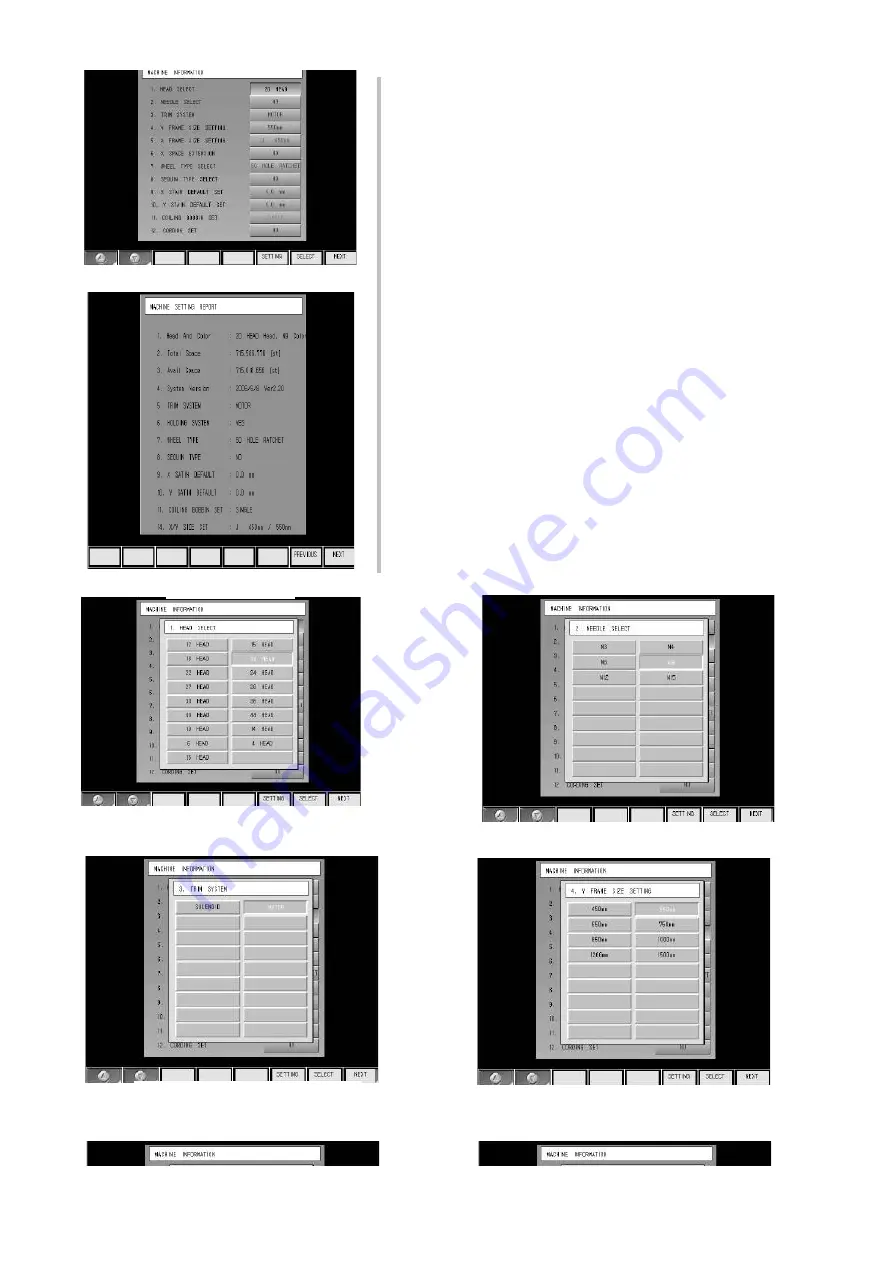
    shown in [Picture 9] and you can confirm the setting.

8) Lastly, check the machine information at the initial embroidery

   screen.

8) [Picture 8] shows machine settings.

    Selecting MEMORY [PARA SET] in [Picture 4] generates the

    same screen.

    [Picture 8-1~11].

    After configuring all items, press F7 NEXT to enter the screen

    Use F1 

, F2 

 keys to move to each item.  Press

    F7 SELECT to generate function screens such as

Picture 8

Picture 9

Picture 8-1 Head No. Set

Picture 8-2 Color No. Set

Picture 8-3 Setting Trim Type

Picture 8-4 Setting Y-Frame

─ Ver.2009 1st

────────────────────── SunStar Co., Ltd ─

Summary of Contents for SWF SWB-E-08

Page 1: ...n SWF logo image as in Picture 2 appears Turn ON the machine Insert FDD or USB 1 2 3 Select START key 4 5 Update thread sensing 6 settings 1 Turn ON the machine and press left and right frame move key 2 At the screen shown in Picture 4 use F1 and F2 arrow T OPERATION BOX A Content SWB E 08 Order Tools Required B Order C Details JIG Instruments No CD CODE No Picture 1 Picture 2 Picture 3 Picture 4 ...

Page 2: ...ick connect it press F1 GO key To cancel press F3 CANCEL to USB PORT and press F2 USB To cancel press F3 CANCEL 7 If you want to upgrade the program of thread sensing board When you use a diskette insert the diskette to FDD and press F1 FDD key When you use a USB memory stick connect it 3 Program Installation 6 Picture 7 is a screen that is automatically created when to USB PORT and press F2 USB T...

Page 3: ...e 8 shows machine settings Selecting MEMORY PARA SET in Picture 4 generates the same screen Picture 8 1 11 After configuring all items press F7 NEXT to enter the screen Use F1 F2 keys to move to each item Press F7 SELECT to generate function screens such as Picture 8 Picture 9 Picture 8 1 Head No Set Picture 8 2 Color No Set Picture 8 3 Setting Trim Type Picture 8 4 Setting Y Frame Ver 2009 1st Su...

Page 4: ...rame Size Picture 8 6 Setting alternative function Picture 8 7 Setting Wheel Picture 8 9 Setting Basic Value in X Satin Picture 8 10 Setting Basic Value in Y Satin Picture 8 10 Setting Cording Picture 8 8 Setting Sequin Ver 2009 1st SunStar Co Ltd ...

Reviews: