background image

Parts

4

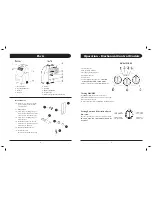
1. Control Panel

2. Cooling Air Outlet

3. Handle

4. Castors

5. Air Inlet

6. Air Filter

7.  Exhaust Air Outlet

8. Cord Hanger

9.  Water Stopper (Rubber Plug Inside)

10

11

12

13

14

15

16

Accessories

10. Adaptor - for insertion over the 

hose and into the back of the
air conditioner

11. Exhaust Hose

12. Foam Strip - for filling the open 

window space and with a hole for
connection to the exhaust hose

13.  Foam Strip - for filling the open 

window space

14.  Round Connector - to be used 

between hose and window kit or 
between hose and wall

15.  Cap for Round Connector

16. Remote Control

(Electronic control models only)

Operation - Mechanical Control Models

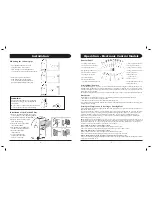
9

1. Power indicator

2. Fan operating indicator

3. Cooling operating indicator

4. Full water indicator

5. Thermostat

6. Speed switch with options for - LOW FAN,

HIGH FAN, LOW COOL, HIGH COOL

7. Timer (1-8 hours) as well as ON/OFF switch

Turning ON/OFF

Set TIMER to ON for continuous operation
(the unit will operate as long as it is not turned off).

Power indicator comes on.

To turn off the unit, turn the TIMER to the OFF position

Setting Function / Ventilation Speed

WA-1210M

Turn the speed switch to select the required setting:

LOW FAN, HIGH FAN, LOW COOL, HIGH COOL,
SPEED OFF

WA-1210M

Summary of Contents for WA-1210E

Page 1: ...er repair or replacement will not be extended beyond the original one year period All replacement parts or units will be new or reconditioned Parts or units which are replaced become the property of SUNPENTOWN The warranty applies to the use of this product in the United States Warranty does not include freight charges This GUARANTEE is in addition to your Statutory Rights Dear Customer Please kee...

Page 2: ...clean Set the unit to maximum cooling and high speed fan initially then adjust the unit to a comfortable setting NOTE It is recommended to turn on the air conditioner when the room temperature is around 75 F Do not wait until the room is excessively hot 1 Maintenance 12 Always unplug the unit from the mains before beginning the cleaning Cleaning the Housing Use a soft damp cloth to wipe the body c...

Page 3: ...the warm air Do not cover or obstruct the appliance inlet or outlet grilles Figure 2 To avoid the risk of shock the product should never be used in bathrooms shower rooms or in any other steamy or wet areas The unit will cool when the room temperature is between 64 F and 110 F depending on the thermostat setting Do not sit or place objects on the unit Do not touch the unit with wet damp hands or w...

Page 4: ...er button is not pressed the unit will work continuously By pressing the timer button but without turning on the unit you can PRE SET the time for the machine to work For example if you press the timer to 2 the unit will come on automatically after 2 hours All the above functions can also be performed with the supplied remote control This remote control requires 2 AAA batteries to operate Regulati...

Page 5: ...ur set temperature At this time the green indicator will light under ST Set Temperature Once the temperature up or down buttons is released the window will return to displaying the ambient temperature after a second Note When unit is in the following modes Auto Cool or Heat the compressor will cool heat the room to reach the set temperature Once the ambient temperature has reached the set temperat...

Page 6: ...between hose and wall 15 Cap for Round Connector 16 Remote Control Electronic control models only Operation Mechanical Control Models 9 1 Power indicator 2 Fan operating indicator 3 Cooling operating indicator 4 Full water indicator 5 Thermostat 6 Speed switch with options for LOW FAN HIGH FAN LOW COOL HIGH COOL 7 Timer 1 8 hours as well as ON OFF switch Turning ON OFF Set TIMER to ON for continuo...

Page 7: ...he Draining into a Container Use a Shallow Container or Dish 1 Turn off the unit 2 Position a flat container or dish under the drain hole Do not allow the water to drip continuously into the container as it might easily overflow 3 Remove the drain knob rubber plug from the drain hole The condensed water will drain out automatically 4 When the container is almost full replace the rubber plug into t...

Page 8: ...cording to its own settings The unit seems to do little Is there direct sunshine Please close the curtains or blinds Are too many windows or doors open Are there too many people in the room Is there something in the room producing lots of heat The unit seems to do nothing Is the dust filter dirty Is the air intake or outlet blocked up Is the room temperature within the selected temperature 5 F The...

Reviews: