


4
Chassis Replacement Guide • April 2010
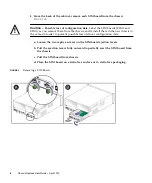
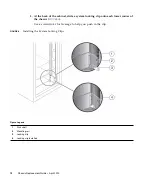
b. Pull the tab gently toward the connector body, and then with your other
hand, extract the connector from the chassis.
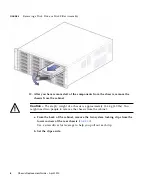
Caution –
Do not twist or pull the tab in any direction other than parallel with the
connector body or you might break the tab. If the tab breaks, use a small sharp object
(such as a fine-tipped screwdriver) to lift the metal spring at the top of the connector
shell to unlatch it.
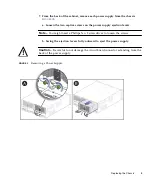
Caution –
Electrical shock hazard.
The power supplies in this equipment can
produce high energy hazards. Only trained personnel with authorized access to this
equipment can remove and replace modules in the system.
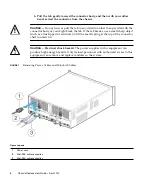
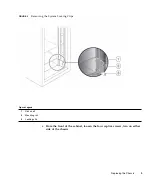
FIGURE 1
Removing Power Cables and Mini-SAS Cables
Figure Legend
1
Power cord
2
Mini-SAS cable connection
3
Mini-SAS cable connection


