


Replacing the Chassis
7
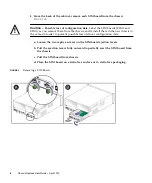
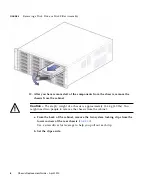
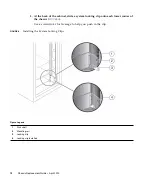
9. From the front of the cabinet, remove each disk drive and disk filler assembly
(
Caution –
Potential loss of data access.
Data might be lost if an active disk drive is
removed. If you remove an active disk drive accidentally, wait at least 30 seconds
before reinserting it.
Caution –
Potential loss of configuration data.
Label each disk drive with the slot
from which it was removed, and reinstall each drive in the identical slot location in
the replacement chassis to prevent possible loss of disk drive configuration data.
a. Press the disk drive release button, allowing the disk ejection lever to move
to the right.
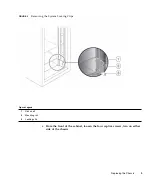
b. Swing the ejection lever fully out and to the right to partially extract the disk
drive from the chassis.
c. Grasp the middle of the disk drive and pull it toward you to remove it from
the chassis.
d. Record the slot location on the outer drive casing.
Use the same slot location when installing each disk drive in the new chassis.
e. Place each disk drive on a static-free surface or in static-free packaging.


