background image

xvi

Revision P

95693


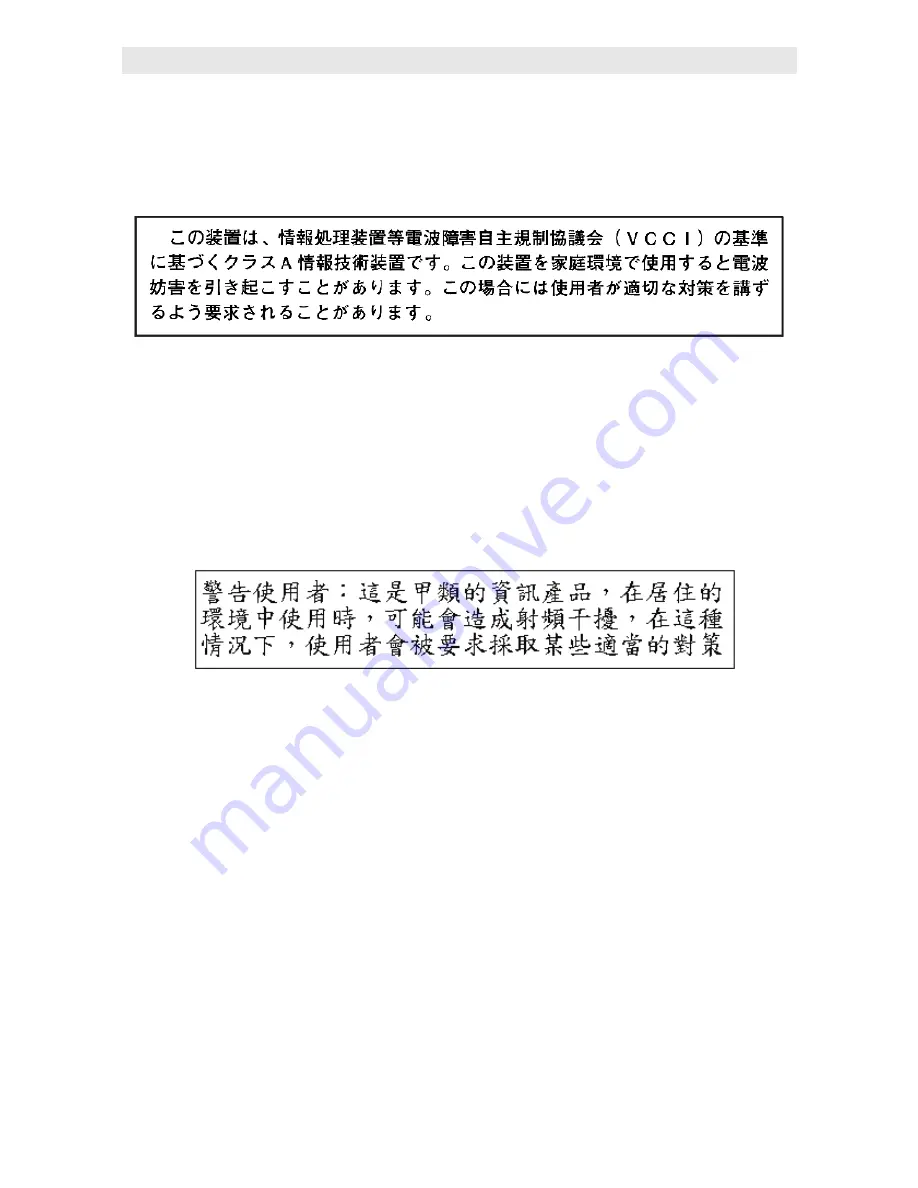
Japanese Compliance Statement

The following compliance statement in Japanese pertains to VCCI EMI regulations:

English translation

: This is a Class A product based on the Technical Requirement of 

the Voluntary Control Council for Interference by Information Technology (VCCI). In a 
domestic environment, this product may cause radio interference, in which case the user 
may be required to take corrective actions.

Taiwan Warning Label Statement


The following warning label statement pertains to BSMI regulations in Taiwan, R.O.C.:

English translation

: This is a Class A product. In a domestic environment, this product 

may cause radio interference, in which case, the user may be required to take adequate 
measures.

Summary of Contents for StorageTek TIMBERWOLF 9740

Page 1: ...StorageTek TIMBERWOLF 9740 Tape Library Hardware Operator s Guide 95693 Revision P ...

Page 2: ......

Page 3: ...TimberWolf 9740 Tape Library Hardware Operator s Guide ...

Page 4: ...ectuels relatants à la technologie qui est décrit dans ce document En particulier et sans la limitation ces droits de propriété intellectuels peuvent inclure un ou plus des brevets américains énumérés à http www sun com patents et un ou les brevets plus supplémentaires ou les applications de brevet en attente dans les Etats Unis et dans les autres pays Ce produit ou document est protégé par un cop...

Page 5: ... 2005 N Changes as noted in this revision 114166 September 2006 P Covers and Title Page Replaced the information with Sun Microsystems Inc information Summary Removed the List of Pages Preface Replaced Additional Information verbiage with Sun boilerplate verbiage Notices Replaced the verbiage with Sun boilerplate verbiage Chapter 1 Removed the model number from Figure 1 1 Chapter 5 Replaced the ve...

Page 6: ...iv Revision P 95693 ...

Page 7: ...es xv United States FCC Compliance Statement xv CISPR 22 and EN55022 Warning xv Japanese Compliance Statement xvi Taiwan Warning Label Statement xvi Internal Code License Statement xvii xviii 1 General Information 1 1 Library Storage Module Components 1 1 Robot 1 2 Cartridge Access Port 1 4 Storage Cells 1 4 Cartridge Exchange Mechanism 1 4 Cartridge Drives and Cabinets 1 5 LSM Safety Features 1 5...

Page 8: ...cleaning Cartridges 3 8 Replacing Expired Cleaning Cartridges 3 9 Operating in Manual Mode 3 10 Opening the LSM Front Doors 3 10 Moving the Robot 3 12 Raising and Lowering the Z Carriage 3 12 Rotating the Z Column 3 13 Locating a Cartridge in the Storage Cells 3 14 Mounting and Dismounting Cartridge Tapes 3 19 Mounting a Cartridge into a 9490 or SD 3 CTU 3 20 Dismounting a Cartridge from a 9490 or...

Page 9: ... Tape Information A 1 Cartridge Requirements A 1 Handling a Cartridge A 1 Inspecting a Cartridge A 2 Storing Cartridges A 5 Cleaning the Cartridge Exterior A 5 Using Cleaning Cartridges A 5 Repairing a Detached Leader Block A 6 Ordering Media A 6 Applying Labels A 7 Non DLT Cartridges A 7 DLT Cartridges A 11 Setting the Write Protect Switch A 12 9490 Write Protect Switch A 12 SD 3 Write Protect Sw...

Page 10: ... 14 Figure 3 7 Locating Cartridges Panels Cells Rows Cartridge Drive 3 15 Figure 3 8 Locating Cartridges Panels Cells Rows Drive Cabinet 3 16 Figure 3 9 Locating Cartridges Panels Cells Rows CEM 3 17 Figure 3 10 Diagnostic and Cleaning Cartridge Cell Locations 3 18 Figure 3 11 DLT Handle and Hub Positions 3 21 Figure 3 12 Mounting a DLT Cartridge 3 22 Figure 3 13 Mounting a Cartridge into a T9840 ...

Page 11: ... 3 19 Table A 1 9490 Cartridge Environmental Specifications A 18 Table A 2 SD 3 Cartridge Environmental Specifications A 18 Table A 3 DLT Cartridge Environmental Specifications A 18 Table A 4 T9840 Cartridge Environmental Specifications A 19 Table A 5 T9940 Cartridge Environmental Specifications A 19 ...

Page 12: ...Tables x Revision P 95693 ...

Page 13: ...unctions This chapter also shows how to set the SCSI address and maximum usage count for the cleaning cartridge Chapter 3 Operating the LSM contains operating procedures The procedures include how to power on and power off the LSM perform automated operations enter and eject cartridges through the cartridge access port cleaning the tape drives and perform manual operations mount and dismount cartr...

Page 14: ...es the information to which it pertains WARNING A warning alerts you to conditions that might result in long term health problems injury or death A warning always precedes the information to which it pertains Related Publications Additional information is contained in the following publications some of which are delivered with this product Publication Part Number Cartridge Drive Publications 9490 ...

Page 15: ...s who have a current warranty or a current maintenance service agreement may apply for membership by clicking on the Request Password button on the CRC home page employees may enter the CRC through the SunWeb PowerPort The URL for the CRC is http www support storagetek com Partners Site The StorageTek Partners site is a Web site for partners with a StorageTek Partner Agreement This site provides i...

Page 16: ...xiv Revision P 95693 ...

Page 17: ...to Federal Communications Commission Rules 47 CFR 15 105 Note This equipment has been tested and found to comply with the limits for a Class A digital device pursuant to part 15 of the FCC Rules These limits are designed to provide reasonable protection against harmful interference when the equipment is operated in a commercial environment This equipment generates uses and can radiate radio freque...

Page 18: ...ce by Information Technology VCCI In a domestic environment this product may cause radio interference in which case the user may be required to take corrective actions Taiwan Warning Label Statement The following warning label statement pertains to BSMI regulations in Taiwan R O C English translation This is a Class A product In a domestic environment this product may cause radio interference in w...

Page 19: ...ch may reside or execute in or be used by or in connection with Equipment and which detects records displays and or analyzes malfunctions in the Equipment d Microcode is defined as a set of instructions software that is either imbedded into or is to be loaded into the Equipment and executes below the external user interface of such Equipment Microcode includes both Internal Code and Maintenance Co...

Page 20: ... on the part of either party expressly subject to all the terms and conditions of this Notice passing in full to the party to whom such Equipment is transferred and such transferee accepts the provisions of this license by initial use of the Internal Code You cannot pass to the transferee of the Equipment any greater rights than granted under this Notice and shall hold StorageTek harmless from any...

Page 21: ...age Module Components The LSM has four major components A robot A cartridge access port CAP that holds up to 14 cartridges Storage cells for 326 or 494 cartridges An optional cartridge exchange mechanism CEM Attached to the rear of the LSM is either A cartridge drive that houses 9490 or SD 3 controller transport units A 9741 or 9741E Drive Cabinet that houses DLT and or T9840 drives An expanded 97...

Page 22: ...n attaches to the floor and ceiling of the LSM The theta motor rotates the Z carriage to allow access to all of the cells in the LSM The hand consists of a reach mechanism and gripper assembly that mount and dismount the cartridge tapes The hand attaches to the Z carriage which moves the hand vertically along the Z column Figure 1 1 External Components C62619 C62619 EXPANSION DOOR DOOR LATCHES RIG...

Page 23: ...e LSM A host request is made at the customer console to audit the LSM The VOLSER information is stored on the library controller card You must request a host update to add the information to the host memory Note The camera does not read the VOLSERs of cartridges in the CTUs or tape drives If you manually mount a cartridge the host memory will retain the VOLSER that was last automatically requested...

Page 24: ...und the robot assembly CAUTION Equipment problems The cartridges must be inserted into the storage cells with the customer label on top and the VOLSER facing the person doing the inserting If the cartridges are inserted into the cells upside down the LSM will stop during operation Cartridge Exchange Mechanism The cartridge exchange mechanism CEM is an optional feature that allows a robot to pass a...

Page 25: ...ive cannot be installed in a 9740 LSM if the library uses a SCSI control path See Chapter 4 Drives for more information about these drives LSM Safety Features Safety features are incorporated into the LSM If the front doors to the LSM are opened electrical interlocks remove power from the robot assembly Behind the right front door covers are placed over the library controller card and the LSM powe...

Page 26: ... Hz 20 a Service 3 wire International 200 to 240 VAC single phase 47 to 63 Hz 10 a Service 3 wire Power consumption 200 W Maximum heat output 683 Btu hr Temperature Operating Storage Shipping 15º to 32ºC 59º to 90ºF 10º to 40ºC 50º to 104ºF 40º to 60ºC 40º to 140ºF Relative Humidity Operating Storage Shipping 20 to 80 noncondensing 10 to 95 noncondensing 10 to 95 noncondensing Wet Bulb Maximum Ope...

Page 27: ...he cleaning cartridges Refer to the controller transport unit or tape drive operator guides for information about operating those units Power Switch The LSM power switch is a circuit breaker located in the lower right corner of the right front door of the LSM The switch provides power to the LSM only Figure 2 1 shows the LSM power switch location Figure 2 1 LSM Power Switch C62018 C62018 DETAIL A ...

Page 28: ... off Do the same to power off the LSM Controller Transport Units The controller transport units also have their own power supplies but they have a power switch on they outside of the cartridge drive that the operator is allowed to use If you need to power down the LSM and drives toggle down the LSM power switch and push the cartridge drive power switch Figure 2 2 on page 2 2 shows the power switch...

Page 29: ... cartridge access port Set the SCSI address See Figure 2 4 on page 2 5 and Figure 2 5 on page 2 6 for this procedure Set the maximum usage count of the cleaning cartridges See Figure 3 2 on page 3 6 for this procedure Setting the SCSI Address You set the SCSI address from the operator panel See Figure 2 4 on page 2 5 and Figure 2 5 on page 2 6 for the menu block diagrams that describe how to set t...

Page 30: ...enter the open command from the system console The display will change to ONLINE PRESS EXECUTE TO UNLOCK CAP Once you have pressed EXECUTE the display will change to ONLINE CAP UNLK PENDING The robot will then unlock the CAP and the display will show ONLINE CAP UNLOCKED When the display shows ONLINE CAP UNLOCKED and you want it locked open and close the CAP The display will show ONLINE CAP LOCKED ...

Page 31: ...reen text from a top level menu display screen and type of information screen is displaying operator panel softkey operations used in menu sequences repeat previous menu action bullet the number of times a previous menu action is repeated between the first and last option in a sequential menu set a bullet plus a number and a multiplication symbol Example 3X Press Execute to Dmnt to Drive 1 EXECUTE...

Page 32: ...menu option until all drives have been assigned an ID 14X Press Execute if Drv X Off Bus Press Execute if Drv X On Bus Press Execute if Drv X is ID 0 Press Execute if Drv X is ID 15 EXECUTE PRESSED EXECUTE PRESSED EXECUTE PRESSED EXECUTE PRESSED EXECUTE PRESSED MENU PRESSED MENU PRESSED MENU PRESSED MENU PRESSED MENU PRESSED Drv X XXX Bus SCSI ID XX SCSI Host SCSI ID X MENU PRESSED MENU PRESSED Of...

Page 33: ...activity The operator panel displays PROM boot and initialization information The operator panel displays ONLINE PRESS EXE TO UNLK CAP Note If the LSM does not power on contact the Central Support Remote Center and report the problem Powering off the LSM To power off the LSM enter the command at the operator console to place the LSM and controller transport units CTUs and drives offline Push down ...

Page 34: ...s ONLINE CAP UNLK DISABLD the CAP is locked by the host Issue the command at the operator console to allow the CAP to be unlocked When the operator panel displays ONLINE PRESS EXE TO UNLK CAP follow the steps below To unlock the CAP 1 Press EXECUTE on the operator panel a The operator panel displays ONLINE CAP UNLK PENDING b The hand unlocks the CAP c The operator panel displays ONLINE CAP UNLOCKE...

Page 35: ...gnizes that a cartridge is present but the hand does not move it You must remove the cartridge from the CAP and correct the problem For some systems you are prompted to type in a label number when no VOLSER is read If you do type in a label number you might cause a problem during an audit because the camera still cannot read an unreadable VOLSER on the cartridge Figure 3 1 Loading a Cartridge into...

Page 36: ...ommand at the operator console to change the LSM to the ONLINE PRESS EXE TO UNLK CAP mode 3 When the operator panel displays ONLINE PRESS EXE TO UNLK CAP press EXECUTE on the operator panel a The operator panel displays ONLINE CAP UNLK PENDING b The hand unlocks the CAP c The operator panel displays ONLINE CAP UNLOCKED 4 Open the CAP to gain access to the cells 5 Remove the cartridges and store th...

Page 37: ...0 drives SCSI Interface If your control path is SCSI these items are true You have the option of using the AUTO CLEAN function or cleaning the drives manually All drive cleaning is set up and controlled through the operator panel The LSM automatically tracks the number of cleaning cycles performed by the AUTO CLEAN function on any particular cleaning cartridge AUTO CLEAN Feature The AUTO CLEAN fea...

Page 38: ... Press Execute to Show DLT Data Press Execute to Change Limit EXECUTE PRESSED EXECUTE PRESSED EXECUTE PRESSED EXECUTE PRESSED EXECUTE PRESSED EXECUTE PRESSED MENU PRESSED MENU PRESSED MENU PRESSED 19X DLT 3490 9490 or Redwood SD 3 data appears here when the LSM is configured for those drives only This menu option only appears when the LSM is configured for a mixed drive environment of 9840s and DL...

Page 39: ...ge disappears with the next operator panel message or SCSI command If a drive indicates that it needs cleaning the LSM continues to use an expired cleaning cartridge incrementing the clean counter for each cleaning mount When an expired cleaning cartridge is inserted into the drive the drive will run the cleaning tape to the end and detect that the cleaning cartridge is expired but will not reset ...

Page 40: ...the prior cleaning operation For that mount and for each subsequent mount to the uncleaned drive a message will be posted in the event log No Cleaning Cartridge Available for the specified drive The ACSLS Messages document PN 20177 explains the meaning of the message in detail recommending required action to add more cleaning cartridges Replacing Cleaning Cartridges The Cleaning Transports section...

Page 41: ... If you want to replace the 3480 cleaning cartridge press EXECUTE If you want to replace the helical cleaning cartridge press MENU PRESS EXECUTE TO REPLACE HELICAL CART If you want to replace the DLT cleaning cartridge press MENU again PRESS EXECUTE TO REPLACE DLT CART If you want to replace the 9840 cleaning cartridge press MENU again PRESS EXECUTE TO REPLACE 9840 CART 3 Press EXECUTE and wait un...

Page 42: ...unlock the top and bottom latches Turn the key counterclockwise CAUTION Components are Sensitive to Static Electricity Even a small electrostatic discharge ESD can damage an electrical component inside the LSM A damaged component may not fail immediately but over time it will become worse possibly causing an intermittent problem Make sure you touch gray unpainted metal or wear an antistatic wrist ...

Page 43: ...95693 Revision P 3 11 Operating in Manual Mode Figure 3 3 Opening Front Doors C62021 A C62021 BOTTOM LATCH TOP LATCH LSM with Standard Door LSM with Expansion Door DETAIL A LATCH KEY LATCH REF ...

Page 44: ...e hand is fully retracted before moving any part of the robot Turn the belt drive to retract the reach mechanism If the LSM goes offline because of a power failure the reach mechanism might extend into a storage cell or drive If the robot is rotated in this condition the hand will be damaged Move the Z column and Z carriage only as shown in Figure 3 4 and Figure 3 5 on page 3 13 Raising and Loweri...

Page 45: ...n rotating it do not force it Rotate the Z column in the opposite direction If you need to rotate the Z column grasp it and carefully rotate it as shown in Figure 3 5 If the Z column meets resistance and stops before the desired position is reached it has contacted a stopping mechanism Rotate the Z column in the opposite direction Figure 3 5 Rotating the Z Column E62023 E62023 ...

Page 46: ...e panels rows and columns of the cartridge storage cells in a typical LSM configuration Note There is a decal at the top of each column that also provides location information Figure 3 6 Locating Cartridges Top View C62024 C62024 9740 with Expansion Door PANEL 3 PANEL 0 PANEL 1 PANEL 2 COLUMN 0 COLUMN 0 COLUMN 0 COLUMN 0 COLUMN 0 CARTRIDGE DRIVE CTU ...

Page 47: ...0 36 36 0 0 COLUMN 0 COLUMN 0 COLUMN 0 COLUMN 1 COLUMN 1 COLUMN 1 COLUMN 2 COLUMN 2 COLUMN 2 COLUMN 0 COLUMN 3 COLUMN 3 COLUMN 3 COLUMN 0 COLUMN 1 COLUMN 2 PANEL 2 PANEL 1 PANEL 0 PANEL 3 EXPANSION T 41 T T T T T T T T T T T T T T T T T T T T T T T 41 41 41 41 41 41 41 41 41 41 BASE 326 168 14 494 4 CTUs CUSTOMER CARTRIDGE CAPACITY CHART CAP TOTAL EXPANSION NOT A STORAGE CELL CLEANING CARTRIDGE CE...

Page 48: ...UMN 1 COLUMN 1 COLUMN 1 COLUMN 2 COLUMN 2 COLUMN 2 COLUMN 0 COLUMN 3 COLUMN 3 COLUMN 3 COLUMN 2 PANEL 2 PANEL 1 PANEL 0 PANEL 3 EXPANSION T 41 T T T T T T T T T T T T T T T T T T T T T T T T T T T T T 41 41 41 41 41 41 41 41 41 41 BASE 326 168 14 494 10 DRIVES CUSTOMER CARTRIDGE CAPACITY CHART CAP TOTAL EXPANSION NOT A STORAGE CELL CLEANING CARTRIDGE CELL DIAGNOSTIC CARTRIDGE CELL T T T T EMPTY DR...

Page 49: ... COLUMN 1 COLUMN 1 COLUMN 1 COLUMN 2 COLUMN 2 COLUMN 2 COLUMN 0 COLUMN 3 COLUMN 3 COLUMN 3 COLUMN 2 PANEL 2 PANEL 1 PANEL 0 PANEL 3 EXPANSION T 41 T T T T T T T T T T T T T T T T T T T 41 41 41 41 41 41 41 41 41 41 BASE 318 168 10 or 14 486 4 or 10 DRIVES CUSTOMER CARTRIDGE CAPACITY CHART CAP TOTAL EXPANSION NOT A STORAGE CELL CLEANING CARTRIDGE CELL DIAGNOSTIC CARTRIDGE CELL T T T T EMPTY DROPOFF...

Page 50: ...d Table 3 1 on page 3 19 designates where the respective cartridges for each drive type are located in the playground CAUTION Proper operation Do not insert cartridges into the reserved cells or the LSM will not be able to complete its initialization routines If the LSM does not initialize it cannot be placed online Figure 3 10 Diagnostic and Cleaning Cartridge Cell Locations C62733 ROW 22 Do Not ...

Page 51: ...e recessed area on the right side 3 To mount a cartridge obtain the VOLSER location and drive number from the operator console Locate the cartridge and mount it into the drive 4 To dismount a cartridge locate the CTU or drive Remove the cartridge from the drive and place it outside the LSM The following information details the mount and dismount procedures for each cartridge and device type Procee...

Page 52: ...insert the cartridge properly or you will damage the drive Use standard ETape or EETape 9490 cartridges for 9490 transports Use DATA D3 helical tape cartridges for SD 3 transports 3 Insert the cartridge with the customer label on top and the VOLSER toward you Note If a transport has been running it might not accept the tape unless you place the transport into manual mode To do this 1 Press the REA...

Page 53: ...nd Digital Linear Tape Drives on page 4 4 for the following procedures Figure 3 11 DLT Handle and Hub Positions E62378 DRIVE SHUTTLE DRIVE HUB UP HUB DOWN CARTRIDGE HOOK UP CARTRIDGE HOOK DOWN HANDLE HANDLE VIEW A HANDLE DOWN POSITION VIEW B HANDLE UP POSITION OPERATE HANDLE INDICATOR UNLOAD BUTTON A B ...

Page 54: ...ush the shuttle in completely If the cartridge did not eject or if the handle did not rise pull and push again To mount a cartridge into a DLT drive 1 Follow the steps in Mounting and Dismounting Cartridge Tapes on page 3 19 2 Make sure that the DLT handle is up and the cartridge handle hook and hub are down See Figure 3 11 on page 3 21 for more information CAUTION Potential equipment damage Inser...

Page 55: ...e the cartridge from the shuttle latch under the right side of the cartridge Then push the cartridge into the drive and lower the handle Dismounting a Cartridge from a DLT Drive To dismount a cartridge from a DLT drive 1 Make sure that the Operate Handle indicator is on 2 Push the shuttle completely back pause for about two seconds then release the shuttle Note If the cartridge does not come out o...

Page 56: ...ert the cartridge into the drive using the direction shown in Figure 3 13 3 Wait for one of the following messages to display and take the appropriate action if necessary The Ready A message displays when the drive is VolSafe enabled and loaded with a write enabled VolSafe cartridge The Ready F File Protected message displays when a write protected cartridge loads successfully The Ready U File Unp...

Page 57: ...r the tape rewinds the cartridge ejects from the drive Remove the cartridge from the drive and place it outside of the LSM The cartridge fails to eject after the tape rewinds Refer to the T9840 Tape Drive User s Reference Manual to correct this condition If the Unload switch is pressed during a write operation the drive tries to write the remaining data before the cartridge unloads If the UnWrxxxx...

Page 58: ...a T9940 Drive To unload the cartridge from a T9940 drive 1 Ensure that the T9940 drive is not selected CAUTION Loss of data Pressing the Unload switch during a write operation causes the drive to try to write the remaining data before the tape unloads An operator display of UnWr xxxx unwritten data where xxxx is the fault symptom code means the write failed and some data is not written to the tape...

Page 59: ...edure To remove a cartridge from the hand when your LSM has a standard door 1 Rotate the Z column until the hand is located on the left top side of the LSM Panel 0 Column 0 2 If a cartridge is in the top cell remove it so you have more room to perform the next step 3 Rotate the reach mechanism drive belt until the gripper is extended to its full position as shown in Figure 3 15 on page 3 28 4 Hold...

Page 60: ...gure 3 15 on page 3 28 3 Hold the reach mechanism belt drive with one hand and grasp the cartridge with the other Pull gently on the cartridge until it is released from the gripper as shown in Figure 3 16 on page 3 29 CAUTION Potential equipment damage Make sure that the gripper is fully retracted If it is left extended and you turn the robot the gripper will strike a storage cell If it is left ex...

Page 61: ...Close and lock the LSM doors The robot will conduct an audit of the LSM 3 Place the LSM online by entering the command at the customer server operator console 4 Refer to your specific software publications for instructions about placing the cartridges you removed into the CAP and having the robot insert the cartridges into the LSM cells Figure 3 16 Removing a Cartridge from the Hand C62027 GRIPPER...

Page 62: ...Operating in Manual Mode 3 30 Revision P 95693 ...

Page 63: ...installed in a 9741 9741E Drive Cabinet are allowed to be mixed in the same cabinet Controller Transport Units Controller transport units CTUs are independent subassemblies within the cartridge drive Each CTU consists of a separate controller and transport and provides a 1 by 1 architecture Because of this 1 by 1 architecture Operation of one CTU does not effect the operations of any other CTUs in...

Page 64: ... and retrieval system The subsystem reads and writes on half inch magnetic tape cartridges in American National Standards Institute compatible helical scan recording format These cartridge tapes are not compatible with linearly recorded cartridges and are available in the following types 10 gigabyte A cartridge 91 meters 298 feet 25 gigabyte B cartridge 204 meters 668 feet 50 gigabyte C cartridge ...

Page 65: ...95693 Revision P 4 3 Controller Transport Units Figure 4 1 Power Control Panel C42052 Figure 4 2 Library Operator Panel C42431 OPERATOR CRTG LOADED CLEAN SELECT OFFLINE REWIND UNLOAD READY ...

Page 66: ...gn includes a quad channel read write head with high efficiency data compression to maximize data throughput and to minimize access time DLT products use half inch wide tape The DLTtape IV data cartridges are designed exclusively for the DLT 4000 DLT 7000 and DLT 8000 tape drives Operator Panel Figure 4 3 shows an example of a DLT operator panel When a library is in manual mode you will use this p...

Page 67: ... labels for T9840 cartridge tapes have unique letters R identifies T9840 standard and VolSafe data cartridge tapes Note T9840A B and T9840C VolSafe cartridges are not interchangeable T9840C tape drives can read the 20 GB VolSafe tape cartridges used in T9840A and T9840B drives but cannot write to them The 40 GB VolSafe tape cartridges used in T9840C drives cause a load error when mounted in a T984...

Page 68: ...4 T9840 T9940 Operator Panel C62772 P O W E R IN D IC A T O R A C T IV IT Y IN D IC A T O R C LE A N IN D IC A T O R S E R V IC E IN D IC A T O R IP L S W IT C H U N L O A D S W IT C H L O A D IN G S L O T D IS P LA Y M E N U S W IT C H S E LE C T S W IT C H C A R T R ID G E T A P E M A N U A L U N L O A D D E V IC E ...

Page 69: ...r Services Support Center Customer support is available 24 hours a day seven days a week to customers with Sun or StorageTek maintenance contracts and to Sun employees You can find additional information about customer support on the Customer Resource Center CRC Web site at http www support storagetek com Customer initiated Maintenance Customer initiated maintenance begins with a telephone call fr...

Page 70: ...call the process will be much easier Sun s Worldwide Offices You may contact any of Sun s worldwide offices to discuss complete storage service and support solutions for your organization You can find address and telephone number information on Sun s external Web site at http www sun com worldwide Account name Site location number Contact name Telephone number Equipment model number Device address...

Page 71: ...olor reflection densitometer For more information about colored cartridges contact your StorageTek marketing representative Handling a Cartridge Improper handling of cartridges can result in a loss of data or damage to a library component To handle a cartridge correctly Make sure the leader block is latched every time you pick up a cartridge Keep cartridges clean Inspect a cartridge before each us...

Page 72: ... Broken leader block Broken leader block latch Damaged write protect selector or write protect switch Liquid in the cartridge Labels not firmly attached or extending over the cartridge edge Any other obvious damage Figure A 1 Inspecting a 9490 3480 style Cartridge C62454 LABEL LOCATIONS TYPICAL C62454 STANDARD TAPE E CART or E TAPE EETape FILE PROTECT SELECTOR FILE PROTECT SELECTOR FILE PROTECT SE...

Page 73: ... 3 Inspecting a Cartridge Figure A 2 Inspecting an SD 3 Helical Scan Cartridge C62030 WRITE PROTECT SWITCH LABELS LEADER BLOCK DETENT SPRINGS Figure A 3 Inspecting a DLT Cartridge C62380 WRITE PROTECT SWITCH TAPE LEADER ...

Page 74: ...WITCH FORWARD POSITION IS WRITE PROTECTED FINGER GRIPS VOLSER LABEL MEDIA ID LABEL CUSTOMER LABEL AREA MANUFACTURER LABEL AREA Figure A 5 Inspecting a T9940 Cartridge C62727 C62727 MEDIA ID VOLSER LABEL AREA FINGER GRIPS CUSTOMER LABEL AREA MANUFACTURER LABEL AREA REAR VIEW WRITE PROTECT SWITCH TAPE LEADER BLOCK FRONT VIEW ...

Page 75: ... the cartridge with a lint free cloth Use StorageTek Tape Cleaner Wipes PN 4046289 01 to clean the cartridges These wipes are saturated with isopropyl alcohol Do not let any solution touch the tape or get inside the cartridge Using Cleaning Cartridges Cleaning cartridges have a VOLSER prefix of DG CLN or CLNxxx These cartridges cannot be used as scratch cartridges or initialized by software utilit...

Page 76: ...d labeled cartridges You must select the volume serial number VOLSER range and other label options when ordering cartridges If you choose to order additional labels order them from any standard media vendor Labels used in StorageTek libraries can be made by any vendor that produces a label that meets the Sun Label Specification Some vendors not all inclusive are EDP Colorflex http www colorflex co...

Page 77: ... indented area of the cartridge so that the edges of the label are parallel to the edges of the cartridge The label should be close to the inside edge of the indented area but must never overlap See Figure A 6 through Figure A 11 for the proper location of the labels To apply the labels 1 Make sure that the cartridge has been at room temperature for at least 24 hours 2 Clean the surface where the ...

Page 78: ... Labels A 8 Revision P 95693 Figure A 6 3480 Cartridge Label Locations C62031 CUSTOMER LABEL VOLSER LABEL C62031 Figure A 7 ETape Cartridge Label Locations C62528 CUSTOMER LABEL VOLSER LABEL MEDIA LABEL C62528 ...

Page 79: ... Cartridge Label Locations C62526 CUSTOMER LABEL C62526 VOLUME SERIAL NUMBER VOLSER LABEL MEDIA LABEL Z Figure A 9 Helical Scan Cartridge Label Locations C62032 C62032 WRITE PROTECT SWITCH CUSTOMER LABEL TAPE LENGTH LABEL VOLUME SERIAL NUMBER VOLSER LABEL ...

Page 80: ...igure A 10 T9840 Cartridge Label Locations C62444 C62444 MEDIA ID LABEL VOLSER LABEL WRITE PROTECT CUSTOMER LABEL Figure A 11 T9940 Cartridge Label Location C62731 C62731 MEDIA ID VOLSER LABEL AREA CUSTOMER LABEL AREA MANUFACTURER LABEL AREA ...

Page 81: ...ee Cleaning the Cartridge Exterior on page A 5 3 Locate the label that you need DLTtape III has a C next to the far left number bar code down DLTtape IIIXT has an E next to the far left number bar code down DLTtape IV has a D next to the far left number bar code down Diagnostic cartridge has DG at the beginning of the VOLSER Cleaning cartridge has CLN at the beginning of the VOLSER 4 Hold the cart...

Page 82: ...ge that is not physically write protected 9490 Write Protect Switch To write enable the 9490 cartridges 1 Hold the cartridge with the write protect switch towards you 2 Locate the write protect switch on the front of the cartridge 3 Rotate the switch to the desired setting To write enable the standard cartridge turn the thumbwheel until the white dot icon above the wheel disappears To write enable...

Page 83: ...ETape Write Protect Selector C62529 WRITE PROTECTED POSITION UNPROTECTED POSITION C62529 Figure A 15 Setting the EETape Write Protect Selector C62523 LEADER BLOCK TYPICAL LABEL LOCATIONS TYPICAL C62523 WRITE PROTECTED POSITION WRITE DISABLED WRITE PROTECTED POSITION WRITE ENABLED ...

Page 84: ...ate the write protect switch on the front of the cartridge 3 Slide the write protect switch to the right so that the pencil icon is joined To write protect this cartridge slide the switch to the left so that the pencil icon is split Figure A 16 Setting the Helical Scan Write Protect Switch C62034 C62034 LABELS LEADER BLOCK DETENT SPRINGS WRITE ENABLE POSITION WRITE PROTECT POSITION ...

Page 85: ...ate the write protect switch on the front of the cartridge 3 Slide the write protect switch to the right so that the orange indicator is not visible To write protect this cartridge slide the switch to the left so that the orange indicator is visible Figure A 17 Setting the DLT Write Protect Switch C62382 C62382 WRITE PROTECTED POSITION ORANGE INDICATOR WRITE ENABLED POSITION ...

Page 86: ...LSER label toward you 2 Locate the write protect switch on the right side of the cartridge 3 Slide the write protect switch to the back of the cartridge towards you To write protect this cartridge slide the write protect switch to the front of the cartridge away from you Figure A 18 Setting the T9840 Write Protect Switch C62445 C62445 WRITE ENABLE POSITION WRITE PROTECT POSITION ...

Page 87: ...ect switch on the front of the cartridge 3 Slide the write protect switch to the left so the arrow points to the unlocked padlock icon To write protect this cartridge slide the write protect switch to the right so the arrow points to the locked padlock icon Figure A 19 Setting the T9940 Write Protect Switch C62728 C62728 UNPROTECTED PROTECTED WRITE PROTECT SWITCH ...

Page 88: ...6 7ºC 80ºF maximum Table A 2 SD 3 Cartridge Environmental Specifications Operating Environment Temperature 15º to 27ºC 59º to 81ºF Relative humidity 30 to 60 Wet bulb temperature 25ºC 77ºF maximum Cartridge Storage Environment Temperature 5º to 32ºC 41º to 90ºF Relative humidity 5 80 Wet bulb temperature 26ºC 80 F maximum Table A 3 DLT Cartridge Environmental Specifications Operating Environment T...

Page 89: ...5ºC 41º to 78ºF 5º to 32ºC 41º to 90ºF Relative humidity Archive Non archive 40 to 60 5 to 80 Wet bulb temperature 26ºC 78 8ºF Table A 5 T9940 Cartridge Environmental Specifications Operating Environment Temperature 15 6º to 32 2ºC 60º to 90ºF Relative humidity 20 to 80 Wet bulb temperature 26ºC 78 8ºF Cartridge Storage Environment Temperature Archive Non archive 18º to 26ºC 65º to 79ºF 5º to 32ºC...

Page 90: ...Environmental Specifications A 20 Revision P 95693 ...

Page 91: ...the LSM It holds DLT T9840 and T9940 drives A ACSLS Automated Cartridge System Library Software audit 1 For an LSM a part of its IPL sequence that catalogs all cartridge locations within the LSM cells and retains the data in the library controller card s memory 2 For a host its request to catalog the cartridges in an LSM by LSM number panel row and column automatic mode A relationship between an L...

Page 92: ...ment Digital Linear Tape DLT A type of magnetic tape storage device marketed by several companies DLT cartridges are inch wide and come in several sizes ranging from 20 to over 80 GB dismount To remove a cartridge from a drive F fault symptom code FSC A four character hexadecimal code generated in response to an error to help isolate failures within the device field replaceable unit FRU An assembl...

Page 93: ...y of peripheral devices T T9840 A two reel supply and take up reels tape drive that reads from and writes to magnetic tapes T9940 A single reel tape drive that reads from and writes to magnetic tapes T9x40 A term used to denote T9840 and or T9940 when the specific drive or tape cartridge is not important tape drive An electromechanical device that moves magnetic tape and includes the mechanisms fo...

Page 94: ...Glossary Glossary 4 Revision P 95693 ...

Page 95: ...tions A 18 handling A 1 inspecting A 2 repair A 6 requirements A 1 storing A 5 types of A 2 caution description of xii cautions applying labels A 7 DLT shuttle jam 3 23 DLT loading tapes 3 22 loading cartridges in the CAP 3 2 moving the robot 3 12 moving the Z column 3 13 placing cartridges in cells 1 4 reserved cells 3 18 sensitive components 3 10 shielded cables xv CE compliance statement xv cel...

Page 96: ...ripper 3 28 F fault symptom code 2 3 FCC compliance statement xv file protect A 12 FSC 2 3 function keys 2 3 G gripper assembly 1 2 gripper extending 3 28 H hand assembly 1 2 removing a cartridge 3 27 handling cartridges A 1 hardcopy publications from StorageTek 1 xiii I indicators 2 1 inspecting a cartridge A 2 internal code license xvii IPL 3 1 J Japanese compliance statement xvi L labels applyi...

Page 97: ...move 3 12 overview 1 2 rotating the Z column 3 13 S safety features 1 5 SD 3 cartridge labels A 9 cartridge specifications A 18 cartridges A 3 cleaning 3 5 dismounting a cartridge 3 20 mounting a cartridge 3 20 operator panel 4 2 overview 4 2 power switch 4 2 recording format 4 2 types of tapes 4 2 write protect switch A 14 service 5 1 setting the cleaning cartridge usage count 3 6 softkeys 2 3 sp...

Page 98: ...tect switch A 17 Taiwan warning statement xvi tape drives cleaning 3 5 overview 4 1 power switch 2 2 tapes See cartridges telephone numbers support 5 1 theta motor 1 2 thumbwheel A 12 TimberLine See 9490 4 1 transport 4 1 U usage count cleaning cartridge 3 6 use cleaning cartridge light 3 5 V virtual thumbwheel A 12 VolSafe data cartridges 3 24 4 5 volume serial numbers 1 3 W warning statement Tai...

Page 99: ......

Page 100: ...6188101 HONG KONG 852 2877 7077 HUNGARY 361 202 4415 INDIA 91 80 229 8989 INDONESIA 65 216 8333 IRELAND 353 1 668 4377 ISRAEL 972 9 9710500 ITALY 39 02 9259511 JAPAN 81 3 5779 1820 KOREA 82 2 3453 6602 MALAYSIA 603 2116 1887 MIDDLE EAST 00 9714 3366333 MEXICO 525 261 0344 NETHERLANDS 31 33 4515200 NEW ZEALAND 0800 786 338 NORTH WEST AFRICA 00 9714 3366333 NORWAY FROM NORWAY 47 22023950 TO NORWAY 4...

Reviews: