


RX01
4
Instruction Manual
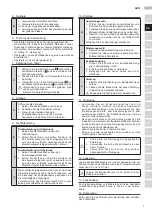
1. Application and Limitations of Use
This is a product used together with filters to remove par
-
ticles, gases, vapours, or the combinations of them.
Misuse could be immediately dangerous to life or
health to the wearer.
1. Before use, wearer must read and understand this
instruction manual for your safety.
Keep the instruction manual for reference.
The facepiece may only be used for the purposes
specified here.
2.
Do not use in the following environments or situa
-
tions;
•
Oxygen-deficient atmospheres (oxygen concen
-
tration < 19.5%).
•
Oxygen only or oxygen-enriched air.
• Unknown contaminants.
•
Airborne contaminants which are unremovable by
filters.
•
Airborne contaminants immediately dangerous to
life or health.
•
Substance or concentration of the airborne con
-
taminants are unknown.
•
Mixture of different types of airborne contami
-
nants.
•
Explosive atmospheres.
3.
The product should be used following the guidance
of a responsible person or after carefully reading
this instruction manual. If there are any questions,
please contact the manufacturer or distributor.
4.
Do not fold or deform the facepiece or apply
excessive force to it.
5.
Do not disassemble or modify the facepiece.
6.
Only use genuine parts.
7.
Do not use this product if you;
•
Have facial hair that prevents a good facial seal
or disturbs the function of exhalation valve.
•
Are in poor physical condition.
8.
Individuals with a compromised respiratory or
circulatory system should consult a physician and
complete a medical evaluation prior to use.
9.
Be sure to always conduct checks prior to use. If
the respirator does not function properly, even after
replacing a defective part with a new one, dispose of
the respirator or contact our distributor.
10. Perform the fit check each time the respirator is
donned.
11.
Do not use a towel or other object between the
facepiece and face that could prevent a good seal.
12.
If any of the following conditions arise during
operation, move to a safe location and take
appropriate measures;
•
If the inhalation resistance rapidly increases and
you have trouble breathing.
•
If you sense an odor, irritant or taste.
•
If any of the parts are damaged.
•
If you feel ill.
13.
Be sure to use the STS-approved filters only.
14.
Do not use filter which are beyond their shelf life.
(Refer to "13. Shelf Life".)
15.
Do not use a filter with damage, deformation, rust,
or other defects.
16.
In the case of an allergic reaction (i.e. rash, redness,
itchiness etc.) while using of this product, please
discontinue use and consult a dermatologist.
17. There are cases in which the decontamination per-
formance of the filters could be influenced depend
-
ing on the temperature and humidity levels.
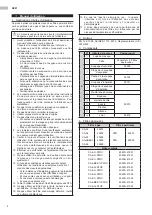
2. Standards
EN 140:1998, AS/NZS 1716:2012, Regulation (EU) 2016/425
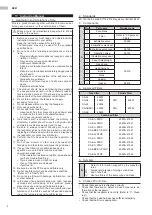
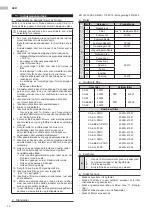
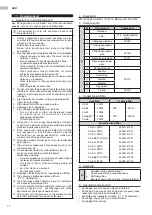
3. Components
No.
Part name
Product code
A
1
Face blank
-
2
Filter
Refer to “4. Approved
Filters”.
3
Exhalation valve
50000
4
Exhalation valve seat
-
5
Exhalation valve cover
03126
6
Inhalation valve
50121
7
Inhalation valve seat
-
8
Speech diaphragm
-
9
Head band
50310
0
Head harness
A
Buckle
B
Hook
C
Adjuster
D
Gasket
50418
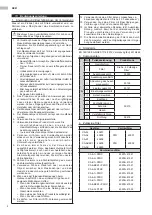
4.
Approved Filters
Gas filter
Particle filter
CA-A1
40201
CA-A2
40202
P2R
40301
CA-K1
40204
CA-ABEK1
40203
P3R
40302
CA-AX
40225
Combined filter
CA-A1+P2RC
40201+41521
CA-A2+P2RC
40202+41521
CA-K1+P2RC
40204+41521
CA-ABEK1+P2RC
40203+41521
CA-AX+P2RC
40225+41521
CA-A1+P3RC
40201+41522
CA-A2+P3RC
40202+41522
CA-K1+P3RC
40204+41522
CA-ABEK1+P3RC
40203+41522
CA-AX+P3RC
40225+41522
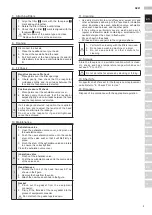
5.
Symbols
B
I.
Refer to information supplied by the manufac
-
turer.
II.
Temperature range of storage conditions.
III.
End of shelf life
IV.
Use two filters of the same type and class.
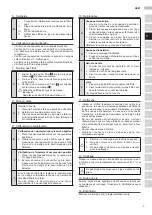
6. Checks Prior to Use
•
Check that each part is attached correctly.
• Check that there are no defect; cracks, holes, tears, de-
formation of the respirator.
•
Check that the respirator is not dirty. (Refer to “11. Clean
-
ing”.)
•
Check that the head harness has sufficient elasticity.
•
Check that the filter is appropriate.