Getting Started - RAID Array 410 for HP-UX
3–6
EK–SMRA3–IG. C01
4. When the host adapter comes in contact with the host computer’s backplane, firmly press
the board inward so that the host adapter connector is fully mated with the backplane.
5. Fold in the extractor levers.
6. Secure the host adapter to the host computer using the two captive screws on the host
adapter (Figure 3-6).
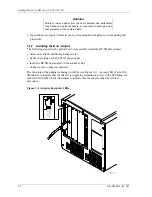
Figure 3–6 Back of Host Computer with Host Adapter Board Installed
3.1.2.4 Connect Cable to Adapter Connector
1. Locate the cable provided as part of the RAID Subsystem Kit.
2. Check the cable’s straight connector pins for proper alignment. Straighten any bent pins.
3. Insert the cable’s straight connector into the connector on the host adapter.
4. Secure the cable to the host adapter by tightening the two screws on the connector (see
Figure 3-7).
CAUTION
Do not connect the other end of the cable until instructed to do so.
Doing so may damage the host computer and or the RAID
Controller.
Summary of Contents for RAID Array 410
Page 25: ...Getting Started RAID Array 410 for HP UX 2 12 EK SMRA3 IG C01 Date__________________ LUN Uses...
Page 41: ...Getting Started RAID Array for HP UX A 2 EK SMRA3 IG C01 Date_____________ LUN Uses...
Page 43: ...Getting Started RAID Array for HP UX A 4 EK SMRA3 IG C01 Date_____________ LUN Uses...
Page 45: ...Getting Started RAID Array for HP UX A 6 EK SMRA3 IG C01 Date_____________ LUN Uses...
Page 47: ...Getting Started RAID Array for HP UX A 8 EK SMRA3 IG C01 Date_____________ LUN Uses...


