background image

Guide Bars

5

4.1

Overview

4.2

Tools, Servicing Aids

Twist drill, 7.5 mm

Pin punch, 5 mm

Hammer

4.3

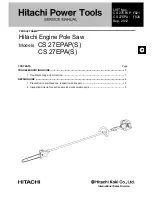
Removing the Guide Bar Nose

The bar nose can be replaced on STIHL Rollomatic ES 

and STIHL Rollomatic ES Light guide bars.

N

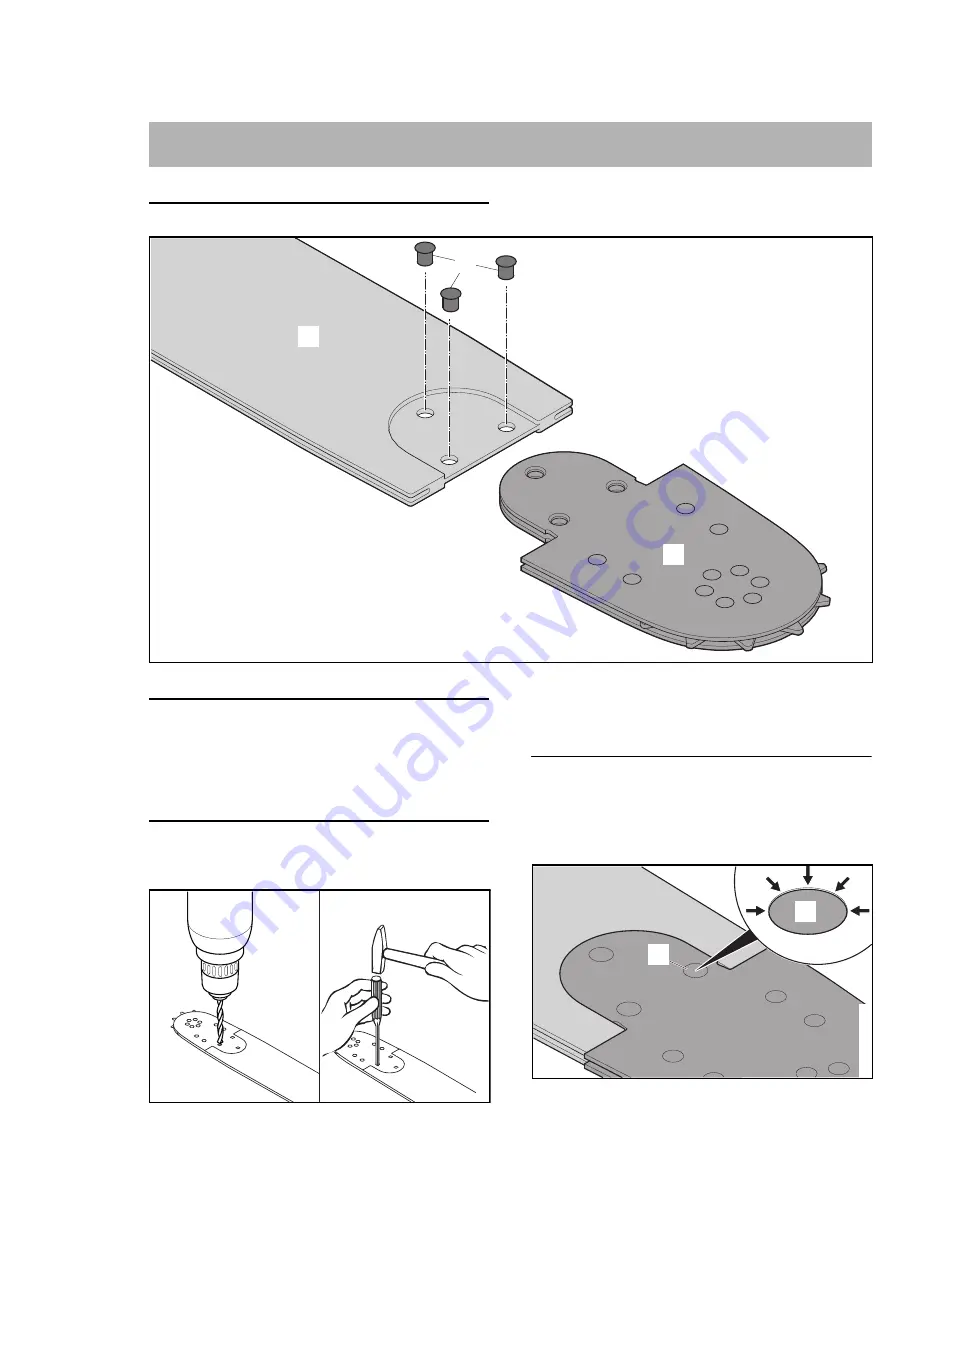
Center-punch the rivet heads (2).

N

Use a 7.5 mm drill to drill away the heads of the rivets 

(2).

N

Knock out the rivets (2) with a 5 mm pin punch.

N

Remove the nose (3) from the guide bar (1).

4.4

Installing the Guide Bar Nose

N

Push the new nose (3) onto the guide bar (1). The 

nose may be fitted either way round.

N

Position the nose (3) so that its holes line up with the 

holes in the guide bar (1).

N

Fit the countersunk rivets (2) and form their heads. 

Each rivet head must completely fill the hole recess 

(arrows).

4

Guide Bar Nose

1

3

2

0000-GXX-1601-A0

0000-GXX-2052-A0 

2

2

0000-GXX-1602-A0 

Summary of Contents for 2016-07

Page 1: ...2016 07 STIHL Guide Bars Service Manual...

Page 2: ......

Page 3: ...nual 2 1 1 Applicable Documentation 2 1 2 Symbols in Text 2 2 Safety During Repair Work 2 2 1 Protective Gloves 2 2 2 Safety Glasses 2 2 3 Spare Parts 2 3 Nose Sprocket 3 3 1 Overview 3 3 2 Tools Serv...

Page 4: ...es N If there is a risk of particles being thrown during the repair Wear safety glasses 2 3 Spare Parts If spare parts not approved by STIHL are installed they may not fulfill the required function or...

Page 5: ...N Center punch the rivet heads 2 N Use a 6 5 mm drill to drill away the heads of the rivets 2 N Knock out the rivets 2 with a 4 mm pin punch N Pull out the nose sprocket 5 from between the guide bar s...

Page 6: ...bar groove slightly to simplify this process N Position the nose sprocket 5 so that the holes in its bearing race line up with the holes in the bar nose 1 N Fit the countersunk rivets 2 and form thei...

Page 7: ...of the rivets 2 N Knock out the rivets 2 with a 5 mm pin punch N Remove the nose 3 from the guide bar 1 4 4 Installing the Guide Bar Nose N Push the new nose 3 onto the guide bar 1 The nose may be fi...

Page 8: ...Guide Bars 6 N If the joints arrows in the running faces are not the same height Grind down the projecting rails 0000 GXX 1603 A0...

Page 9: ...N Inspect bar body for cracks and damage N Support the bar in a press or vise at two points equidistant from the center of the bend 1 N Apply pressure to the apex of the bend 1 until the bar is straig...

Page 10: ...t matches the specified groove width in the wide portion of the groove N Clamp the affected area of the bar in a vise or hammer the bar rails against the spacer on a flat base N Inspect bar body for c...

Page 11: ...Guide Bars 9...

Page 12: ...RA_025_2016_01_01 englisch G www stihl com...

Reviews: