background image

During assembly, it must be ensured in addition
that the rotary shaft seals do not become soiled,
damaged or coated with paint. When lacquering
the units, cover or protect with grease all sealing
rings and running surfaces of the shafts. This is
the only way to prevent damage and thus the
loss of oil.

Then secure the gears using a hexagon head
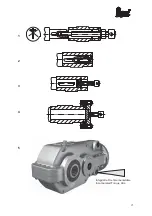
cap screw and a disk (see fig. 2 page 21).

Assembly of Shrinking Disk

The shrinking disks are ready to install and well
greased internally when supplied. Remove the
separators which are fitted between the outer
rings of the shrinking disks for transport before
tightening the clamp bolts. When fitting the
shrinking disks onto the secondary part to be
braced, the seating point of the secondary part
for the shrinking disk must be greased. In the
area of the shrinking disk seat, the bore hole of
the hub and the shaft must be free of grease.

Never tighten the screws on the shrinking
disks

before

the

connection

has

been

completely assembled: the shrinking disk
and hub can become permanently deformed,
rendering them unusable.

Tightening the Shrinking Disk

Tighten clamp bolts evenly and in order using a
wrench of appropriate length in several stages,
ensuring that the disks remain plane-parallel to
each other. A tightening angle of approximately
30° is usually a suitable average value. Finally
check the prescribed starting torque of all
screws and bolts with a torque wrench.
Tightening torques:

Screws grade 10.9

M5: 4 Nm; M6: 12 Nm; M8: 30 Nm; M10: 59 Nm
M12: 100 Nm; M16: 250 Nm; M20: 490 Nm

Screws grade 12.9

M6: 13 Nm; M8: 32 Nm; M10: 65 Nm M12: 120 Nm;
M16: 290 Nm; M20: 570 Nm

Installation positions

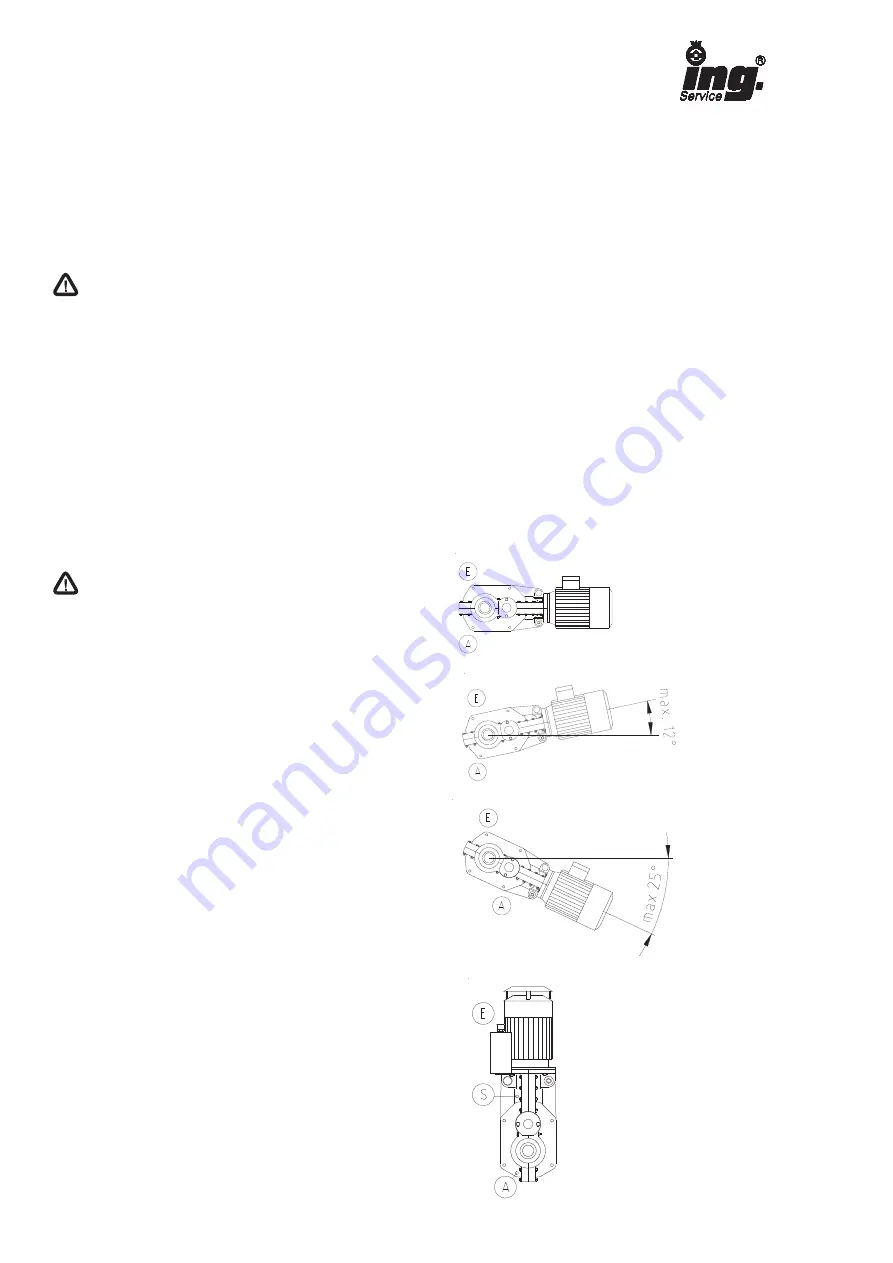
The QuarryMaster

®

series helical bevel gears

can be operated without changing the oil
quantity (see nameplate) in the installation
positions

1-4.

The

maximum

admissible

inclination is to be considered!

Do not install gearboxes in brake motor
execution with motor downward since with
wear of seals withdrawing oil can affect the
function of the brake.

With installation position V1 (index number 5-8)
fill in lubricant to the oil level bore. The
ventilation has to be screwed into the oil
expansion tank at the position named E.

11

E

®

position ventilation

A

®

position oil drain

S

®

position oil level

direction V1

Summary of Contents for QuarryMaster

Page 1: ... Förderbandantriebe Conveyor Drive Units Auflage Edition 10 06 06 D GB Stiebel Getriebebau GmbH Co KG Industriestraße 12 D 51545 Waldbröl Telefon 0 22 91 7 91 0 Telefax 0 22 91 7 91 290 E Mail info stiebel de Internet www stiebel de Auflage Edition 06 12 ...

Page 2: ...e Angaben wie zum Beispiel Anbaumaße sind dem Katalog oder der CD zu entnehmen die vom Hersteller angefordert werden können Further data such as attachment sizes are found in the catalogue or on the CD which may be ordered from the manufacturer ...

Page 3: ...d Reparatur 7 9 Schmierstoffe 8 10 Ersatzteilzeichnung 16 Schmierstofftabelle 20 Contents 1 Technical Data 2 Foreword 9 3 Prescribed Use 9 4 Transport and storage 9 5 Set up and putting into operation 10 6 Conversions and Modifications 13 7 Tips on Maintenance 13 8 Spare parts and Repairs 14 9 Lubricants 15 10 Spare part drawing 16 Lubricant table 20 1 Auflage Edition 10 06 Auflage Edition 06 12 ...

Page 4: ...den soll den Bestimmungen der EG Richtlinie Maschinen entspricht Das Produkt darf nur für den vereinbarten technisch ausgelegten Zweck zum Einsatz gebracht werden Das Produkt darf nicht mit Leistungen Drehmomenten Drehzahlen oder äußeren Belastungen betrieben werden die die konstruktive Auslegung siehe technische Daten bzw Katalog überschreiten Einbau und Inbetriebnahme dürfen nur von fachlich qua...

Page 5: ...weils zugehörigen und beiliegenden separaten Betriebsanleitungen zu beachten Besonders zu berücksichtigen sind die Sicherheitsinformationen für elektrische Betriebsmittel Arbeiten an elektrischen Ausrüstungen dürfen nur von einer Elektrofachkraft gemäß den elektrotechnischen Regeln vorgenommen werden Bevor Arbeiten an dem Getriebe oder an angebauten Ausrüstungen durchgeführt werden muß die Stromve...

Page 6: ...ie Wellendichtringe nicht verschmutzt beschädigt oder mit Farbe bestrichen werden Beim Lackieren der Aggregate sind Dichtringe und Laufflächen der Wellen abzudecken oder durch Fett zu schützen Nur so werden Beschädigungen und somit Ölverlust vermieden Anschließend die Getriebe mit Hilfe einer Sechskantschraube und einer Scheibe sichern s Abb 2 Seite 21 Montage der Schrumpfscheibe Die Schrumpfschei...

Page 7: ...000 2 4 Pfeil Bandlaufrichtung Bei Getrieben mit Rücklaufsperre Drehrichtung des Motors bzw des Netzes mit einem Drehfeldmessgerät ermitteln Bei Motoren die 400 690 V gewickelt sind kann die Drehrichtung durch kurzzeitigen Anlauf in Sternschaltung ermittelt werden Ein Anlauf des Motors mit voller Leistungsaufnahme entgegen der Sperrrichtung des Getriebes führt zur Beschädigung oder Zerstörung der ...

Page 8: ...des Sperrkörpers um 180 wird die Sperrichtung geändert Passfeder 4 in Getriebewelle einpassen Innenring auf Welle ansetzen und vorsichtig bis zur Anlage einschlagen Hinweis Innenring auf ca 80 100 C erwärmen erleichtert das Aufbringen auf die Getriebewelle Vor der Montage der Sperrkörper muß der Innenring wieder abgekühlt sein Axialscheibe 5 in die Bohrung einbringen Rücklaufsperrenaußenring eindi...

Page 9: ...chwingungen ungewöhnliche Geräusche oder Gerüche Ansprechen der Überwachungseinrich tungen usw lassen erkennen dass die Funktion beeinträchtigt ist Zur Vermeidung von Störungen die schwere Personen und Sachschäden bewirken könnten muss das zuständige Wartungspersonal dann umgehend verständigt werden Im Zweifelsfalle die entsprechenden Betriebsmittel sofort abschalten und sichern 8 Ersatzteile und ...

Page 10: ...aben keinen negativen Einfluss auf die Funktion der Getriebe Die verwendeten Schmieröle müssen den Mindestanforderungen nach DIN 51517 3 bzw ISO DP 6743 6 für mineralische Schmieröle CLP entsprechen Die ISO Viskositätsklassifikation entspricht DIN 51519 bzw ISO 3448 Die Schmierstoffhersteller empfehlen die in der Schmierstofftabelle S 20 aufgeführten Produkte Der Schmierstoffhersteller ist für die...

Page 11: ...torques or external loads which exceed the structural design see technical data and catalogue Installation and commissioning may only be carried out by properly qualified personnel Any applicable national local and plant specific conditions and requirements concerning the prevention of accidents must be observed Qualified personnel are those persons who on the basis of their training experience an...

Page 12: ...nt and the surface of gearboxes can reach temperatures which can burn the skin Machines in which these gears have been installed can produce loud noises which damage hearing over longer periods In this case operating personnel should be provided with hearing protection To reduce noise all technical means possible should be used with consideration to the statutory regulations Technical Information ...

Page 13: ...ecome permanently deformed rendering them unusable Tightening the Shrinking Disk Tighten clamp bolts evenly and in order using a wrench of appropriate length in several stages ensuring that the disks remain plane parallel to each other A tightening angle of approximately 30 is usually a suitable average value Finally check the prescribed starting torque of all screws and bolts with a torque wrench...

Page 14: ...ve then at least components 1 2 and 3 must be replaced As a spare part a backstop kit is supplied containing all the necessary parts All elements must be carefully protected from contamination e g from sand or dust Assembly Dismantle the backstop cover or sealing cap from the gear Determine the high resistance direction with the backstop assembled by turning the inner ring and match this with the ...

Page 15: ...ed Regular oil change see chapter 9 Lubricants When changing topping up or draining oil or when taking oil samples it must be ensured that no oil can enter the ground underground or surface water and drains To prevent damage caused by overheating dirt and deposits of dust should be removed regularly from the surface of the gearbox and from the cooling ribs of the electric motor If possible a visua...

Page 16: ...veral stages to prevent the disks from tilting Hollow shaft keyway insert a disk of the appropriate diameter with thread into the hollow shaft Fasten the disk using the retaining ring Then press back the gear with a threaded spindle against the shaft end ensuring that the centre hole is protected against damage see fig 3 page 21 Hollow shaft shrinking disk fit a ring onto the shaft collar and fast...

Page 17: ...ambient temperature Lubricant change The first oil change should be performed within the first 500 operation hours afterwards every 12 months with mineral oil every 24 months with synthetic oil If possible the lubricant should be discharged at operating state temperature so that a complete exchange of the old lubricant is ensured Recommendation Rinse the gearbox with new lubricant in case the oil ...

Page 18: ...16 10 Ersatzteilzeichnung Bild 1 10 Spare Part Drawing illustration 1 ...

Page 19: ...ring Closure cap 505 Sperrkörper Blocking body 510 Rücklaufsperreninnenring Backstop inner ring 515 Passfeder Key Pos Item Bezeichnung Designation 520 Axialscheibe Axial disc 525 Sechskantschraube Hexagon headed bolt 600 Rillenkugellager Single row deep groove ball bearing 605 Kegelrollenlager Taper roller bearing 610 Radialwellendichtring Radial shaft seal 615 Radialwellendichtring Radial shaft s...

Page 20: ...auch Plastic flexible pipe 808 Lasche Strap 810 Radialwellendichtring Radial shaft seal 812 Verschlussschraube Locking screw 814 Entlüftungsfilter Vent filter 18 10 Ersatzteilzeichnung Bild 2 Anbausituation lt Kennzahlen 1 4 horizontal Installation situation acc to 1 4 horizontal 10 Spare Part Drawing illustration 2 E Motor Bremsmotor Pos 10 Electric motor brake motor item 10 Fremdlüfter Pos 20 Se...

Page 21: ...19 10 Ersatzteilzeichnung Bild 3 10 Spare Part Drawing illustration 3 Anbausituation lt Kennzahlen 5 8 vertikal Installation situation acc to no 5 8 vertical ...

Page 22: ...p Blasia SX 220 Alpha SP 220 Tribol 1100 220 Alpha SP 100 Tribol 1100 100 Alphasyn EP 220 Alphasyn T 220 Mobil XMP 220 Mobilgear 600 XP 220 Mobil XMP 100 Mobilgear 600 XP 100 Mobil SHC Gear 220 Renolin CLP 220 Renolin CLP 220 Plus Renolin CLP 100 Renolin CLP 100 Plus Renolin Unisyn CLP 220 Klüberoil GEM 1 220 N Klüberoil GEM 1 100 N Klübersynth GEM 4 220 N STEELO 220 Omala 220 Omala 100 Omala HD 2...

Page 23: ...21 Integrierte Drehmomentstütze Incorporated Torque Arm 1 2 3 4 5 ...

Reviews: