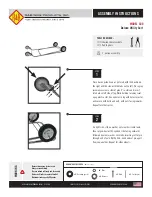
CÓMO FUNCIONA
1.- CONTROL REMOTO
Primeramente seleccione el canal deslizando el interruptor
hacia A, B, C o D. Encienda el equipo, y el indicador LED rojo
se encenderá (El canal no cambiará si el equipo ya está
encendido).
2.- ROBOT FUTBOLISTA
a) El módulo receptor del robot captará el canal desde
el control remoto. Encienda el equipo y los ojos del
robot se encenderá. Dirija el control remoto hacia el
robot y presione cualquier botón por 5 segundos. Los
ojos se encenderán cuando reciban alguna señal del
control remoto.
b) El robot cuenta con 8 movimientos diferentes.
Utilice los botones del control remoto para realizar las
diferentes combinaciones de movimiento.
c) El robot necesita captar el canal seleccionado
desde el control remoto cada vez que lo enciende.
d) Para reiniciar los canales, deberá apagar el robot y
el control remoto, entonces repita los pasos 1 y 2.
e) Si hay 2 o más jugadores (máximo 4) deberá
ajustar el canal uno por uno.
f) Los ojos del robot parpadearán cuando no reciban
señal del control remoto por 5 segundos.
g) Presionando el botón superior derecho, el robot
pateará el balón.
PROBLEMAS Y SOLUCIONES
HOW IT WORKS
1.- IR REMOTE CONTROL
First, select the channel by sliding the left-hand switch to A, B,
C, or D. Then turn the equipment on, the red indicator lights on
(Channel won’t change if the equipment is on).
2.- FOOTBALL ROBOT
a) The robot’s receiver module will learn the channel
from the remote controller. Turn the equipment on and
its eyes will flash. Aim the remote control to the robot
and press any button for 5 seconds. The eyes will
flash when the robot receives any signal from the
remote
controller.
b) This robot has 8 different movements. Use remote
control buttons to do the different movement
combinations.
c) The robot needs to learn the selected channel from
the remote control every time you power on.
d) To restart the channels, you must power off both,
the robot an the remote controller, then repeat steps
1 and 2.
e) If there are 2 or more players (maximum 4)you
must set the channel one by one.
f) Robot’s eyes will flash when it does not receive any
signal from the remote control for 5 seconds.
g) By pressing the right top button, the robot will kick
the
ball.
TROUBLESHOOTING
Adelante
Forward
Atrás
Backward
Vuelta izquierda
Left turn
Vuelta derecha
Right turn
Vuelta izquierda 360°
360° left turn around
Vuelta derecha 360°
360° right turn around
Vuelta izquierda atrás
Back left turn
Vuelta derecha atrás
Back right turn
Problema / Trouble
Solución / Solution
El control remoto no responde
Compruebe que las terminales de las baterías estén
correctamente contectadas a la placa impresa
Asegúrese de que las baterías estén colocadas adecuadamente
Asegúrese de que la placa impresa está asegurada
firmemente a la cubierta
Remote control doesn't works
Check batteries ends are correctly installed to PCB
Make sure bateriies are correctly placed
Make sure PCB is tightly fasten to the case
El robot no responde
Asegúrese de que todos los cables están correctamente
conectados
Si el robot se mueve en dirección contraria a la que
presiona el control remoto, revise las conexiones M1, M2
y M3
Si el robot no hace ningún sonido, revise las conexiones BZ
Robot doesn't works
Make sure all wirings are correctly installed
If the robot moves in different direction as you pressed on
IR Control, check M1, M2 and M3 connections
If the robot doesn't make any sound, check BZ connections