6 / 8
15
13
14
(ill. 13)
Mikroschalter 5 auf den Stecker mit
der M3 Schraube und U-Scheibe an-
schrauben� Der Mikroschalter-Kontakt
mit Umschaltkontakt hat 3 Steckan-
schlüsse 2�8x0�5 und eine Schaltleis-
tung von 6 A, 250 VAC.
(ill. 13)
Fasten microswitch 5 to plug with
the M3 screw and washer� The
microswitch contact is a changeo-
ver contact� Type of connection: 3
plug connectors 2�8x0�5, switching
capacit y 6 A, 250 VAC.
Funktionskontrolle des
Mikroschalters
Functional check of
microswitch
Der Mikroschalter schaltet unmittelbar
bevor die Verriegelung einrastet und
zeigt damit an, dass die Steckverbin-
dung hergestellt ist�
By switching immediately prior to
engagement of the interlock, the
microswitch indicates that the plug
connection is made�
Hinweis:
Die korrekte Verriegelung ist erst
nach dem Einrasten sichergestellt
Note:
Correct interlocking is achieved
only after engagement
4. Montage der Anschlussleitung
4. Cable connection
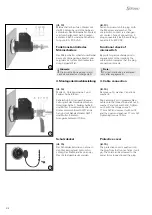
(ill. 14)
Mutter 9, Unterlegscheibe 7 und
Federscheibe 8 lösen�
(ill. 14)
Remove nut 9, washer 7, and lock
washer 8�
Kabelschuh K mit angeschlossener
Leitung auf das Gewinde schieben�
Unterlegscheibe 7, Federscheibe 8
und Mutter 9 montieren� Mutter 9 mit
Drehmomentschlüssel SW17 anzie-
hen und mit Gabelschlüssel SW17
und Mutter 6 kontern�
Anzugsdrehmoment 10 Nm.
Slip cable lug K with preassembled
cable onto the thread� Reinstall nut 9,
washer 7 and lock washer 8� Tighten
nut 9 with the torque wrench
17 mm A/F and secure it with nut 6
and the open-end spanner 17 mm A/F.
Tightening torque 10 Nm.
Schutzdeckel
Protective cover
(ill. 15)
Der Schutzdeckel wird von vorne in
den Stecker gesteckt bis zum An-
schlag� Das Halteband kann an der
Öse (A) festgeschraubt werden�
(ill. 15)
The protective cover is pushed into
the plug from the front as far as it will
go� The cord can be screwed to the
eyelet (A) or looped round the plug�


