background image

2

OPERATING AND SAFETY INSTRUCTIONS

Item no.

Voltage (V)

Wattage (W)

Frequency (Hz)

024730

120

800

60

IMPORTANT SAFEGUARDS

READ THE INSTRUCTIONS BEFORE USE
WARNING: 

To reduce the risk of fire, electrical shock, serious personal injury and/or 

property damage:

A.  Do not touch hot surfaces. Use protective oven mitts or gloves to avoid burns or 

serious personal injury.

B.  To protect against electric shock, do not immerse the power cord, plug or the base in 

water or expose to other liquids.

C.  Do not operate the appliance with the water reservoir empty as it could damage the 

appliance.

D.  Keep the product out of the reach of children and pets. This product is not intended 

for use by children. Close adult supervision is necessary when appliance is used near 
children.

E.  Unplug appliance from electrical outlet before cleaning and when not in use. Allow to cool 

down completely before assembling, disassembling, relocating, or cleaning the appliance.

F.  Do not operate the product if it has a damaged power cord or plug, or after the 

appliance malfunctions or has been damaged in any manner. Do not attempt to 
examine or repair this product yourself. Please call the customer service number 
provided in this user manual.

G.  Do not leave the product unattended while it is in use. Always unplug the product 

from the electrical outlet when not in use.

H.  DO NOT attempt to move or relocate the appliance while it is in use.  

I. 

To disconnect the appliance, pull directly on the plug – do not pull on the power 
cord.

J. 

Take proper precautions to prevent burns, fire, or personal or property damage as 
this appliance generates heat and steam during use.

K.  Do not plug or unplug the product into/from the electrical outlet with a wet hand. 

L. 

Use the product in a well-ventilated area.

M.  Do not operate the appliance directly under kitchen cabinets as it generates steam.

N.  Do not use attachments or accessories not recommended or sold by the product 

manufacturer.

Summary of Contents for 024730

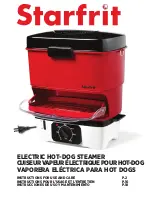
Page 1: ...CTIONS FOR USE AND CARE P 2 INSTRUCTIONS POUR L USAGE ET L ENTRETIEN P 10 INSTRUCCIONES DE USO Y MANTENIMIENTO P 18 ELECTRIC HOT DOG STEAMER CUISEURVAPEURÉLECTRIQUEPOURHOT DOG VAPORERA ELÉCTRICA PARA HOT DOGS ...

Page 2: ...y before assembling disassembling relocating or cleaning the appliance F Do not operate the product if it has a damaged power cord or plug or after the appliance malfunctions or has been damaged in any manner Do not attempt to examine or repair this product yourself Please call the customer service number provided in this user manual G Do not leave the product unattended while it is in use Always ...

Page 3: ...ate this appliance while it is near or touching curtains wall coverings dish towels clothing or other flammable materials SAVE THESE INSTRUCTIONS FOR FUTURE REFERENCE POLARIZED PLUG This appliance is equipped with a polarized plug one blade is wider than the other As a safety feature to reduce the risk of electrical shock this plug is intended to fit in a polarized outlet only one way If the plug ...

Page 4: ...the order of assembly A quick guide for assembly and storage could be found under the lid Fig 1 A First place the steamer base A on a flat level surface and place the drip tray on top of the steamer base B Place the sausage steamer B on top of the steamer base A make sure it sits flat NOTE You can also place the bread steamer directly on top of the steamer base C Insert the sausage tray C inside t...

Page 5: ...tray Bread steamer Metal rings to attach shoulder strap not included Sausage tray Sausage steamer Retractable water fill spout Water level indicator Drip tray Extra locking clips included 60 minute timer Base F E D C B A ...

Page 6: ...ed cooking time maximum of 60 minutes The LED indicator will illuminate indicating the product is heating NOTE Due to the initial heating of the materials used in the manufacturing of the product some light smoke vapors may be released when used initially This is normal F When cooking time is up the light will go off and the unit will shut down unplug the power cord from electrical outlet CAUTION ...

Page 7: ...OD QUANTITY STEAMING TIME Hot Dogs 6 sausages and buns 12 12 min Fish fillets lb 20 to 22 min Lobster tails 2 tails 10 to 12 min Scallops lb 10 to 12 min Shrimp lb 10 to 15 min Salmon lb 15 to 18 min Broccoli 6 to 8 min Carrots 11 to 13 min Cauliflower 7 to 9 min Potatoes 28 to 33 min Corn on the cob 4 7 to 10 min Asparagus squash Zucchini 9 to 11 min ...

Page 8: ...steamer base and drip tray 3 Thoroughly wash all parts except the base in hot soapy water and dry thoroughly Wash after each use WARNING DO NOT wash any part in the dishwasher 4 Rinse the steamer base with hot water and dry thoroughly WARNING Do not immerse the base electrical cord or plug in water or any other liquid 5 Dry thoroughly Rinse after each use 6 The appliance is designed with a stackab...

Page 9: ...our original receipt as a proof of the purchase date Any complaints must be registered within the warranty period The product will be repaired replaced parts or entire appliance or refunded at our sole discretion Shipping charges may apply This warranty does not cover normal wear of parts or damage resulting from any of the following Negligent use or misuse of the product including failure to clea...

Page 10: ...ant de procéder au nettoyage Laisser l appareil refroidir avant de l assembler de le démonter de le déplacer ou de le nettoyer F Ne pas utiliser l appareil si le cordon électrique ou la prise électrique sont endommagés si l appareil a subi une quelconque défaillance ou s il a été endommagé Ne pas tenter d examiner ou de réparer l appareil Communiquez avec le service à la clientèle en composant le ...

Page 11: ...nt d espace au dessus et autour de l appareil pour permettre une circulation d air adéquate Ne jamais utiliser l appareil à proximité de rideaux de revêtements muraux de linges à vaisselle de vêtements ou de tout autre matériau inflammable VEUILLEZ CONSERVER CE MODE D EMPLOI POUR RÉFÉRENCE FICHE POLARISÉE Cet appareil est doté d une fiche polarisée une lame est plus large que l autre Par mesure de...

Page 12: ... lequel elles doivent être assemblées Un résumé des étapes d assemblage et d entreposage se trouve à l intérieur du couvercle Fig 1 A Placer la base du cuiseur vapeur A sur une surface plane et à niveau puis installer le ramasse gouttes sur la base B Placer le cuiseur à saucisses B sur la base de l appareil A et s assurer qu il est bien à plat NOTE Vous pouvez aussi placer le cuiseur à pain direct...

Page 13: ...métal pour attacher une bandoulière de transport non incluse Plateau à saucisses Cuiseur à saucisses Bec verseur escamotable Indicateur du niveau d eau Ramasse gouttes Minuterie 60 minutes Base Fig 2 F E D C B A Attaches de sécurité additionnelles incluses ...

Page 14: ... de 60 minutes Un voyant DEL s illuminera indiquant que l appareil est en fonction NOTE Lors de la première utilisation de l appareil il est possible que certaines composantes produisent une légère fumée ou de la vapeur en chauffant Ceci est normal et il n y a pas lieu de s en inquiéter F Lorsque le temps de cuisson sera écoulé le voyant DEL et l appareil s éteindront Débrancher l appareil avant d...

Page 15: ... 6 12 12 min Filets de poisson 225 g lb 20 à 22 min Queues de homards 2 10 à 12 min Pétoncles 225 g lb 10 à 12 min Crevettes 225 g lb 10 à 15 min Saumon 225 g lb 15 à 18 min Brocoli 6 à 8 min Carottes 11 à 13 min Chou fleur 7 à 9 min Pommes de terre 28 à 33 min Épis de maïs 4 7 à 10 min Asperges courges courgettes 9 à 11 min Le cuiseur à pains D peut être placé directement sur la base A ...

Page 16: ...se à l eau chaude savonneuse et sécher complètement Toutes les pièces de l appareil doivent être nettoyées après chaque utilisation ATTENTION Ne pas mettre les pièces de cet appareil dans le lave vaisselle 4 Rincer la base du cuiseur vapeur à l eau chaude et sécher complètement ATTENTION Ne pas immerger la base du cuiseur vapeur le cordon ou la prise électrique dans l eau ou tout autre liquide 5 S...

Page 17: ...la période de la garantie L appareil sera réparé remplacé en tout ou en partie ou remboursé à notre entière discrétion Des frais d expédition pourraient être exigés Cette garantie ne couvre pas les conséquences de l usure normale des pièces ou les dommages dus à l une ou l autre des causes suivantes La négligence ou l utilisation abusive de l appareil y compris à la suite d un accident ou par l om...

Page 18: ...ntes de montarlo desmontarlo cambiarlo de sitio o limpiarlo F No operar el aparato si tiene el cable o el enchufe dañado o si el aparato no funciona bien o ha resultado dañado de algún modo No intentar examinar ni reparar este producto por su cuenta Favor de llamar al número de atención al cliente proporcionado en este manual G No dejar el aparato sin supervisión mientras no esté en uso Desconecta...

Page 19: ...uipado con un enchufe polarizado una clavija es más ancha que la otra Como medida de seguridad para reducir el riesgo de descarga eléctrica este enchufe encajará únicamente en una toma eléctrica polarizada en una dirección Si el enchufe no encaja por completo en la toma eléctrica dar al vuelta al enchufe Si sigue sin encajar contactar con un electricista cualificado No intentar desactivar esta med...

Page 20: ...ntaje Puede encontrarse una guía rápida de montaje y almacenamiento bajo la tapa Fig 1 A Primero colocar la base de la vaporera A sobre una superficie plana y colocar la bandeja de goteo sobre la base de la vaporera B Colocar la vaporera de salchichas B sobre la base de la vaporera A asegurándose de que queda nivelada NOTA Se puede asimismo colocar la vaporera de pan directamente sobre la base de ...

Page 21: ...a la correa de transporte no incluida Bandeja de salchichas Vaporera de salchichas Boquilla retráctil de entrada de agua Indicador de nivel de agua Bandeja de goteo Temporizador de 60 minutos Base Fig 2 F E D C B A Sujetadores de seguridad adicionales incluidas ...

Page 22: ...ado máximo de 60 minutos El indicador LED se iluminará indicando que el aparato se está calentando NOTA Debido al calentamiento inicial de los materiales utilizados para la fabricación del producto se creará un ligero humo vapor cuando se utiliza por primera vez Esto es normal F Cuando termine el tiempo de cocción la luz se apagará y la unidad tambien desconecte el cable de poder de la toma eléctr...

Page 23: ...e A ALIMENTO CANTIDAD TIEMPO DE COCCIÓN Hot Dogs salchichas y panecillos de 6 12 12 min Filetes de pescado lb 20 a 22 min Colas de langosta 2 10 a 12 min Callos de hacha lb 10 a 12 min Camarones lb 10 a 15 min Salmón lb 15 a 18 min Brócoli 6 a 8 min Zanahorias 11 a 13 min Coliflor 7 a 9 min Papas 28 a 33 min Mazorca de maíz 4 7 a 10 min Espárragos calabaza calabacitas 9 a 11 min ...

Page 24: ... la bandeja de goteo 3 Lavar concienzudamente todos los componentes excepto la base con agua caliente jabonosa y secar por completo Lavar tras cada uso ADVERTENCIA NO lavar ningún componente en el lavaplatos 4 Aclarar la base de la vaporera con agua caliente y secar por completo ADVERTENCIA No sumergir la base cable eléctrico ni enchufe en agua ni ningún otro líquido 5 Secar por completo Aclarar t...

Page 25: ...robante de compra original como prueba de la fecha de compra Cualquier reclamación deberá ser registrada dentro del periodo de garantía El aparato será reparado reemplazado las piezas o el aparato en su totalidad o reembolsado a nuestro único criterio Puede que se apliquen gastos de envío Esta garantía no cubre el desgaste normal de las piezas ni daños que resulten de lo siguiente Uso negligente o...

Page 26: ...FOR HOUSEHOLD USE ONLY POUR UN USAGE DOMESTIQUE SEULEMENT ...

Reviews: