8. System Temperature Overheat and Fan Failure Management
If the alarm indicator has lit up red and the audio alarm sounds, this could mean the system fan has stopped
operating entirely, the system temperature has exceeded over the default temperature of 60°C. Hard drive is
not properly installed or system malfunction, When this occurs, you may mute the audio alarm( refer to the
System Controls > View events > Mute Beeper ) to shut off the audio alarm and power off the system imme-
diately if in the allowed operational state then re-power on the system to double check and see if the problem
is still present. If the problem persists, please turn off the system and contact your supplier or the STARDOM
tech support for further assistance.
If you require an host adapter to be used with this system, please log onto
www.stardom.com.tw
to find the
recommended adapter or contact STARDOM for more information.
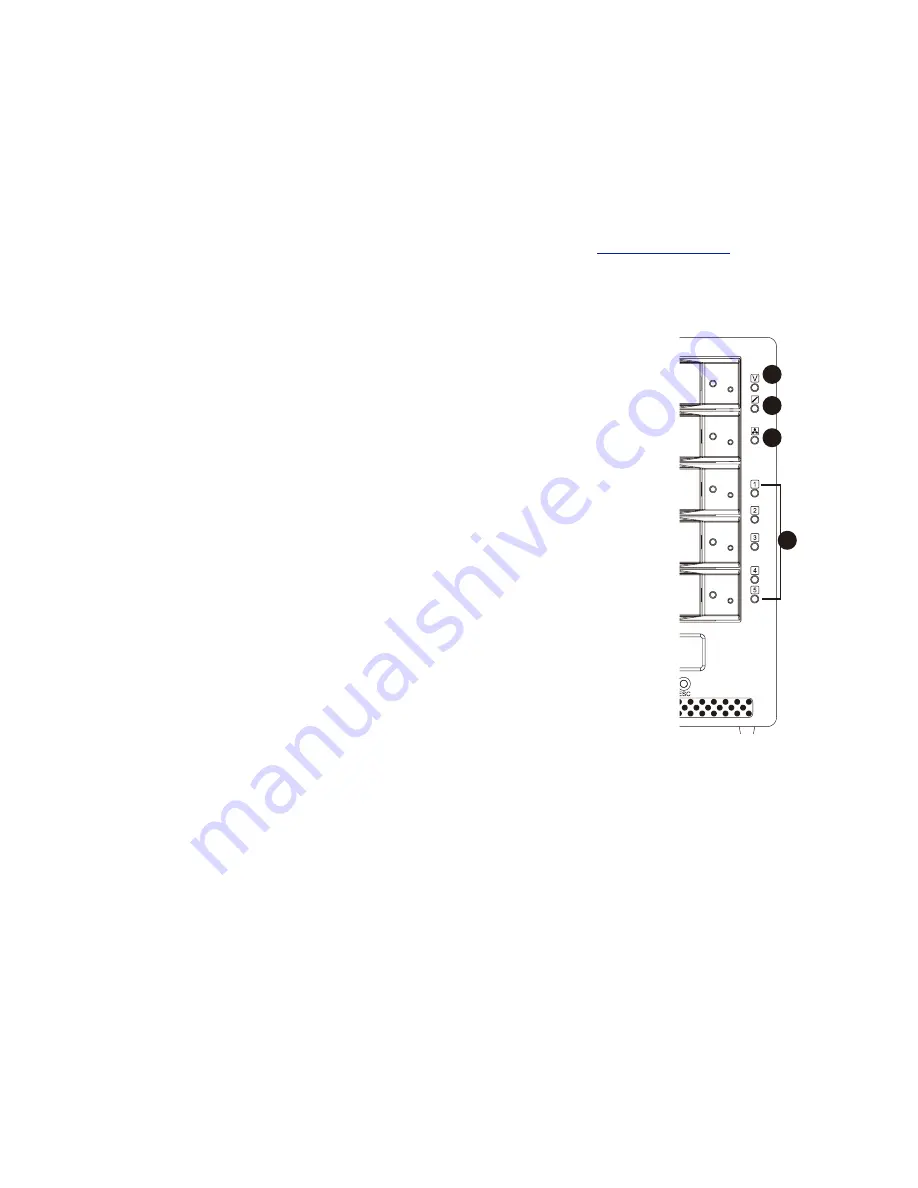
9. Visual Status Indicator Definitions
A. Voltage Indicator:
(1) When the LED indicator lights green, this means the power of the system is on.
(2) When the LED indicator is blink red, this means there is a voltage error.
B. Temperature Indicator:
(1) When the LED indicator light green, this means the system is on normal status.
(2) This Led will blink red if the internal temperature rises above the Spec setting.
C. Fan Indicator:
(1) When the LED indicator light green, this means the system is on normal status.
(2) This Led will blink red if there is a fan problem.
D. Hard Drive Status Indicator:
(1) When the hard drive status indicator light green, this means the drive is present
and is on idling.
(2) When the hard drive status indicator lights red twice per second, this means
drive failure.
(3) When the hard drive status indicator lights red four times per second, this
means drive is a target disk of the rebuild situation.
10. 2.2TB Setting Instruction
Please pay attention, this process only can be worked with eSATA cable, and 64bit operating system.
1. GUI Instruction
Click “Quick Create”, find “Greater 2 TB Volume Support” and select “Yes”. Click “Confirm The Operation”
and press “Submit” to complete the setting process.
2. Disk Management
(1) After complete RAID setting, the hard drive will be divided into two parts and show two disks in the
disk management column. Please right click on disk 1 and select ”GPT Disk” to combine these two
disks.
(2) Format the disk to complete the process.
$
%
&
'
SOHORAID SR5 Series User Manual
17


