2. Be sure there is no pressure in trap body; remove cover (unscrew by turn-
ing counterclockwise).
3. Remove clamp holding pump halves together.
4. Remove pump base mounting bolts, if used. Motor and seal plate assem-
bly can now be pulled away from pump body.
5. Remove five screws and washers holding diffuser to seal plate. Remove
diffuser.
6. Remove motor canopy. Being careful not to touch capacitor terminals,
loosen capacitor clamp and move capacitor to one side.
7. Hold shaft with 7/16” open-end wrench on motor shaft flats.
8. Unscrew impeller from shaft (turn counterclockwise when facing it).
9. Remove four screws holding seal plate to motor.
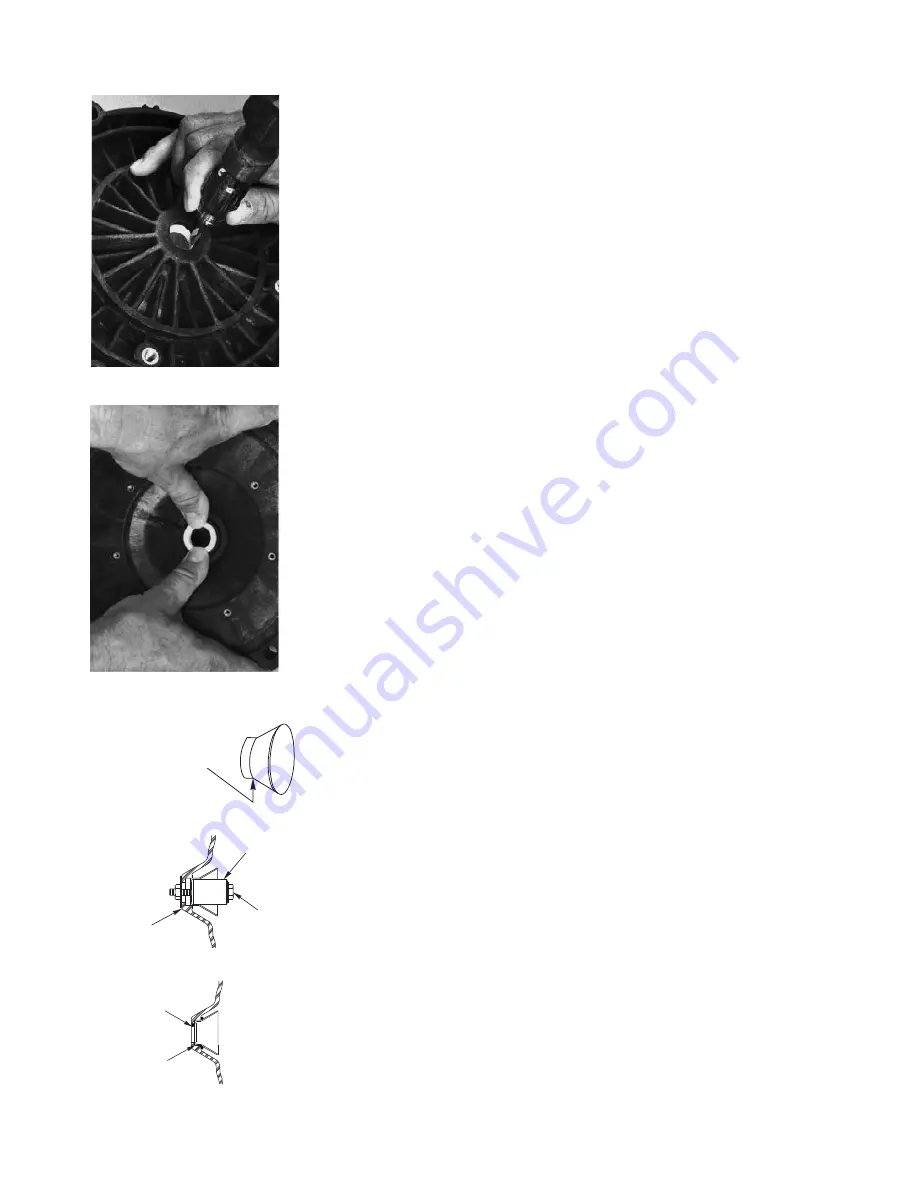
10. Place seal plate face down on flat surface and tap out ceramic seat
(Figure 4).
NOTICE: Do not force out heat sink insert (Key No, 7, Page 11). If insert
has moved, pump will leak; see “Installing Insert”, below.)
11. Clean seal cavity in seal plate and clean motor shaft.
Pump Reassembly/Installing New Seal:
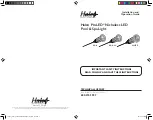
1. Ceramic seat must be clean and free of dirt, grease, dust, etc. Wet outer
edge of O-Ring with small amount of liquid detergent; press ceramic
seat into seal plate cavity firmly and squarely with finger pressure
(Figure 5).
2. If ceramic seat will not locate properly, remove it, place face up on
bench and reclean cavity. Ceramic seat should now locate.
3. If seat still will not locate properly, place a cardboard washer over the
polished face and use a piece of 3/4" standard pipe for pressing purpos-
es. NOTICE: Be sure not to scratch or mar polished surface or seal will
leak.
4. Remount seal plate to motor. Tighten bolts to 60-80 inch-lbs.
(69-92 cm/kg) torque.
5. Apply a small amount of liquid detergent to inside diameter of rotating
half of seal.
6. Slide rotating seal member, polished face first, over threaded shaft end
and shaft shoulder until rubber drive ring hits shaft shoulder. (Figure 3).
NOTICE: Be sure not to nick or scratch polished seal face; seal will leak
if face is damaged.
7. Screw impeller onto shaft (clockwise); this will automatically locate seal
in seal plate.
8. Mount diffuser on seal plate; tighten screws to 10-14 inch-lbs.
(11.5-16 cm/kg) torque.
9. Assemble motor and seal plate to volute; be sure clamp is properly seat-
ed. NOTICE: Clamp knob can be located in any position around volute;
if it is moved after assembly, tighten knob while tapping around clamp
to assist sealing. Do not move clamp while pump is full of water.
10. Reinstall pump base mounting bolts (if used) and prime pump according
to instructions on Page 7.
Installing Heat Sink Insert:
If the heat sink insert moves or shifts during seal removal, remove and
reinstall it to prevent leakage.
1. To remove heat sink insert, grasp with fingers at the large end and move
back and forth. Do not deform.
2. Replace heat sink insert as follows:
A. Clean off old sealant and foreign material; clean out insert cavity.
B. Apply a small amount of non-hardening silicone RTV on surface of
insert (see Figure 6).
C. Pull insert into cavity (see Figure 7).
D. Remove surplus silicone RTV from insert cavity (see Figure 8).
9
FIGURE 4
FIGURE 5
FIGURE 6
FIGURE 7
FIGURE 8
WIPE ON SMALL AMOUNT OF
NON-HARDENING PERMATEX
ON THIS SURFACE
7/8" SOCKET
BOLT
1-3/8" O.D.
WASHER
038 0893
REMOVE
SURPLUS
PERMATEX
PROPERLY
SEATED
039 0893


