DocID028405 Rev 1
11/28
UM1955
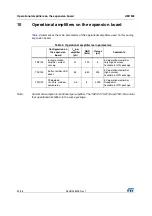
Photodiode/UV sensor
28
5 Photodiode/UV
sensor
This configuration can be used to monitor the ambient light and, for example, trigger an
action when a threshold level is reached.
5.1 Schematic
diagram
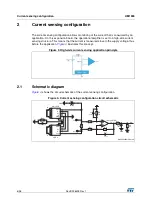
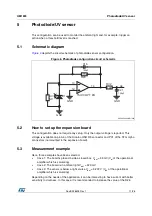
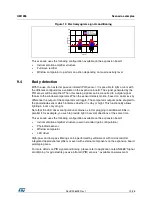
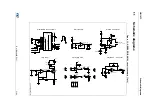
Figure 6
depicts the circuit schematic of photodiode sensor configuration.
Figure 6. Photodiode configuration circuit schematic
5.2
How to set up the expansion board
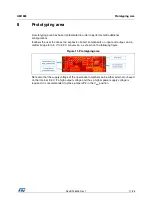
This configuration does not require any setup. Only the output voltage is reported. This
voltage is available on pin A4 of the Arduino UNO R3 connector and PC1 of the ST morpho
connectors (not mounted in the expansion board).
5.3 Measurement
example
Here, three examples have been selected.
•
Case 1: The board is placed inside a closed box. V
out
= 33 mV (V
ol
of the operational
amplifier which is saturating)
•
Case 2: The board is in ambient light V
out
= 420 mV
•
Case 3: The sensor is below a light source V
out
= 3.272 V (V
oh
of the operational
amplifier which is saturating)
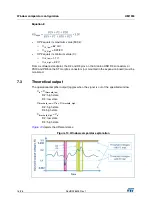
Depending on the needs of the application, it can be interesting to have current with better
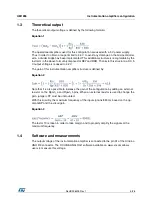
sensitivity to darkness. In this case, it is recommended to increase the value of the R26
768,37 '
N
5
'
*1'
*1'
S)
&
$
N
5
*1'
1&
89
S)
&
*63*',


