background image

DIL/NetPC DNP/5280 – Preparations


SSV


EMBEDDED


SYSTEMS


5


2.2 

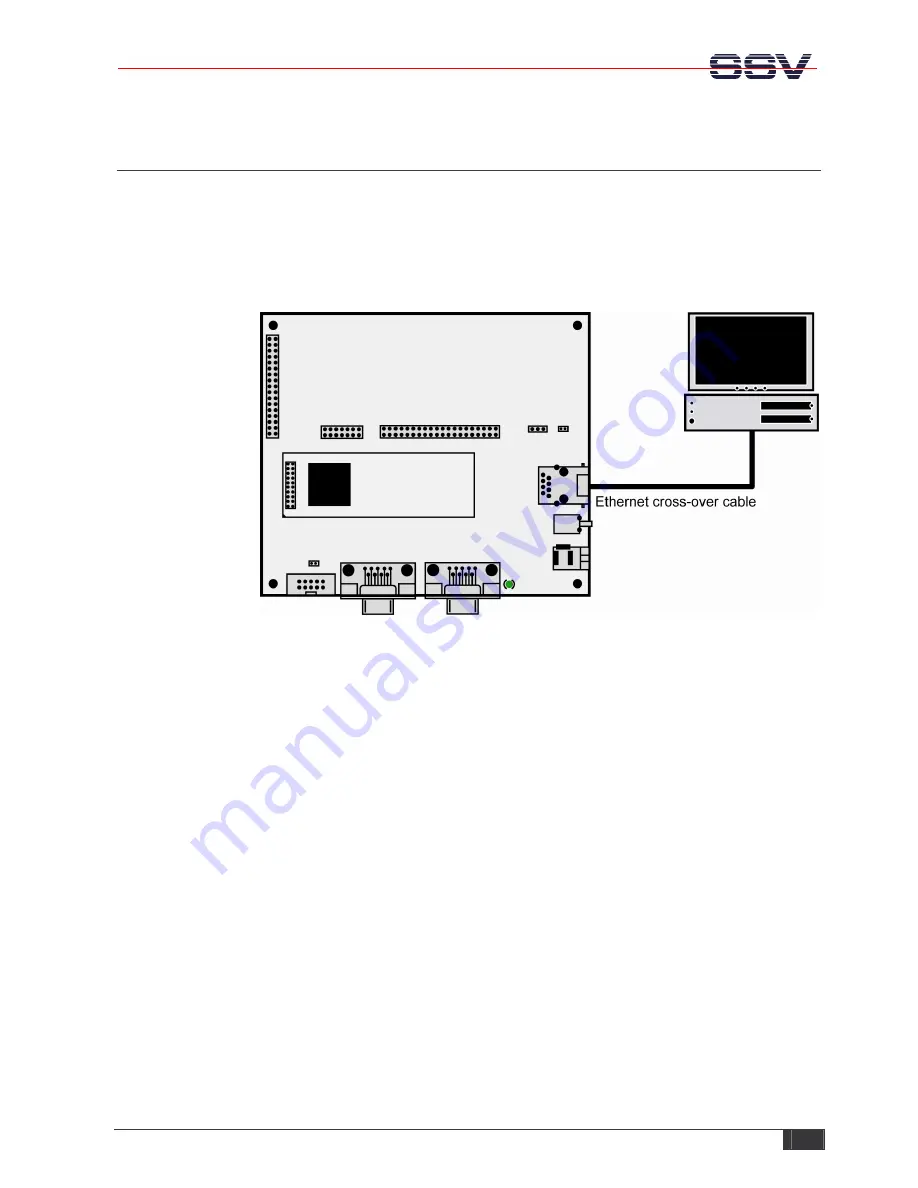
Ethernet Link between Evaluation Board and PC 

Setup  the  Ethernet  link  between  the  Evaluation  Board  and  your  PC.  Use  an  Ethernet 

cross-over cable for this connection. 


The Ethernet link is for the file transfer between the DNP/5280 and your PC via TFTP. 

Connect one end of the Ethernet cross-over cable with the LAN interface


of your PC and 

the other end with the LAN interface


of the Evaluation Board. 


Figure 2:


Ethernet link between Evaluation Board and PC 


Summary of Contents for DNP/5280

Page 1: ...on User Manual SSV Embedded Systems Heisterbergallee 72 D 30453 Hannover Phone 49 0 511 40 000 0 Fax 49 0 511 40 000 40 E mail sales ist1 de Manual Revision 1 0 Date 2006 04 03 For further information...

Page 2: ...Configuring Ethernet Link 6 2 4 Connecting Power Supply 7 2 5 Configuring HyperTerminal 8 3 INSTALLING THE PPP CONNECTION 9 3 1 Uploading the PPP Files on the DNP 5280 9 3 2 Installing the PPP Files o...

Page 3: ...rements The following hardware is needed to install a PPP connection on the DNP 5280 One PC with Windows XP and two unused COM ports One Evaluation Board e g EVA6 with mounted DNP 5280 and two COM por...

Page 4: ...ur PC via HyperTerminal Connect one end of null modem cable 1 with the COM1 port of your PC Connect the other end with the COM1 port of the Evaluation Board Figure 1 Serial links between Evaluation Bo...

Page 5: ...rd and your PC Use an Ethernet cross over cable for this connection The Ethernet link is for the file transfer between the DNP 5280 and your PC via TFTP Connect one end of the Ethernet cross over cabl...

Page 6: ...Panel and select Network Connections Right click on the LAN connection and click on Properties Open the tab General and select Internet Protocol TCP IP from the list and click on Properties In the fol...

Page 7: ...wer Supply Connect a 5 VDC power supply with a 5 5 mm x 2 5 mm jack plug with the Evaluation Board Figure 4 Power supply for the Evaluation Board Please pay attention to the polarity of the power conn...

Page 8: ...ion Figure 6 Direct connection setup with HyperTerminal Now change the connection parameters to the values of table 1 Make sure that you use the COM1 port of your PC and that it supports 115 200 bps F...

Page 9: ...If you have not powered up the Evaluation Board so far please do it now Note Start the DNP 5280 without the RCM jumper Wait until the Linux boot process finishes this may take a few seconds Change to...

Page 10: ...the file transfer tftp g l dnp5280 ppp winxp tar gz 192 168 0 125 Figure 10 Starting file transfer via TFTP Tftpd32 shows some information about the file transfer Figure 11 Successful file transfer wi...

Page 11: ...directory var To unzip the file enter the following commands 1 gunzip dnp5280 ppp winxp tar gz 2 tar xvf dnp5280 ppp winxp tar Figure 12 Unzipping the file dnp5280 ppp winxp tar gz 3 3 Starting the P...

Page 12: ...n the Windows PC Open the Control Panel and select Network Connections Click on Create a new connection The New Connection Wizard opens Click on Next Figure 14 New Connection Wizard In the following d...

Page 13: ...he PPP Connection SSV EMBEDDED SYSTEMS 13 Select Connect directly to another computer and click on Next Figure 16 Selecting the advanced connection options In the next dialog select Guest and click on...

Page 14: ...ction SSV EMBEDDED SYSTEMS 14 Enter a name for the new connection e g DNP5280 and click on Next Figure 18 Entering a connection name Select COM2 as device to make the connection and click on Next Figu...

Page 15: ...DIL NetPC DNP 5280 Installing the PPP Connection SSV EMBEDDED SYSTEMS 15 Click on Finish to complete the New Connection Wizard Figure 20 Completing the New Connection Wizard...

Page 16: ...ows PC Open the Control Panel and select Network Connections Double click on the new created connection e g DNP5280 and click on Properties Figure 21 Connection dialog In the following dialog select t...

Page 17: ...ct Internet Protocol TCP IP from the list and click on Properties In the following dialog select Use the following IP address and enter 192 168 11 1 Click on OK to close the dialog Click again on OK t...

Page 18: ...u do not have to enter a user name or password Figure 24 Starting the PPP connection on the Windows PC To test the connection open Telnet and establish with the following command a connection to the D...

Page 19: ...0 2006 04 03 first version WBU COPYRIGHT The content of this document can change any time without announcement There is taken over no guarantee for the accuracy of the statements The user assumes the...

Reviews: