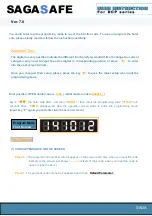
background image

13


1.


2.


3.


4.

5.

6.

WARNING: YOUR SAFE IS DESIGNED TO SUPPORT ITSELF WHEN THE DOOR IS OPENED.  
HOWEVER, CAUTION SHOULD BE USED TO AVOID TIPPING. WHILE SECURING YOUR 
SAFE BE SURE TO HAVE A SECOND PERSON HOLD AND STABILIZE THE SAFE TO KEEP IT 
FROM TIPPING, CAUSING INJURY, AND/OR DAMAGE TO THE SAFE AND SURROUNDING 
STRUCTURES. FAILURE TO DO SO WILL COMPROMISE THE SAFETY, SECURITY, AND 
WARRANTY OF THE SAFE. 

Use the hardware provided or consult your hardware retailer for fastening 

hardware for your particular mounting surface.
Open your safe door and locate and remove the four black caps on the 

safe floor. This will provide access to the factory drilled bolt down holes.  
To secure your safe to the floor it will first be necessary to drill pilot holes 

in the floor surface. 
Drill the appropriate diameter and depth of pilot holes based on the type of 

hardware being used and the type of floor surface. For the hardware provided 

(concrete floor installation) we recommend using a hammer drill and 1/2” 

concrete drill bit to drill holes the four corresponding in the concrete floor.  
Insert and drive the plastic anchoring plugs into the pilot holes. You may need 

to use a hammer to fully insert the plugs into the pilot holes.
Secure the safe, by threading all 4 anchor bolts through the factory drilled bolt 

down holes in the bottom of the safe and ratcheting down tight.  

7.


Re

p

lace

 th

e

 four 

blac

k caps onto th

e flo

or of th

e

 saf

e

Make sure the metal washer sits on top of the rubber washer. Tighten the 

bolt to compress the rubber washer between the safe and metal washer. 

Failure to do so will allow water to enter the safe in the event of a flood.   

18. SECURING YOUR SAFE

TOOLS NEEDED TO BOLT SAFE TO A CONCRETE SURFACE

• DRILL / HAMMER DRILL

• DRILL BIT – 1/2” ( for installing into concrete with provided hardware)

• 

WR

E

NCH


/ 11/16” (17M

M

S

OC

KET 

• 

H

AMME

R

• 

SAFETY GLASSES

• 

GLOVES

• 

OTHER SAFETY EQUIPMENT AS NEEDED

FENDER WASHER

Summary of Contents for HAVEN SA5925HX-BIO

Page 1: ...read this information and follow all safety rules carefully before operating your gun safe Failure to do so will void your warranty 111521 HAVEN SERIES INSTRUCTION MANUAL MODELS SA5925HX BIO SA5930HX...

Page 2: ...TEST 7 8 PROGRAMMING ADDITIONAL FINGERPRINTS 7 9 TROUBLE SHOOTING 8 10 CLEARING ALL PROGRAMMED FINGERPRINTS 8 11 LOW BATTERY WARNING 9 12 LOCKOUT MODE TAMPER PROTECTION 9 13 SILENT ENTRY MODE 10 14 IN...

Page 3: ...ensure proper installation as laid out in this manual and do not open the door with the safe on an uneven or unstable oor Ignoring this could result in serious injury or death If you choose to utilize...

Page 4: ...ld Safe Please ll out all the required information below and retain for your records and safe keeping PLEASE HAVE THIS INFORMATION READY PRIOR TO CALLING FOR TECHNICAL ASSISTANCE AT Contact Customer S...

Page 5: ...e time of delivery must be resolved with the delivery company and or retailer Shipping damage is not warrantable by SA Consumer Products WARNING SAFES ARE HEAVY AND CAN BE UNSTABLE ON UNEVEN GROUND PL...

Page 6: ...e safe Insert and turn the backup key clockwise to unlock Step 4 Step 3 Step 2 Step 1 4 Rotate the handle clockwise until the safe door opens Once open turn the handle back to its starting position so...

Page 7: ...hear 1 beep and the indicator ring will illuminate white on the front of the door indicating that you are now in programming mode Keep safe door open while programming new ngerprint Locate the 4 AA A...

Page 8: ...ROGRAMMING ADDITIONAL FINGERPRINTS INDIVIDUALLY MAPPING ALL ZONES OF YOUR FINGERPRINT WILL ENSURE A RELIABLE READING BY THE SCANNER To ensure each programming sequence is properly captured the scanner...

Page 9: ...s may lack de nition due to excessive skin dryness We recommend applying moisturizer or slide your ngerprint against your forehead before scanning process THE SCANNER IS NOT READING YOUR FINGERPRINT 1...

Page 10: ...in Basic Lockout mode The Bio Scanner is deactivated for 30 seconds 2 Six consecutive rejected scans result in Severe Lockout mode The Bio Scanner is deactivated for 5 minutes 3 After the safe enters...

Page 11: ...ment 13 SILENT ENTRY MODE By activating the silent entry mode the safe will no longer make audible sounds To turn on silent entry mode hold a programmed nger on the scanner for 5 seconds beyond your n...

Page 12: ...the baseboard and or wall trim if necessary Always ensure the safe is in an isolated and dry area Never place the safe in direct contact with a wet oor When installing your safe on a concrete oor use...

Page 13: ...left and pull the shipping skid on the right side away from the bottom of the safe With the shipping skid removed from one side of the safe carefully lower the safe to the oor Follow the same procedu...

Page 14: ...dware being used and the type of oor surface For the hardware provided concrete oor installation we recommend using a hammer drill and 1 2 concrete drill bit to drill holes the four corresponding in t...

Page 15: ...nforced shelving but as a good safety precaution store heavier items either on the oor of the safe or away from the middle of the shelves When placing guns into your safe make sure they rest securely...

Page 16: ...d Canada Proof of registration and copy of sales receipt must be on file at the time of claim Visit our website at www saproducts com to register your safe Lifetime warranty only applies to the origin...

Reviews: