


©2014 Mad Dogg Athletics, Inc. All rights reserved. Spin®, Spinner®, Spinning®, Spin Fitness® and the
Spinning logo ® are registered trademarks that are owned by Mad Dogg Athletics, Inc.
6
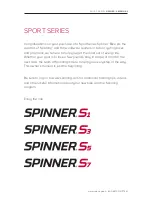
SPINNER
®
BIKE ASSEMBLY
STEP 1:
Unpack the carton
Open the shipping carton and remove all of the parts. Make sure that
the following parts are included and that no damage has occurred
during shipping:
• Bike frame with flywheel
• Front stabilizer bar with
transportation wheels
• Rear stabilizer bar
• Handlebars
• Pedals
• Seat slider and saddle
• Seat post
• Tools for assembly and maintenance
• Owner’s manual
•
Guide to Ride
• Ultimate Rides Collection DVDs
Take time now to enter your Spinner® bike serial number in the space
below (serial number is located on the bottom crossbar). If parts
are missing, or if you have any assembly questions, please contact
customer service at 800.847.SPIN (7746).
Serial No. : ____________________________________________
STEP 2:
ATTACH THE STABILIZER BARS
Lift the back of the bike and remove the
plastic shipping guards. Have someone help
you tilt the bike forward (toward the flywheel)
so that you can attach the rear stabilizer
bar from the underside with the provided
bolts and washers. Line up the holes in the
stabilizer bar with the holes in the frame.
Using the wrench included tighten the bolts
(with washers) securely. Repeat the process
with the front stabilizer bars.
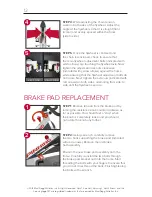
STEP 3:
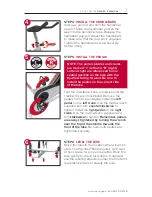
INSTALL THE SADDLE
While holding and pulling back the seat post
pop-pin, slide the seat post into the seat tube.
Release the pop-pin. Adjust the seat post to
make sure the pop-pin is properly engaged.
Tighten the seat post pop-pin securely. Now
unscrew, pull out and hold the seat slider
pop-pin. Slide the seat slider all the way into
the seat tube. Release the seat slider pop-
pin. Adjust the seat slider (fore/aft) to make
sure the pop-pin is engaged. Tighten the
seat slider pop-pin securely.
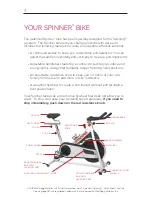
3
1
seat slider
seat post
pop-pins
2


