©2014 Mad Dogg Athletics, Inc. All rights reserved. Spin®, Spinner®, Spinning®, Spin Fitness® and the
Spinning logo ® are registered trademarks that are owned by Mad Dogg Athletics, Inc.
8
WARNING!
SAVE THESE INSTRUCTIONS
THE MOMENTUM OF THE FLYWHEEL OF THE BIKE WILL KEEP THE PEDALS TURNING EVEN AFTER
YOU STOP PEDALING OR IN THE EVENT THAT YOUR FEET SLIP OFF OF THE PEDALS. DO NOT
DISMOUNT THE BIKE OR ATTEMPT TO REMOVE YOUR FEET FROM THE PEDALS UNTIL BOTH THE
PEDALS AND THE FLYWHEEL HAVE STOPPED COMPLETELY. FAILURE TO COMPLY MAY LEAD TO LOSS
OF CONTROL AND SERIOUS PERSONAL INJURY.
TESTING THE BIKE
Use this checklist to perform the bike test procedure.
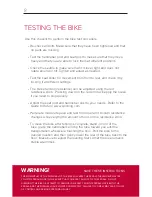
• Re-check all bolts. Make sure that they have been tightened and that
no parts are missing.
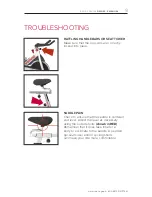
• Test the handlebar post and seat post to make sure that they move
freely and that you are able to lock them at different positions.
• Check the saddle to make sure that it is level, tight and does not
rotate around or tilt. Tighten and adjust as needed.
• Test the seat slider for movement from front to rear, and check it by
locking it at different settings.
• The brake tension (resistance) can be adjusted using the red
resistance knob. Pressing down on the red knob will apply the brake
if you need to stop quickly.
• Adjust the seat post and handlebar post to your needs. Refer to the
Guide to Ride
or www.spinning.com.
• Pedal at a moderate pace and test for proper and smooth resistance
changes while varying the amount of turns on the resistance knob.
• To move the bike after testing is complete, stand in front of the
bike, grasp the handlebars and tip the bike toward you until the
transportation wheels are touching the floor. Roll the bike to the
desired location and then gently lower the rear of the bike back to the
floor. Make sure to adjust the leveling feet so that the bike remains
stable at all times.


