


13
3. Use the mouse to select the alarms you want to set.
Once you have selected the desired alarm(s), specify the
desired values using the ▲ or ▼ indicators.
4. Select the parameters you wish to record. The meter can
take readings for temperature, humidity, dew point, and
wet bulb.
Note…
The meter has a 16K memory capacity. If you chose
multiple parameters, the amount of memory will be divided
evenly between each choice. For example, if you select both
temperature and relative humidity, there will be 8K of data
storage available for each parameter.
Logger Sampling Setting
1. Select “Log Setting” from the
Setting options. The Logger
Setting menu appears.
2. Select the “Setting” tab.
3. The meter sampling range is
1 second to 6:59:59. Adjust the
▲ or ▼ indicators to specify the
sampling rate in hours, minutes,
and seconds.
4. Adjust the ▲ or ▼ indicators to
select Immediate, Real-Time, Key
Start, Roll Over, or Schedule start mode.
Logger Setting:
BASIC:(Pic.3)
1:ID setting
Maximum 20 characters , name your logger press OK button
to confirm.
2:Current Date/Time
Clock setting, the system automatically shows current date and
time of your pc. Press OK to confirm.
(Note :Schedule date & time refer to current pc date and time)
►Please click OK to sync the meter’s date and time every time.
3 LCD display set
:
(N/A for non-LCD models)
Press ON ( Logger LCD still illuminated after complete
recording ), or OFF( LCD is not illuminated after complete
recording. Press OK after selection.
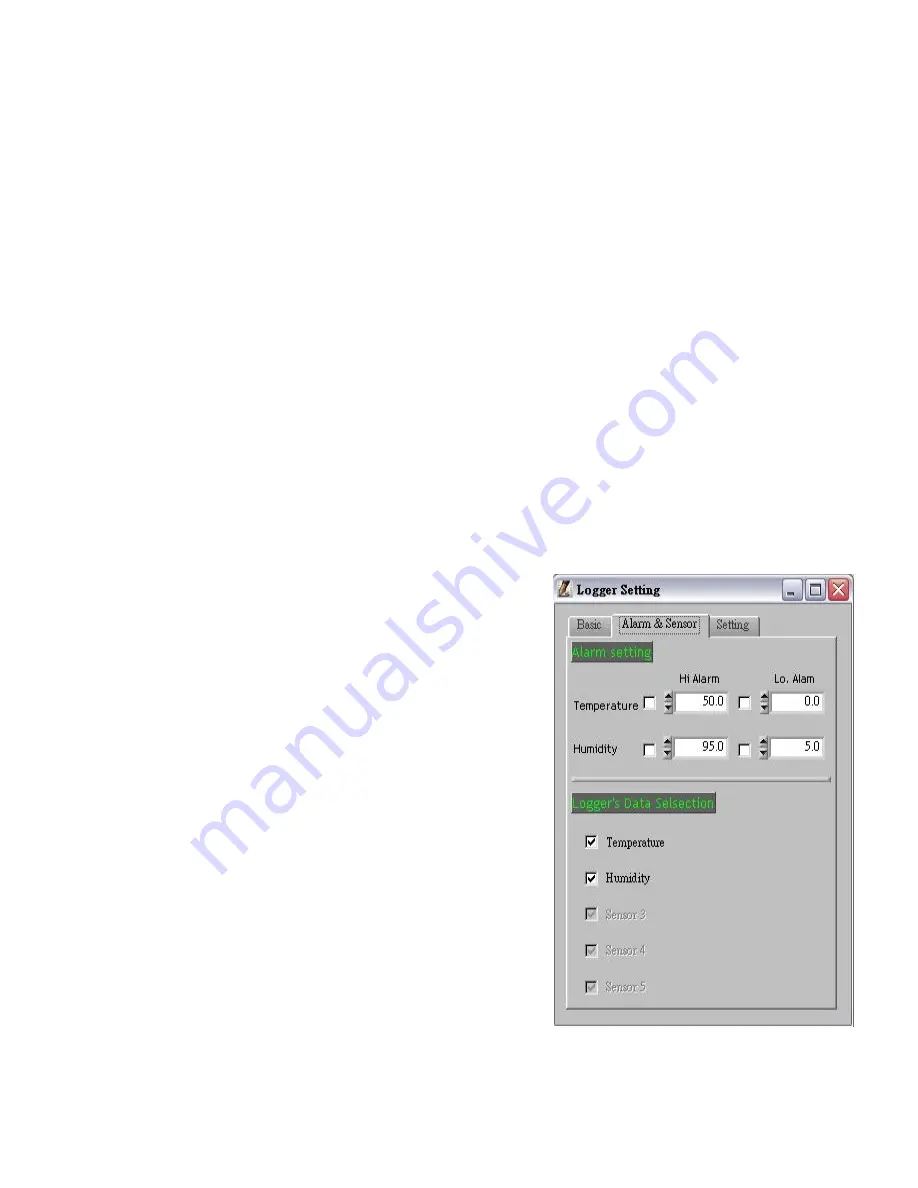
ALARM&SENSOR:(Pic.4)
1.Select Temp./Humidity alarm, set Hi/Lo Temp. and H/Lo
Humidity values.
(Red LED will flash if the current reading is over the setting.)
2.Select the parameter you want to record.
Example: Total is 16K memory, if choose Temp. and RH sensors
at the same time, memory store will split to 8K for Temp.+8K for
RH.
(Pic.4)
(Pic.3)
2. Remember the Comm port number and go back to software.
3
.
Click “Setting” ”Comm port “ select the port number as you
see from step 1, then press OK button.
NOTE:
If software message box show as pic2.Follow the next steps.
1.click
“
My computer
””
Content
”
in hardware content,click
“
Device manager
”
to
find the listed (COMx) listed under Ports(COM & LPT as below with red line.If
you may Prolific USB-to-Serial Comm. Port , it means the logger is connected to
computer properly.


