background image

Operation Instruction 


15


Computer system requirements for using the Speco Remote program are: 


Operating System: Microsoft

®

 Windows

®

 XP x86 (32 Bit) (Service Pack 3), Microsoft

®


Windows

®

 Vista x86 (32 Bit) (Service Pack 1), Microsoft

®

 Windows

®

 7 x86 (32 Bit) 


CPU: Intel Pentium III (Celeron) 600MHz or faster 


RAM: 128MB or higher 


VGA: 8MB or higher (1024x768, 24bpp or higher) 


Internet Explorer: Version 6.0 or later 


Start Internet Explorer on your local PC.  You can run the Speco Remote program by entering 
the following information in the address field. 


– 

“http://IP address:12088” (The DVR IP address and the Speco Remote port number 
(default: 12088) set in the Network setup screen (Speco Remote tab)) 

– 

Or, “http://DDNS.SPECOTECH.NET/YOURNAME” (The DVRNS server address and the DVR name 
registered on the DVRNS server) 


NOTE:  You will need to get the appropriate IP address for the DVR you want to connect 
to and the Speco Remote port number from your network administrator. 


NOTE:  Speco Remote only works with Microsoft Internet Explorer and will NOT 
Work with other browsers such as Google Chrome, Mozilla, Firefox, etc..


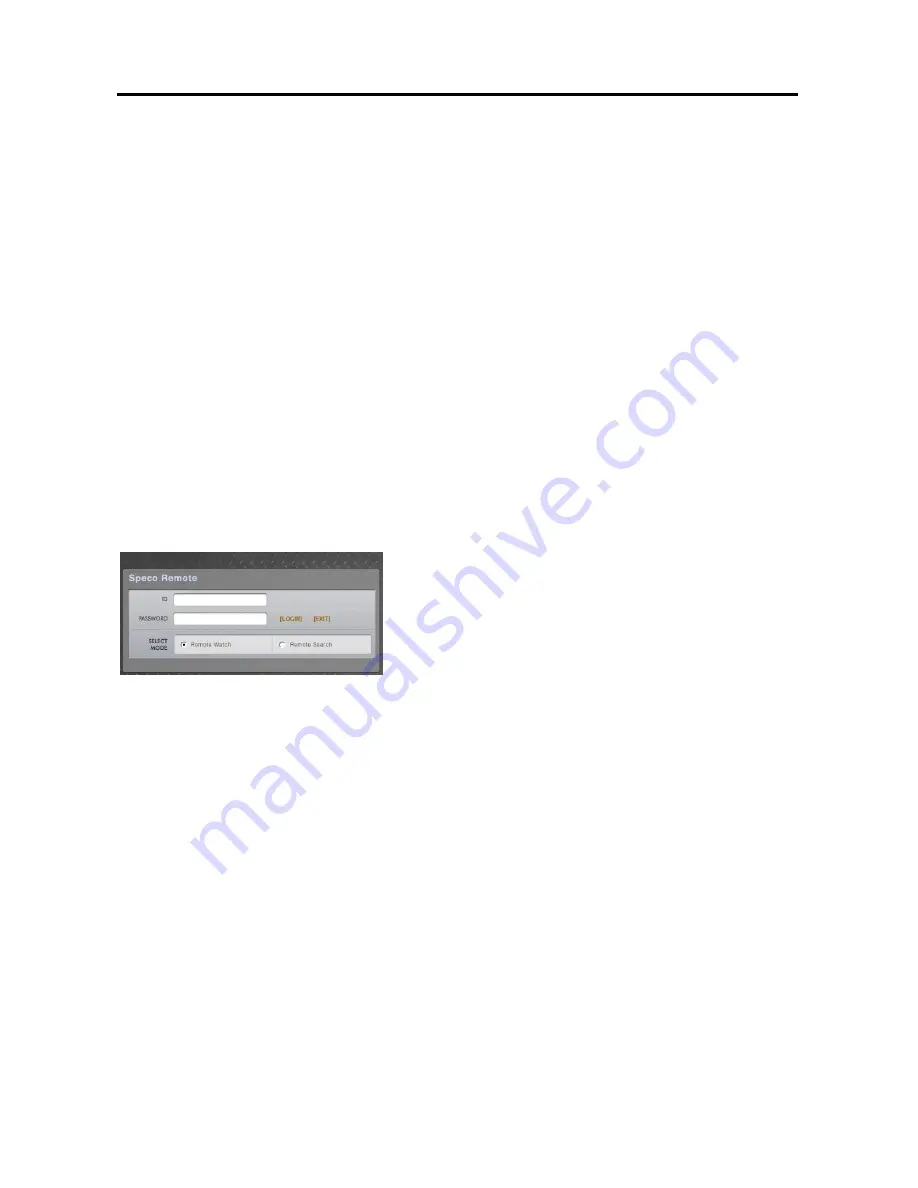
Select between the 

Remote Watch

 (Web monitoring) 

and 

Remote Search

 (Web search) modes.  Entering 

ID

 and 

PASSWORD

 and clicking the [

LOGIN]

 button 

logs in using the selected mode. 


NOTE:  Do NOT close the LOGIN window during the Speco Remote operation, otherwise, 
it will cause a script error when switching between Web monitoring and Web search modes 
and running the Speco Remote program again will be required. 


NOTE:  When running the updated Speco Remote for the first time, Internet Explorer might 
occasionally load the information of the previous version.  In this case, delete the temporary 
internet files by selecting Tools 

 Internet Options 

 General tab, and then run Speco 

Remote again. 


NOTE:  There might be a problem that the bottom of Speco Remote page is cropped due 
to the address or status bars in Microsoft Internet Explorer 7.0.  In this situation, it is 
recommended that websites open windows without address or status bars by changing 
the internet setting. (Go to the Tools 

 Internet Options 

 Security tab 

 Click the Custom 

level… button 

 Select 

Enable 

for the 

Allow websites to open windows without address 

or status bars 

option) 


NOTE:  When running Speco Remote in the Microsoft Windows Vista or higher operating 
system, it is recommended to start Internet Explorer with elevated administrator permissions.  
Click the right mouse button on the Internet Explorer icon and select the 

Run as administrator 

option from the context menu.  Otherwise, some functions of Speco Remote might be limited. 


Summary of Contents for CS4

Page 1: ......

Page 2: ...crease the number s value When in the PIP display format pressing theUp and Down arrow buttons moves the position of the small screen counter clockwise and clockwise and pressing the Left and Right buttons changes the PIP screen size In the playback mode pressing the button plays video backward at high speed Pressing the button again toggles the playback speed from and and the screen displays and ...

Page 3: ...ive to connect it to the DVR A USB mouse not supplied can be connected to the USB port You can use the mouse to navigate through the screens and menus much like you would on a computer A USB to Serial converter can be connected to the USB port Multiple text in devices can be used with a USB to Serial converter Remote Control Buttons ID Button Camera Buttons Sequence Button Login Logout Button Arro...

Page 4: ... screen Arrow Buttons These buttons are used to navigate through menus and GUI You can also use them to change numbers by highlighting a number in the menu and using the Up and Down arrow buttons to increase or decrease the number s value When in the PIP display format pressing theUp and Down arrow buttons moves the position of the small screen counter clockwise and clockwise Pressing the Left and...

Page 5: ...rectangle temporarily displays showing what area of the screen has been enlarged You can use the arrow buttons to move the rectangle to another area PTZ Button Pressing thePTZ button enters the PTZ Pan Tilt Zoom mode which allows you to control properly configured cameras Enter Button The Enter button selects a highlighted item or completes an entry that you have made during system setup This butt...

Page 6: ...ont panel controls are described in Chapter 3 Configuration Turning on the Power Once you have installed the DVR following the instructions in Chapter 2 Installation it is ready to record Live Monitoring As soon as the DVR completes its initialization process it will begin showing live video on the attached monitor and playing live audio through the attached speaker The default mode is to display ...

Page 7: ...g the Left and Right arrow buttons To change its location and size by using the mouse select the PIP and then click the right mouse button to display the following menu Select the options you want You can also change the location of the PIP by clicking the left mouse button on the PIP window and dragging it to where you want it located and change the size of the PIP by clicking the left mouse butt...

Page 8: ...wing Camera Menu Zoom SelectingZoom and choosing the camera number zooms the current image of the selected camera on the screen Refer to the following Zoom Mode section for details Audio Selecting Audio toggles audio output On and Off Color Control SelectingColor Controland choosing the camera number allows you to control brightness contrast hue and saturation for each camera for the selected came...

Page 9: ...ime has elapsed the monitor returns to the previous screen unless another event has occurred If you want to return to the live monitoring mode before the dwell time has elapsed press one of the camera buttons Covert Camera If a camera is set up as Covert 1 in the Camera setup screen Settings tab that camera will not be displayed unless a user with Covert Camera View authority logs into the system ...

Page 10: ... When entering the playback mode video is paused Pressing the button plays back video at regular speed The screen displays when the DVR is in the Pause mode and the screen displays when the DVR is playing back video You can use a mouse for convenient playback control Position the mouse pointer on the playback screen and the following Record Table Search Compact View Mode screen will display The in...

Page 11: ...xt In Search selects text input strings Go To Selecting Go To in the Search menu displays the following GO TO menu Go to the First SelectingGo to the Firstdisplays the first recorded image Go to the Last SelectingGo to the Lastdisplays the last recorded image Go to the Date Time Selecting Go to the Date Time displays the Go to the Date Time screen Move the cursor over the date and time and press t...

Page 12: ... time difference of 1 60 second 1 50 second for PAL between odd and even fields because it is composed of 60 interlaced fields per second 50 fields for PAL When recording video with Very High D1 resolution video is made up of frame units combining two fields one odd field and one even field This can cause horizontal scan lines or flashes in areas with motion because of the time difference between ...

Page 13: ...pied by displaying the Clip Copy screen Select Clip Copy from the Export menu in the Search menu press theCOPY button while in the Search mode and the Clip Copy screen appears to allow clip copy setup Highlight the box besideChannels and press the button You can select the cameras that you would like to include in your video clip Figure 73 Clip Copy screen You can search video from the first to la...

Page 14: ...selecting Cancel or hide the screen by selecting Close When selectingClose Clip Copy continues and a confirmation screen will display when complete NOTE The file size for clip copy is limited to 30GB When copying video clips larger than 2GB the video clips will be save in units of 2GB For example 3 individual 2GB files will be created when saving a 6GB video clip You can use other functions on the...

Page 15: ...ASSWORD and clicking the LOGIN button logs in using the selected mode NOTE Do NOT close the LOGIN window during the Speco Remote operation otherwise it will cause a script error when switching between Web monitoring and Web search modes and running the Speco Remote program again will be required NOTE When running the updated Speco Remote for the first time Internet Explorer might occasionally load...

Page 16: ...ter running the Command Prompt with elevated administrator permissions Restart your computer to apply the changes Web Monitoring Mode Remote Watch is a remote web monitoring program that allows you to monitor live video transmitted in real time from the remote DVR Click the to log out the Speco Remote program Click the to access to the web search mode Position the mouse pointer on the WebWatch log...

Page 17: ...tached speaker and click the button again stopmonitoring live audio Clicking both and allows two way communication Clicking the disables audio communication Aspect Ratio Changes the image aspect ratio Deinterlacing Using a deinterlace filter for interlaced video enhances image display quality by eliminating horizontal scan lines and noise in areas with motion Anti Aliasing Screen Enhances image di...

Page 18: ...mage Click the screen format to select the desired display mode Click the to enter the time lapse search mode which allows you to search for recorded data by time and then play back images found within the time parameters The Timetable window located at the bottom displays the time information for the image of the date selected on the calendar If more than one video stream in the same time range y...

Page 19: ...otion Anti Aliasing Screen Enhances image display quality by eliminating stair stepping aliasing effects in the enlarged image NOTE A camera name change in the Remote Search mode does not affect the camera name set up on the remote site Leaving the Camera Title blank causes the camera name set up on the remote site to display System Log Notices Boot Up Schedule Off Shutdown Panic On Restart Panic ...

Reviews: