background image

MULTICUT 160/200 


17


Daily/Every 8 hours


Grease all grease points, on PTO.


Check condition of blades and blade bushes and ensure all retaining bolts are 
fully tight.


Check gearbox oil, replenish with ‘EP90’ gear oil as necessary to the correct 
level line on the dipstick provided with each gearbox.


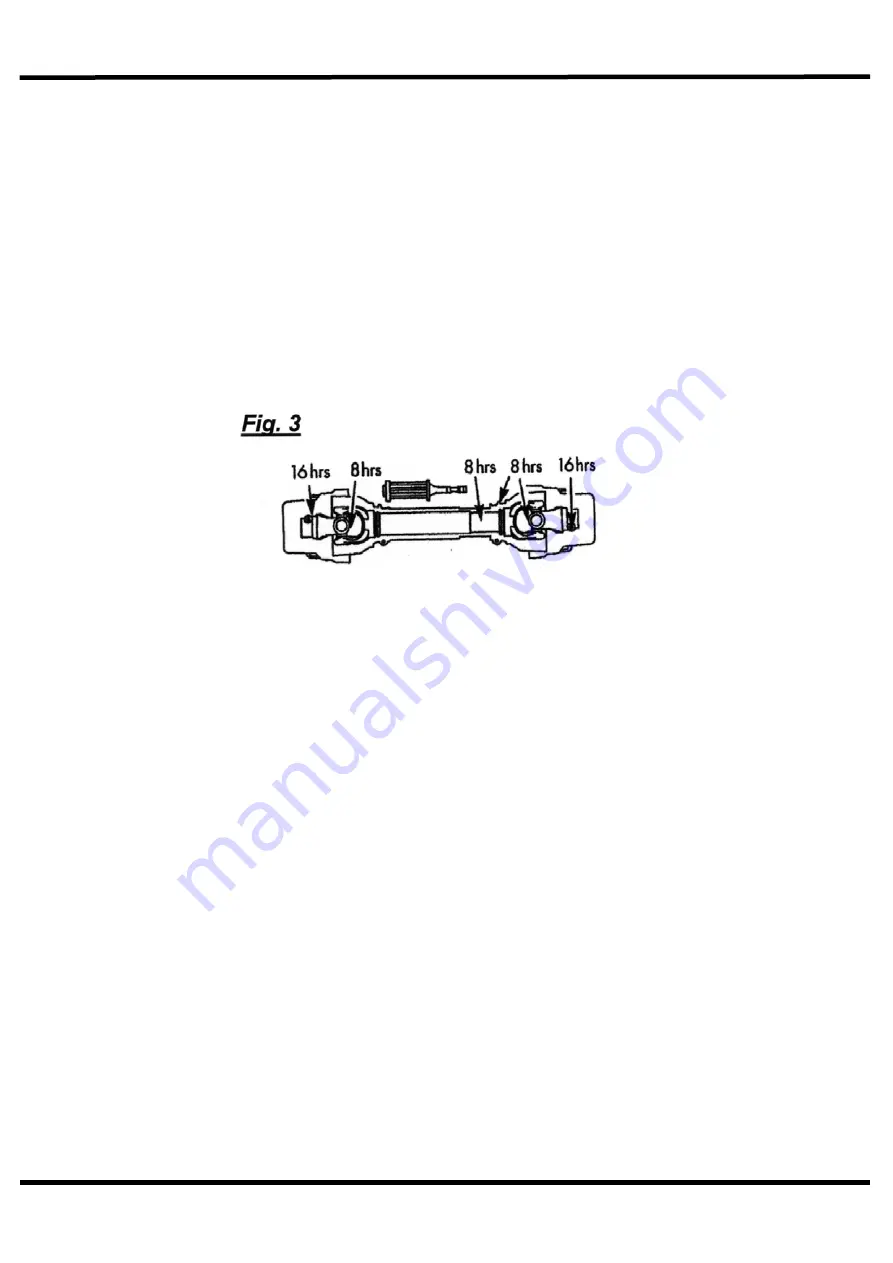
Dismantle and clean PTO sliding surfaces and re-grease. Grease universal 
joints (Fig. 3).


Every 20 hours


Grease PTO inner tube and push pins (Fig. 3)


Regularly


  Check there is no wrapping of string, plastic, grass or other debris between 

rotor boss and blades. 

  Inspect gearbox seals for leaks. 

  Regularly check the rotor boss retaining castle nut for tightness (part 

no.5771409). First remove the split pin, select the correct size socket in 3/4” 
drive and fully tighten the nut.  

  When replacing the split pin, do not slacken the nut to align the hole, always 

tighten. 

  Failure to regularly check this nut will result in serious wear to hub, which is 

expensive to repair. 


It is most important that all gearbox and blade bolts are regularly checked to be 
very tight. 

When the machine is new there will be a ‘bedding in’ period 

where very frequent checking is important.


Summary of Contents for 8999008

Page 1: ...MULTICUT 160 200 1 MULTICUT 160 200 Edition 4 0 May 2019 Part No 8999008...

Page 2: ...relates to please contact the After Sales Department for advice Spearhead Machinery Limited 2003 Spearhead Machinery Green View Salford Priors Evesham Worcestershire WR11 8SW Tel 01789 491860 Fax 0178...

Page 3: ...the selling dealer to verify that your machine has been registered with Spearhead Machinery Limited IMPORTANT During the initial bedding in period of a new machine it is the customer s responsibility...

Page 4: ...rranty does not apply to any expendable items such as blades flails bushes belts flap kits skids shields guards wear pads or pneumatic tyres 1 05 Temporary repairs and consequential loss i e oil downt...

Page 5: ...h herein and implied warranties with respect to the goods including but not limited to merchantability and fitness for a particular purpose 3 02 The manufacturer makes no warranty as to the design cap...

Page 6: ...Safety of Machinery Risk Assessment Part 1 Principles Part 2 Practical Guide and Examples of Methods BS EN ISO 12100 1 2010 Safety of Machinery Part 1 Basic Terminology and Methodology Part 2 Technic...

Page 7: ...or Requirements 10 Attaching To The Tractor 11 Setting Up Adjustments 14 Machine Protection 14 Operation 15 Transportation 15 Servicing Maintenance Safety First 16 Torque Settings 16 Daily Every 8 Hou...

Page 8: ...nning Never stop the engine with the PTO engaged Always check that all guards are properly fitted check there are no damage or loose parts Particular attention should be given to the flails to ensure...

Page 9: ...g Warning Shut off engine and remove key Warning Carefully read operator s manual before handling this machine Observe instructions and safety rules when operating Warning Do not remove open guard War...

Page 10: ...rhead strongly recommends 40hp min MC160 45hp min MC200 tractor with CATEGORY 2 rear linkage Ensure there is sufficient weight on front wheels of the tractor for safe transport and stability PTO must...

Page 11: ...To check first connect the mower to the tractor Pull the PTO shaft apart and connect to the tractor PTO output shaft and the gearbox input shaft Hold the half shafts next to each other in the shortest...

Page 12: ...d additional assistance please contact your local implement dealer or qualified service centre 1 Remove shielding 2 Shorten drive tubes by required length In normal conditions telescoping tubes must a...

Page 13: ...int System shortening the driveline will involve removal of the plastic ring which connects the shield tubes If it is necessary to remove this collar ADD A RETAINING CHAIN TO THE TRACTOR SIDE OF THE D...

Page 14: ...found it is recommended that the operator reduces the engine revs to allow the blades to pivot more easily when striking solid objects and proceed with caution The clutch settings should not be altere...

Page 15: ...he wire ropes Select a sensible forward speed bearing in mind the density of growth the terrain and the available horsepower taking extra care when turning particularly on slopes When turning it is no...

Page 16: ...ntenance is completed It is imperative that the following checks are carried out in order not to invalidate your warranty these are carried out before the first operation after the first hour then aft...

Page 17: ...pping of string plastic grass or other debris between rotor boss and blades Inspect gearbox seals for leaks Regularly check the rotor boss retaining castle nut for tightness part no 5771409 First remo...

Page 18: ...st be replaced when new blades are to be fitted If the blades are showing any signs of severe wear damage or cracking they must be replaced immediately Never attempt to weld the blades this will make...

Page 19: ...is any sign of over hearing wear or cracking replace with new Do not attempt to use the machine with damaged slip clutch plates Assemble the clutch and tighten the bolts to achieve a h length of 17mm...

Page 20: ...nough overlap 6 Lack of grease 7 Build up of Debris under drive shaft Gearbox Overheating 1 Incorrect oil grease level 2 Incorrect grade of oil grease 3 Incorrect operating speed 4 Machine overloaded...

Page 21: ...MULTICUT 160 200 21 Spearhead Machinery Green View Salford Priors Evesham Worcestershire WR11 8SW Tel 01789 491860 Fax 01789 778683 www spearheadmachinery com enquiries spearheadmachinery com...

Reviews: