background image

50

•  Do not burn green or freshly cut wood.
•  Be careful not to overfire the appliance by leaving the door open too 

long after the initial start-up. A thermometer on the chimney connector 
and/or appliance top helps.

•  Replace worn, dried out (inflexible) gaskets.
•  Have chimney regularly cleaned.

IN CASE OF A CHIMNEY FIRE:

•  Have a well understood plan for evacuation and a place outside for 

everyone to meet. Prepare to evacuate to ensure everyone’s safety.

•  Close air control on appliance.
•  Call local fire department. Have a fire extinguisher handy. Contact local 

authorities for further information on how to handle a chimney fire.

•  After the chimney fire is out, clean and inspect the chimney or chimney 

liner for stress and cracks prior to lighting another fire. Also check 
combustibles around the chimney and the roof.

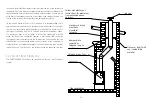
7.4 CHIMNEY CLEANING

Both the chimney and the appliance must be inspected and cleaned at 
least once a year.

For serious wood burners, chimney cleaning must be done as needed to 
avoid chimney fires; the venting systems for controlled combustion appli-
ances may need cleaning as often as once a month. These rates, however, 
depend on the burning habits of the individual operating the appliance. 
For example, it is possible to clog a solid fuel appliance chimney in a few 
days if slow, smoldering fires are burned and the chimney is cold. NOTE: 
Appliances burned consistently without hot fires may result in significant 
creosote accumulations in the chimney.

Certain items and considerations are important in chimney cleaning:

•  Proper tools should be used, including a brush specifically designed 

for chimney cleaning.

•  The chimney connector and dampers as well as the chimney should be 

cleaned.

•  The appliance’s firebox and baffle system should be cleaned if needed.
•  The chimney should be inspected and repairs made if needed, prefer-

ably by a qualified chimney sweep or mason.

7.5 GLASS REPLACEMENT

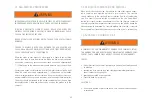
WARNING

DO NOT USE SUBSTITUTE MATERIALS

GLASS MAY BE HOT, DO NOT TOUCH GLASS UNTIL COOLED.

CARE MUST BE TAKEN WHEN REMOVING AND DISPOSING OF ANY  BROKEN 
DOOR GLASS OR DAMAGED COMPONENTS. BE SURE TO  VACUUM UP ANY 
BROKEN GLASS FROM INSIDE THE APPLIANCE BEFORE OPERATION.

DO NOT STRIKE, SLAM OR SCRATCH GLASS. DO NOT OPERATE APPLIANCE 
WITH GLASS REMOVED, CRACKED, BROKEN OR SCRATCHED.

Installation:
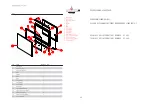
Remove the door from the stove and remove the glass retainer. Position 
the 4 mm ceramic Schott Robax glass in the door, make sure that the 
glass gasketing will properly seal your unit, and replace the retainer, 
it should rest on the gasket not the glass. Tighten securely, but do not 
wrench down on the glass as this may cause the glass to break. Replace-
ment Glass Part as for unit.

Summary of Contents for M 700 INSERT

Page 1: ...600 ZERO CLEARANCE FIREPLACE M 700 ZERO CLEARANCE FIREPLACE Keep this insruction for future use Spartherm Feuerungstechnik GmbH Maschweg 38 D 49324 Melle Phone 49 0 5422 94 41 0 Fax 49 0 5422 9441 14...

Page 2: ...ESCRIPTION SPARTHERM S600 M700 ZERO CLEARANCE FIREPLACE PLEASE READ THIS ENTIRE MANUAL BEFORE YOU INSTALL YOUR S600 M700 ZERO CLEARANCE FIREPLACE PLEASE READ THE MANUAL FOR OPERATING INSTRUCTIONS AND...

Page 3: ...m diameter pipe Failure to provide this may starve other fuel burning appliances from an adequate air supply Make sure not to create negative pressure in the installation room e g by means of an exhau...

Page 4: ...moke Safe Wood Burning Practices When using your wood burning appliance follow these guidelines for safe operation Keep flammable items like curtains furniture newspapers and books away from your appl...

Page 5: ...24 MINIMUM CLEARANCES TO COMBUSTIBLES 25 PLACEMENT 0F S600 INSTALLATION 27 PLACEMENT OF M700 INSTALLATION 28 FLANGES AND ANCHOR PLATE 27 INSTALLATIONS HEARTH EXTENSIONS 29 DISTANCE TO COMBUSTIBLE MAN...

Page 6: ...OR CHIMNEY FIRE 50 CHIMNEY CLEANING 51 GLASS REPLACEMENT 51 CARE OF GLASS 52 CLEANING THE GLASS CERAMIC SHEET 52 CARE OF PLATED PARTS 53 REPLACEMENTS 53 EXPLODED VIEW 54 TROUBLESHOOTING 56 GENERAL WA...

Page 7: ...ate this wood heater in a manner inconsistent with operating instructions in this manual This wood heater has a manufacturer set minimum low burn rate that must not be altered It is against federal re...

Page 8: ...8 12 9 inches 25 33 cm 1 8 kg hr 2 1 kg hr Intermittent operation Flue gas mass flow grams per second grams per second Flue gas temperature C F C F Single wall connector stove pipe Canada 6 150mm USA...

Page 9: ...essary WARNING THIS APPLIANCE IS HOT WHEN OPERATED AND CAN CAUSE SEVERE BURNS IF CONTACTED ANY CHANGES OR ALTERATIONS TO THIS APPLIANCE OR ITS CONTROLS CAN BE DANGEROUS AND IS PROHIBITED Do not operat...

Page 10: ...to be installed on the appliance Keep the packaging material out of reach of children and dispose of the material in a safe manner As with all plastic bags these are not toys and should be kept away f...

Page 11: ...Ne connectez pas ce po le un conduit de chemin e utilis par un autre appareil N utilisez pas de grille et ne faites pas monter le feu Etablissez le feu de bois directement dans l tre L installation d...

Page 12: ...ce po le un conduit de chemin e utilis par un autre appareil N utilisez pas de grille et ne faites pas monter le feu Etablissez le feu de bois directement dans l tre L installation doit tre faite excl...

Page 13: ...NSIONS Example shown S 600 S 600 fireplace A 18 7 9 477mm B 25 5 9 649mm C 23 1 3 592mm D 6 152mm E 17 1 3 441mm F 24 4 5 630mm Allgemeintoleranzen nach DIN 7168 mittel A B D C back cumbustion air con...

Page 14: ...25 1 3 643mm D 6 152mm E 18 1 2 471mm F 28 5 6 732mm u0 15 u5 u0 3 u10 u0 6 u20 u0 9 u30 u1 8 u60 Abma e mm auf 100 mm 400 120 400 50 120 10 50 10 Abma e Winkelminuten Nennma des k rzeren Schenkels Al...

Page 15: ...7 M 700 FIREPLACE 1 58 ft3 13 129 BTU h 29 452 BTU h 66 77 USA 7 x2 only CANADA 7 x1 only 298lbs 135kg 2 DO NOT CONNECT THIS APPLIANCE TO A CHIMNEY FLUE SERVING ANOTHER APPLIANCE THIS APPLIANCE AND TH...

Page 16: ...ossible to enable the exhaust products to easily flow through it Chimney vent systems that are too short or too long refer to point 4 3 chimney installation can also have an adverse affect on the flow...

Page 17: ...ide In order for the air system to function you have to ensure in the structure that no vacuum occurs in the housing If convection grates are installed be sure not to block them Air system accessory i...

Page 18: ...to the back Fresh air ducts The ducts providing the outside combustion air should be as short as possible to prevent pressure loss and to prevent making the house cold Grills The combustion air ducts...

Page 19: ...outside wall as possible The air duct should be insulated and the distance from the fireplace to the outside should be as short as possible For 5 air duct please refer to the maximum lengths and elbow...

Page 20: ...PRECAUTIONS WILL REDUCE THE POSSIBILITY OF APPLIANCE SMOK ING OR AIR FLOW REVERSAL THE OUTSIDE AIR INLET MUST REMAIN CLEAR OF LEAVES DEBRIS ICE AND OR SNOW OR ANY OTHER OBSTACLES IT MUST BE UNRESTRICT...

Page 21: ...teilweise werden gem 2 Absatz Ziffer 7 96 ff und 106 ff Urhebergesetz sowie u U nach 1 3 4 18 und 19 UWG zivil und strafrechtlich verfolgt Bez glich Rechtsanspr che u d Benutzung gelten unsere allgeme...

Page 22: ...y around the stove protect the stove surface with an acid proof cover Fresh Air Inlet Unless there is deemed to be insufficient residual air into the room via doorways windos and the like a dedicated...

Page 23: ...BUSTIBLE MATERIALS Minimum hearth requirement Cassette Insert 600 Make sure there is enough space for the wood heater If the fireplace is fitted with a frame that s conceals the contours of the recess...

Page 24: ...s of the recess an additional tolerance of 1 1 2 ca be set when the recess is made The wood heater must be able to expand freely The brickwork or decorative materials must not enter into contact with...

Page 25: ...nt of the stove made of non combustible material is required In front of the unit the hearth exten sion must extend 6 on each side Also there must an hearth extension under the unit which extend 2 on...

Page 26: ...en material A If the R value Thermal resistance is given no conversion is needed Configuration SIDE WALL TO UNIT SIDE WALL TO PIPE BACK WALL TO UNIT BACK WALL TO PIPE CEILING OR ALCOVE TO BOTTOM OF UN...

Page 27: ...27 4 2 DISTANCE COMBUSTIBLE MANTLE MANTLE MINIMUM CLEARANCES For mantle that is 8 deep 7 1 4 Min 9 25 7 1 4...

Page 28: ...9 228 6 mm Clearance to Combustible Wall Member Using a 8 203 2 mm inside diameter listed factory built Solid Pak chimney section with insulation of 1 25 4 mm or more build a wall pass through with a...

Page 29: ...l surfaces on all sides Make sure fasteners used to secure the metal chimney connector do not penetrate chimney flue liner Method D 2 50 8 mm Clearance to Combustible Wall Member Start with a solid pa...

Page 30: ...id the noise created when the fireplace expands This can be achieved by having the chimney supported by the supports The maximum chimney length that should be supported by the fireplace is 9 ft 2 75 m...

Page 31: ...eiling floor separation through which the chimney will pass At the attic level install an attic radiation shield from above 3 Follow the chimney s manufacturers instructions and place the first chimne...

Page 32: ...iant shield attic radiation shield flashing storm collar rain cap chimney section basement 1st floor attic elbow elbow wall radiation shield radiation shield attic radiation shield flashing storm coll...

Page 33: ...y section insulated wall radiation shield elbow offset support wall band rain cap flashing storm collar basement 1st floor attic attic 1st floor basement chimney wall band offset support fireplace ins...

Page 34: ...roots 2 ft 3 ft min 10 ft to nearest roofline less than 10 ft 2 ft 3 ft min pitched roof 3 ft min 3 ft min 2ft min less than 10 ft 10 ft or more wall or parapet flat roof windward leeward location NO...

Page 35: ...over cut a six inch 6 3 4 171mm hole to lie directly below the fireplace flue opening Allow two inches of material for a flange on all sides and cut to these measurements Bend down the flanges If you...

Page 36: ...installation instructions above If a continuous liner is not installed a direct flue connection must be made The direct flue connection requires a non combustible connector that extends from the modul...

Page 37: ...N Circulation of convection air The convection air enters into the fireplace via the inlet at the bottom of the fireplace The hot air for convection comes out of the fireplace via the front outlet and...

Page 38: ...ALLATION WARNING OPERATION OF THE APPLIANCE WITHOUT THE BAFFLES CAN RESULT IN EXCESSIVE TEMPERATURES THAT COULD DAMAGE THE APPLIANCE CHIM NEY AND THE SURROUNDING ENCLOSURE NOTE DO NOT OPERATE IF BAFFL...

Page 39: ...L INSTALLATION WARNING BURNING YOUR APPLIANCE WITH THE DOORS OPEN OR AJAR CREATES A FIRE HAZARD THAT MAY RESULT IN A HOUSE AND OR CHIMNEY FIRE DO NOT STRIKE OR SLAM DOOR NEVER REMOVE THE DOOR WHEN THE...

Page 40: ...40...

Page 41: ...the smell To start a brisk fire is required Place loosely crumpled paper on the floor of the appliance and cover with dry kindling Light the paper and leave the door slightly ajar one inch until all k...

Page 42: ...this Without an appliance thermometer you are working blindly and have no idea of how the appliance is operating An appliance thermometer offers a guide to performance Can t get the fire going Use mor...

Page 43: ...volume of combustion air and secondary air B Controlled burning Control lever approx 20 mm further than the closed air supply position This ensures that the fire does not receive too much air and the...

Page 44: ...44 DOOR ASSEMBLY SPARE PARTS ROBAX 4MM CERAMIC GLASS USE ONLY AS PER MANUFACTURERS STANDARD AND SPARE PARTS 7 600 GLASS REPLACEMENT PART NUMBER SP 898 700 GLASS REPLACEMENT PART NUMBER SP 899...

Page 45: ...f position For maximum efficiency when the appliance is throughly hot load it fully to the line of air inlet nozzles at the backside of the firebox or if not present to 50 of the fireboxes backside he...

Page 46: ...ax binders etc Never burn more than two manufactured firelogs at a time Do s Dont s Build a hot fire Take ash out immediately Let it accumulate to a depth of at least one inch A good ash layer provide...

Page 47: ...kitchen bathroom WC etc This will avoid low pressure building up in the installation room that can affect the extraction of flue gasses from the fireplace Check the combus tion air supply if required...

Page 48: ...or for creosote and soot buildup weekly until a safe frequency for cleaning is established If accumulation is excessive disconnect the appliance and clean both the chimney and the appliance You may wa...

Page 49: ...ocessed wood coal charcoal coloured paper or cardboard 7 1 ASH REMOVAL PROCEDURES WARNING IMPROPER DISPOSAL OF ASHES RESULTS IN FIRES DO NOT DISCARD ASHES IN CARDBOARD BOXES DUMP IN BACK YARDS OR STOR...

Page 50: ...g a solid fuel appliance chimney in a few days if slow smoldering fires are burned and the chimney is cold NOTE Appliances burned consistently without hot fires may result in significant creosote accu...

Page 51: ...rong but do not let burning fuel rest or fall against it and always close the door gently NEVER FORCE IT SHUT If the glass should ever crack or break while the fire is burning do not open the door unt...

Page 52: ...but this can be improved if the assembly is warmed using a hair dryer or similar heat source 8 REPLACEMENTS Contact your dealer or the factory for questions concerning prices and policies on replacem...

Page 53: ...1004 voll in Anspruch genommen Unbefugte Vervielf ltigungen tungen und Wiedergaben ganz oder teilweise werden gem 2 Absatz Ziffer 7 96 ff und 106 ff Urhebergesetz sowie u U nach 1 3 4 18 und 19 UWG z...

Page 54: ...losed too far Open air control more Burn hotter smaller fires Use well seasoned wood 10 GENERAL WARRANTY TERMS AND CONDITIONS 10 1 GENERAL INFORMATION This quality manufactured product is state of the...

Page 55: ...erload the elevating mechanism If the installation instructions are not correctly followed resulting in overheating of the pulleys and bearings the seals Reduced sealing due to thermal stress and hard...

Page 56: ...56 10 6 FOR YOUR INFORMATION...

Page 57: ...57 10 6 FOR YOUR INFORMATION...

Page 58: ...58 10 6 FOR YOUR INFORMATION...

Page 59: ...59 Appliance Service History This heater must be serviced annually depending on usage Date Dealer Name Service Technician Name Service Performed Special Concerns 11 SERVICE HISTORY...

Page 60: ...ERM A1 SP US CA 05 2019 THE GLOBAL BRAND FOR YOUR LIVING ROOM Your specialist dealer Spartherm Feuerungstechnik GmbH Maschweg 38 D 49324 Melle Phone 49 0 5422 94 41 0 Fax 49 0 5422 9441 14 www sparthe...

Reviews: