background image

1. Follow the Shapeoko assembly instructions until you get to the part 

where controller is added. There are a few differences, for instance 
the motors in this kit have equal length wires, but nothing too 
significant. Use the parts list from downloaded from the “Required 
Materials” section above rather than the list from the assembly guide.

 Set Aside Some Time

It may take about four hours to 

complete the initial assembly. Once you’ve got it, continue on. 

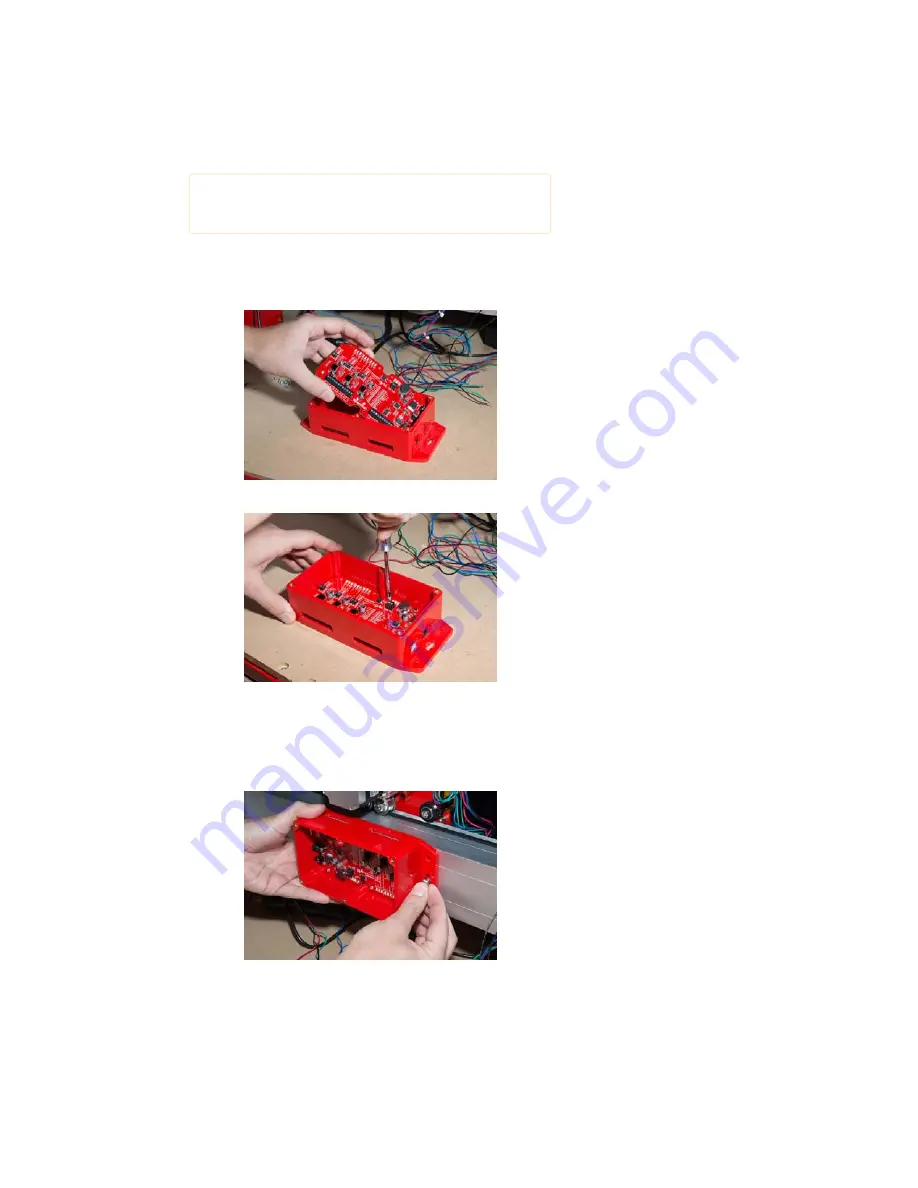
2. Install the Shapeoko into the enclosure. There are 10 4-40 screws for 

this purpose, but you’ll only need 8. Use a number 1 phillips 
screwdriver.

To get the Stepoko into the enclosure, put the ‘port end’ in first.

Installing the 4-40 screws

3. Get ready to install the controller. Test fit it first, but don’t install just 

yet, set it down such that the pad can be added, and then it can be 
rotated into position. Make sure the aluminum heatsink and extruded 
mill rail are clean and free of debris.

Test fitting the enclosure – the motor wires will go through the top

Page 2 of 10

Summary of Contents for Shapeoko

Page 1: ...the mill Required Materials Shapeoko assembly instructions Download and read before unboxing It works well to print two pages per sheet in order to have a copy on hand and to save trees Shapeoko Delux...

Page 2: ...assembly Once you ve got it continue on 2 Install the Shapeoko into the enclosure There are 10 4 40 screws for this purpose but you ll only need 8 Use a number 1 phillips screwdriver To get the Stepo...

Page 3: ...ling the protective sheet Once removed the rigidity of the material changes completely 5 Holding by the corners lower the pad onto the exposed heat sink and gently press into place Generally it just n...

Page 4: ...a bit too much is used It only needs to be filling in the treads Excess may run The finished installation Notice that the enclosure is nice and even and not deformed along the mill 8 Install the encl...

Page 5: ...s Group one coil from each motor together by color except with reversed polarities Twist the ends to test Try and move the mill in the Y axis If it moves smoothly solder the wires and apply heatshrink...

Page 6: ...eads Here the switch has been mounted and the switch wires are being measured They go into the two terminals labled E Stop Soldering on the leads All of the wires are added for this mill setup 13 Scre...

Page 7: ...ings 17 Measure know movements and calibrate each axis See the Stepoko guide s Firmware Configuring grbl and Calibrating section for more info Finishing Touches The cable carriers have been included i...

Page 8: ...s Here four of the eight wires have a tape wrap to indicate that they belong to the same motor The wires are probably not long enough to pull through with a bend so carefully work the ends free 3 Afte...

Page 9: ...up the cable carrier and try again Resources and Going Further Here s some links and projects you may find useful Stepoko Hookup Guide Read in depth about the Stepoko The Stepoko GitHub Repository Sch...

Page 10: ...ster Stepoko Powered by grbl Hookup Guide NOVEMBER 20 2015 Hardware guide for the Stepoko Shapeoko Coaster Project NOVEMBER 20 2015 A step by step guide to cutting and engraving a coaster with the Sha...

Reviews: