Page 9
Page 8
Electrical Requirements
Preparation
WARNING
Severe Injury
Rotating fan can cause severe
injury. Stay clear of fan when
motor is running.
WARNING
Excessive Weight
Require three or more person to move and
install this range hood. Spinal or other bodi-
ly injuries could occur if it is not followed.
IMPORTANT:
Observe all governing codes and ordinances.
(Please consult with a qualified electrician for 220-Volt 50 Hz voltage)
It is the customer’s responsibility:
• To contact a qualified electrical installer.
• To assure that the electrical installation is adequate and in conformance with National Electrical Code, ANSI/
NFPA 70 — latest edition*, or CSA Standards C22. 1-94, Canadian Electrical Code, Part 1 and C22. 2 No.
0-M91 - latest edition** and all local codes and ordinances.
If codes permit and a separate ground wire is used, it is recommended that a qualified electrician determine that
the ground path is adequate.
A 120-Volt, 60 Hz, AC-only (USA & Canada standard), fused electrical supply is required on a separate 15-amp
circuit, fused on both sides of the line.
DO NOT ground to a gas pipe.
Check with a qualified electrician if you are not sure that the range hood is properly grounded.
DO NOT have a fuse in the neutral or ground circuit.
IMPORTANT:
Save this Installation Guide for electrical inspector’s use.
The range hood must be connected with copper wire/plug only.
The range hood should be connected directly to the fused disconnect (or circuit breaker) box through flexible
armored or non-metallic sheathed copper cable. A U.L. - or C.S.A. - listed strain relief must be provided at each
end of the power supply cable.
Wire sizes (copper wire only) and connections must conform with the rating of the appliance as specified on
the model/serial rating label. Wire sizes must conform to the requirements of the National Electrical Code
ANSI/NFPA 70 — latest edition*, or CSA Standards C22. 1-94, Canadian Electrical Code Part 1 and C22.
2 No. 0-M91 - latest edition** and all local codes and ordinances. A U.L. - or C.S.A. - listed conduit con
-
nector must be provided at each end of the power supply cable (at the range hood and at the junction box).
Copies of the standards listed may be obtained from:
* National Fire Protection Association
Batterymarch Park
Quincy, Massachusetts 02269
**
CSA International
8501 East Pleasant Valley Road
Cleveland, Ohio 44131-5575
Advanced Preparations:
1. Be familiar with the controls of the range hood by reading
through
Range Hood Operations
,
Page 12.
2. Place the range hood on a flat, stable surface. Connect the
range hood to a designated standard outlet (please refer the
product label for the suitable voltage of this unit) and turn on
the range hood. Verify all operations of the range hood by
referring to
Range Hood Operations
,
Page 12.
3.
Place all supplied parts and required hardware on a flat, stable surface and
verify the existence of all supplied parts listed on Page 4.
4. Carefully remove the white plastic protective coat from the chimney covers
and range hood.
Preparations:
NOTE: To avoid damage to your hood, prevent debris from entering the vent opening.
1.
Decide the location of the venting pipe from the hood to the outside. Refer to
Venting Methods
on Page 7.
2. Due to the weight and size of this unit, please make sure that the wood hood or framework being used is stable
and secure in the wall.A straight, short vent run will allow the hood to perform more efficiently.
3.
Try to avoid as many transitions, elbows, and long run as possible. This may reduce the performance of the
hood.
4. IMPORTANT: Peel white plastic protective coat off the hood, if any.
5.
Use silver tape or duct tape to seal joints between pipe sections.
6.
Put a thick, protective covering over counter top, cook top or range to protect from damage or dirt. Remove
any hazardous objects around the area when installing.
CAUTION: If moving the cooking range is necessary to install the hood, turn OFF the power on an elec-
tric range at the main electrical box. SHUT OFF THE GAS BEFORE MOVING A GAS RANGE.
7.
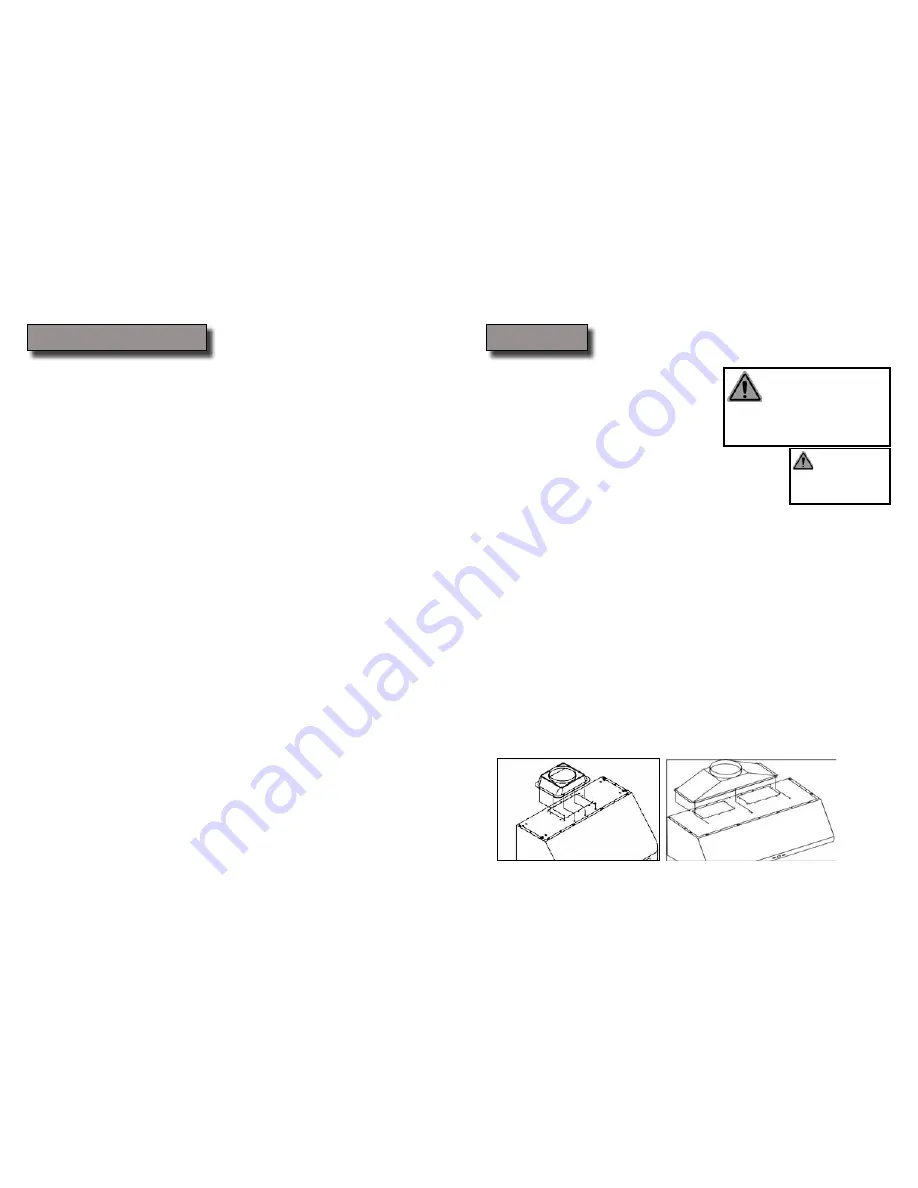
The hood assembly is shipped with the standard 8” round transition. Note: The transition is shipped unin
-
stalled and must be installed before mounting the insert liner (Figure 1 or 2 below). If in-hood fan is furnished
the transition is shipped separately.
8. If venting to the outside install vent system (see
Venting Requirements
, Page 6). Use caulking to seal exterior
wall or roof openings.
9. Disconnect main electrical supply, prepare and run electrical wiring through ceiling or wall. Leave approxi
-
mately 12” of electrical cord hanging from the ceiling. Do not restore power until wiring is completed.
10. Disconnect power cord, remove the buffle filters and the grease tunnel. Refer to installation step 9 & 10.
11. Reinstall the baffle filters and the grease tunnel after the range hood is properly installed.
Figure 2
Figure 1


