background image

Sony KV-SW21N63 Group O9 (

GB

)_2-630-056-12 (2)

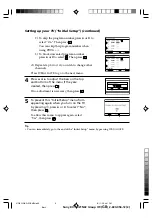
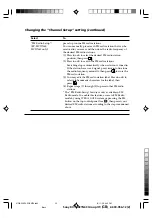
2) To skip the program number, press 

V

 or 

v

 to

select “On”. Then press 

.

You can skip this program number when
using PROG +/-.

3) To block unwanted program number,

press 

V

 or 

v

 to select  . Then press 

.

d) Repeat step b) to c) if you wish to change other

channels.

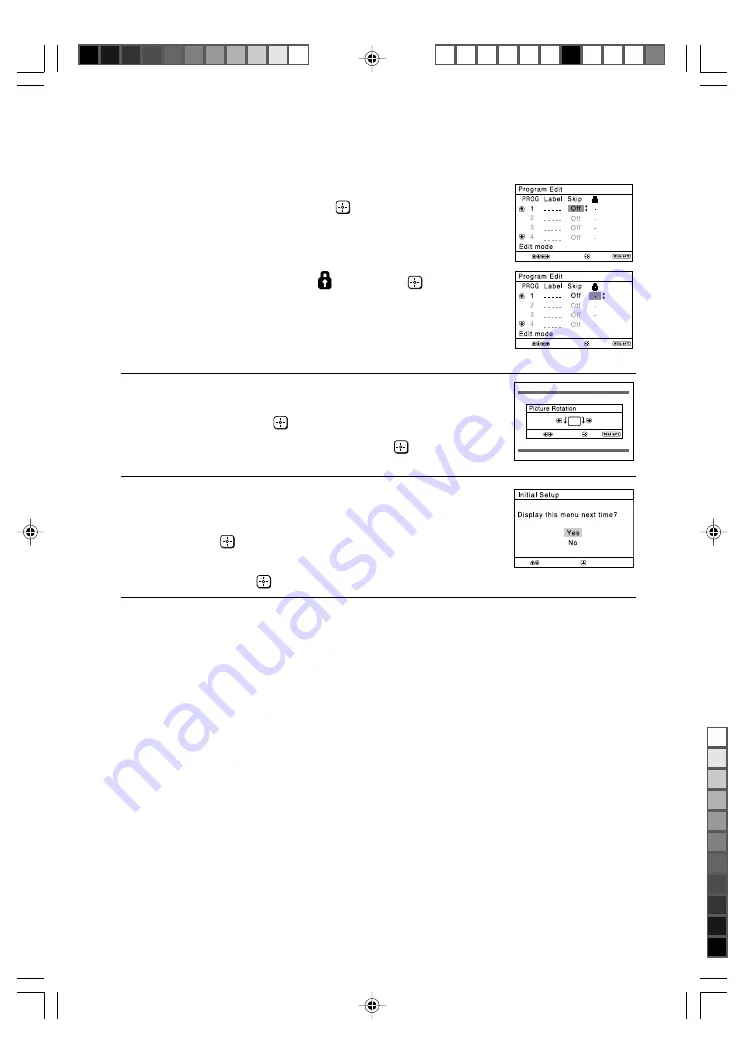
Press WEGA GATE to go to the next menu.

4

Press 

or 

b

 to adjust the bars on the top

and bottom of the menu if they are
slanted, then press 

.

If no adjustment is necessary, then press 

.

5

To prevent this “Initial Setup” menu from
appearing again when you turn on the TV
by pressing 

!

, press 

or 

v

  to select “No”,

then press 

.

To allow this menu to appear again, select
“Yes”, then press 

.

Tip

• You can immediately go to the end of the ”Initial Setup” menu by pressing WEGA GATE.

End

Select

Confirm

Select

Confirm

Exit

Select

Confirm

Exit

Select

Confirm

Setting up your TV (“Initial Setup”) (continued)

01GB02WAR-SOEMPhi.p65

8/11/05, 4:31 PM

6

Black

Summary of Contents for WEGA KV-SW21

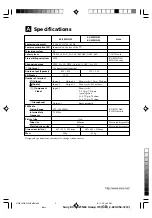
Page 1: ... Trinitron Color TV 2005 Sony Corporation KV SW21 2 630 056 12 2 Operating Instructions Before operating the unit please read this manual thoroughly and retain it for future reference N63 N60 N50 GB 01GB01COV SOEMPhi p65 8 11 05 4 23 PM 1 Black ...

Page 2: ...Note KV SW21N63 KV SW21N60 KV SW21N50 110 240 V AC 50 60 Hz Indicated on the rear of the TV M NTSC3 58 PAL PAL 60 SECAM NTSC 4 43 AV IN only MTS KV SW21N63 SW21N60 only VHF 2 to 13 UHF 14 to 69 CATV 1 to 125 75 ohm external terminal 4 W 4 W 5 W 5 W 12 W Input 2 Output 1 Phono jacks 1 Vp p 75 ohms Input 3 Output 1 Phono jacks 500 mVrms Input 1 Phono jacks Y 1 Vp p 75 ohms sync negative CB 0 7 Vp p ...

Page 3: ... the TV Do not allow children to climb onto it For your own safety do not touch any part of the TV the power cord and the antenna cable during lightning storms Do not place any objects on the TV The apparatus shall not be exposed to dripping or splashing and that no objects filled with liquids such as vases shall be placed on the apparatus Do not operate the TV if any liquid or solid object falls ...

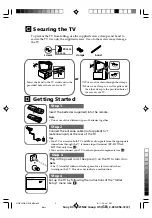
Page 4: ...ied into the remote Note Do not use old or different types of batteries together Connect the antenna cable not supplied to 8 antenna input at the rear of the TV Tips Your TV can receive both TV and FM radio signals from the appropriate connections through the 8 antenna input terminal KV SW21N63 SW21N60 only see H You can also connect your TV to other optional components see H Plug in the power cor...

Page 5: ...screen To skip automatic channel presetting select No then press If the message No channel found Please connect cable antenna appears check your TV connections then press 3 The Program Edit menu enables you to edit the channels a If you wish to keep the channels in the current condition press WEGA GATE to exit b Press V or v to select the program number with the channel you wish to change The sele...

Page 6: ...the bars on the top and bottom of the menu if they are slanted then press If no adjustment is necessary then press 5 To prevent this Initial Setup menu from appearing again when you turn on the TV by pressing press V or v to select No then press To allow this menu to appear again select Yes then press Tip You can immediately go to the end of the Initial Setup menu by pressing WEGA GATE End Select ...

Page 7: ... items K 9 WEGA GATE Display or cancel WEGA GATE menu K 0 FM Listen to FM Radio R KV SW21N63 SW21N60 only SOUND MODE Select sound mode options with a 5 Band Graphic J KV SW21N50 only Equalizer display qa 8 Antenna input terminal H qs T Monitor output terminal H qd Component video input terminal H qf t1 Video input terminal 1 H qg WOOFER 3D WOOFER terminal G KV SW21N63 only L R 2 MONO 4 5 WEGA GATE...

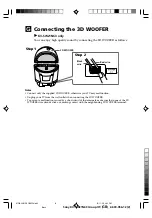
Page 8: ...plied 3D WOOFER otherwise your TV may malfunction Unplug your TV from the wall outlet when connecting the 3D WOOFER To prevent a malfunction caused by a short circuit of the terminals make sure that none of the 3D WOOFER wire strands stick out making contact with the neighbouring 3D WOOFER terminal Black wire Red wire Step 2 3D WOOFER Step 1 01GB03INS SOEMPhi p65 8 11 05 4 32 PM 8 Black ...

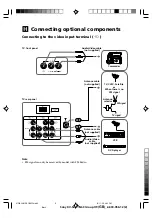
Page 9: ...Note FM signal can only be received by model with FM Radio TV front panel Camcorder Audio Video cable not supplied TV rear panel Audio Video cable not supplied Antenna cable not supplied TV CATV Satellite or When there is no FM signal FM signal Antenna selector Antenna cable not supplied TV signal VCR DVD player 01GB03INS SOEMPhi p65 8 11 05 4 32 PM 9 Black ...

Page 10: ...on your TV Your TV can receive either 525i 60Hz or 625i 50Hz interlace signals The component video terminals on your DVD player are sometimes labeled Y CB CR Y PB PR Y Cb Cr or Y B Y R Y If you select DVD on your TV screen the signal from the T monitor output jacks will not be output properly This does not indicate a malfunction Connecting optional components continued TV rear panel Audio system L...

Page 11: ...nu and set the Signal Booster to Auto see O Try using an external booster Turn off or disconnect the external booster if it is in use Display the Channel Setup menu and set the Signal Booster to Off see O Check the power cord antenna and VCR connections see H Press 1 power to turn on the TV see J Press main power on the TV to turn off the TV for about five seconds then turn it on again see F Press...

Page 12: ...the TV Do not move the TV while the TV is turned on Press main power on the TV to turn off the TV for about 15 minutes then turn it on again to demagnetize the TV Check the antenna cable and connection on the TV VCR and at the wall see H Check the antenna setup Contact a Sony dealer for advice Connect a separate FM antenna and the TV channel source through an antenna selector switch to your TV see...

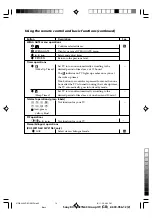
Page 13: ...0 Display on screen information qa Mute the sound qd t Select TV or video input H qf 0 9 Input numbers For program numbers 10 and above enter the second digit within two seconds ql Select sound mode options N with a 5 Band Graphic Equalizer display Dynamic Standard Custom When the Custom mode is selected you can receive the last adjusted sound settings from the Sound Adjustment option in the menu ...

Page 14: ...timer If no buttons or controls are pressed for more than one hour after the TV is turned on using the wake up timer the TV automatically goes into standby mode qh Set TV to turn off automatically according to the desired period of time max of one hour and 30 min Teletext operations green labels Not function for your TV red green yellow blue PIP operations V v B b Not function for your TV Stereo b...

Page 15: ... 4 5 TV Confirm Select End 1 2 3 4 5 TV Confirm Select End Tip The WEGA GATE and V v B b buttons on the top control panel can also be used for the operations above watch the preset TV channels see E select the inputs for the connected equipment see H change the settings of your TV see L TV External Inputs Settings Confirm Select WEGA GATE Settings External Inputs FM Radio TV 1 2 3 4 5 TV Confirm S...

Page 16: ... Off Confirm End Channel Setup Select Cable On Auto Auto Program Program Edit Signal Booster FM Radio Setup Channel Setup see O Cable On Off Auto Program Program Edit Signal Booster Auto Off FM Radio Setup KV SW21N63 SW21N60 only Confirm End Setup Select Picture Rotation Language Video Label Color System Wake Up Timer Beep NTSC3 58 Factory Settings On English Setup see P Language English Chinese P...

Page 17: ...quality Press V or v to select On then press To cancel select Off then press You can adjust the setting to your personal preference in the Picture Adjustment and Color Temperature options only when the Custom mode is selected Adjusting the Picture Adjustment items under Custom mode 1 Press V or v to select either Picture contrast Brightness Color Hue color tones or Sharpness then press Selecting R...

Page 18: ...naural sound or Off You can adjust the setting to your personal preference in the Sound Adjustment option only when the Custom mode is selected Adjusting the Sound Adjustment items under Custom mode The 5 Band Graphic Equalizer feature allows you to adjust sound frequency settings of Custom mode in the menu 1 Make sure that Adjust is selected then press Selecting Reset will set your TV to the fact...

Page 19: ...elect Cable On you will be able to receive 125 cable TV channels If there are no cable TV channels you will receive VHF broadcast channels only To receive only VHF and UHF broadcast channels select Off then press Auto Program preset channels automatically Program Edit label the program number skip the program number and block unwanted programs see step 3 of the section Initial Setup in E Signal Bo...

Page 20: ... station has a weak signal press B or b to fine tune the radio frequency manually then press to store the FM radio station 3 You may edit the FM radio station label Press V or v to select alphanumeric characters for the label then press 4 Repeat steps 1 through 3 to preset other FM radio stations The FM Radio Setup feature is only available in FM Radio mode To enable this feature access to FM Radi...

Page 21: ...n press V or v to select the label options Video 1 Video 2 DVD VCR SAT Game or Edit You may edit the video label to your favorite name Press V or v to select alphanumeric characters for the label then press Color System select the color system for video input only Press V or v to select either Auto PAL SECAM NTSC3 58 or NTSC4 43 then press Normally set this to Auto Wake Up Timer allow your TV to e...

Page 22: ... Press A B until you receive the sound you want Select To listen to Stereo stereo broadcast sound Auto SAP SAP Second Audio Program broadcast sound Mono monaural sound Notes When select Auto SAP non SAP program sound will be same as Stereo mode sound If the stereo signal is very week the stereo broadcast sound may become noisy To reduce the noise select Mono A B TV 1 2 3 4 6 7 8 9 0 5 PROG A B RET...

Page 23: ...ttons in FM Radio mode The available radio frequency is only for temporary listening pleasure and cannot be stored in the memory If the message Please setup FM Radio appears display the Channel Setup menu and select FM Radio Setup to preset the desired FM radio stations see O Note When a FM stereo program has static noise press A B until Mono appears There will be no stereo effect but the noise wi...

Reviews: