22
GB
Location of Parts and Basic Operations
8
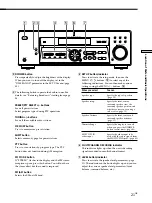
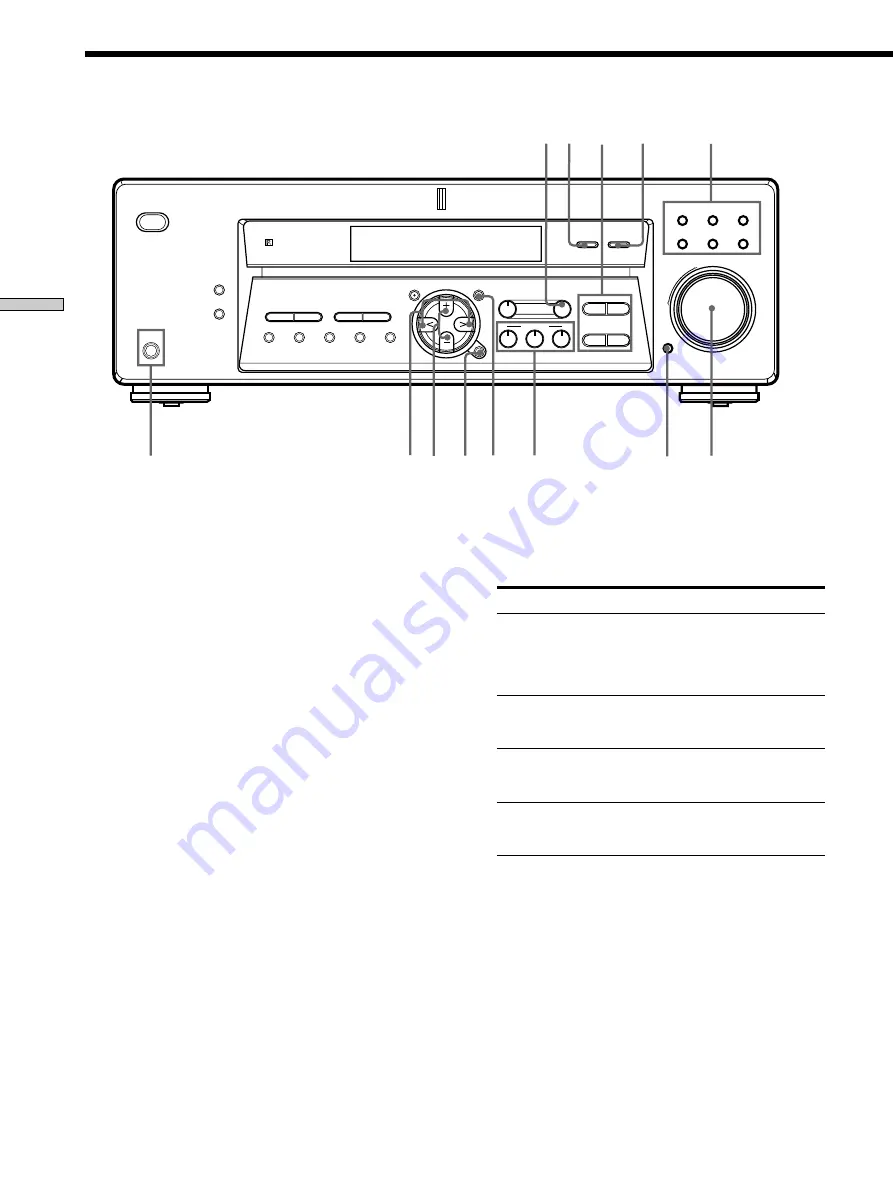
SURR button/indicator
Press to activate the surround parameters (page 30).
The indicator on the button lights up and you can
adjust the various surround parameters (effect level,
wall type, etc.).
9
MULTI CH IN button
Press to enjoy the audio source connected to the
MULTI CH IN jacks with the video from the selected
component. Press again to cancel MULTI CH IN.
• When the MULTI CH IN is selected, the tone, sound field
and surround parameters do not function.
0
Tone buttons
/– buttons
Press to adjust the tone (treble) (page 32).
BASS +/– buttons
Press to adjust the tone (bass) (page 32).
qa
INPUT MODE button
Press to select the input mode for your digital
components (DVD/LD and TV/SAT).
Each press switches the input mode of the currently
selected component.
Select
To
AUTO
Give priority to digital signals
when there are both digital and
analog connections. If there are
no digital signals, analog is
selected
DIGITAL (OPTICAL)
Specify the digital audio signals
input to the DIGITAL OPTICAL
input jacks (TV/SAT only)
DIGITAL (COAXIAL)
Specify the digital audio signals
input to the DIGITAL COAXIAL
input jacks (DVD/LD only)
ANALOG
Specify the analog audio signals
input to the AUDIO IN (L and R)
jacks
Note
If 96 kHz digital signal is input, the tone, sound field and
surround parameters do not function.
Front Panel Parts Description
MULTI CHANNEL DECODING
MASTER VOLUME
DISPLAY
–
+
MULTI CH IN
INPUT MODE
BASS
MUTING
A.F.D.
ENTER
NAME
VIDEO
DVD/LD
TV/SAT
MD/TAPE
CD
TUNER
SET UP
MENU
LEVEL
SURR
SOUND CONTROL
SOUND FIELD
MODE
2CH
DIMMER
PHONES
?
/
1
TREBLE
–
–
+
TUNING
–
+
PRESET/
PTY SELECT
MEMORY
SHIFT
PTY
FM MODE
FM/AM
–
+
+
9
qa
qs
8
0
qd
qf
w;
qg
qh
qj
qk
ql

