26
Loading Paper Roll and Ink Ribbon
After removing the ink ribbon holder, do not insert
your hand into the opening in the unit. Touching the
protrusions or movable parts inside the unit may result
in bodily injury or malfunction of the unit. In
particular, touching the thermal head when it is hot
immediately after printing may result in burns.
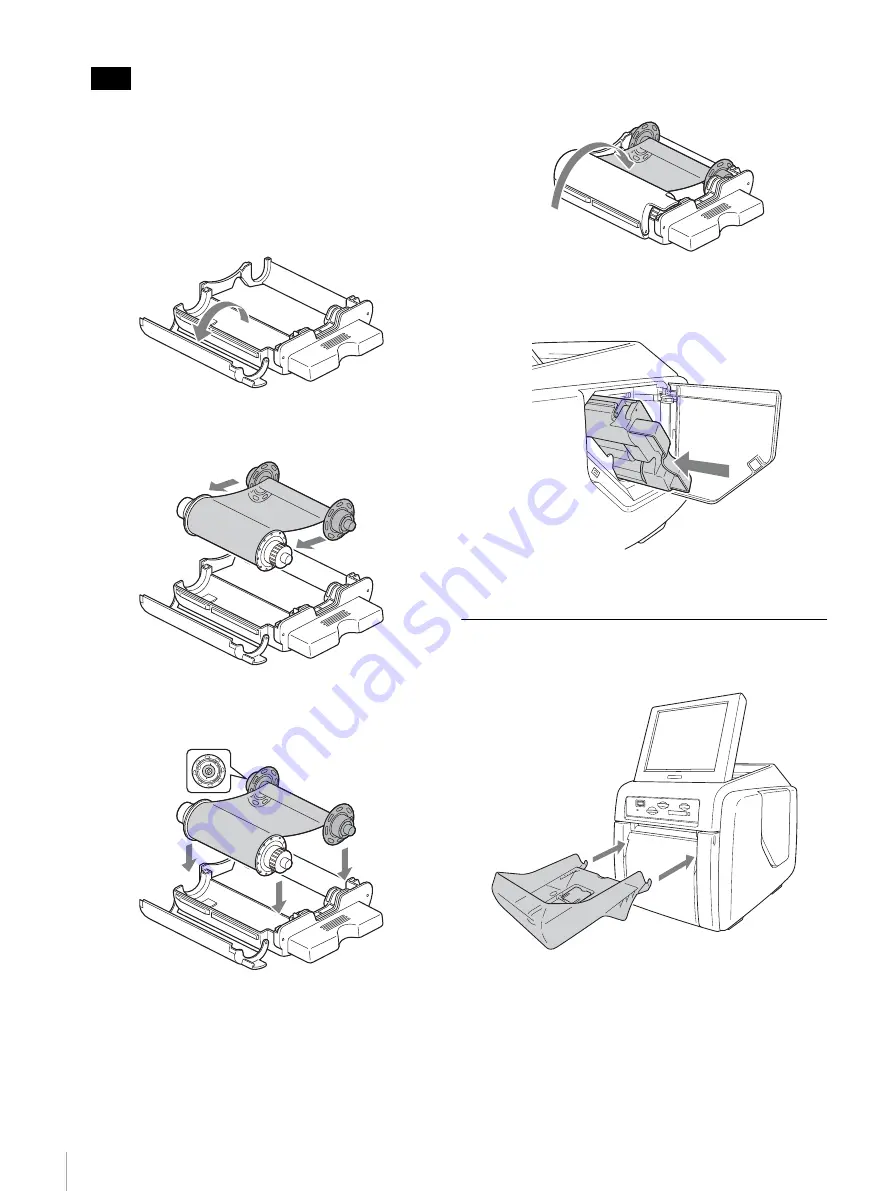
3
Open the ink ribbon holder cover.
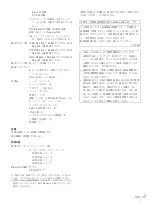
4
Detach the white spool of the ink ribbon from the black
spool.
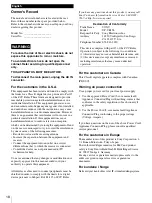
5
Gently unravel the ribbon without loosening it, and
place it in the ink ribbon holder.
Place the white spool in the front holder and the black
spool in the rear holder as shown. Be sure to press
down on the side of the black spool in which the IC
chip is embedded until it snaps into place.
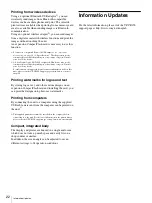
6
Close the ink ribbon holder cover until it snaps into
place.
7
Insert the ink ribbon holder into the compartment, and
push the indented area of the handle (indicated by the
arrow) until the holder is completely inserted.
8
Close the side door.
Attaching the Paper Tray
Attach the supplied paper tray.
Raise the paper eject stopper when printout size is small.
Note
IC chip
Summary of Contents for SnapLab UP-CR15L
Page 113: ......


