5-21
SEL1635GM
5-4. RESOLVING POWER ADJUSTMENT
Resolving Power Adjustment is done by increasing or decreas-
ing the thickness of the washer.
Refer to “2-2. DISASSEMBLY”, disassemble the lens, and
change the thickness of the washer.
5-4-1. Resolving Power Adjustment (1st lens assy)
Adjusting Procedure
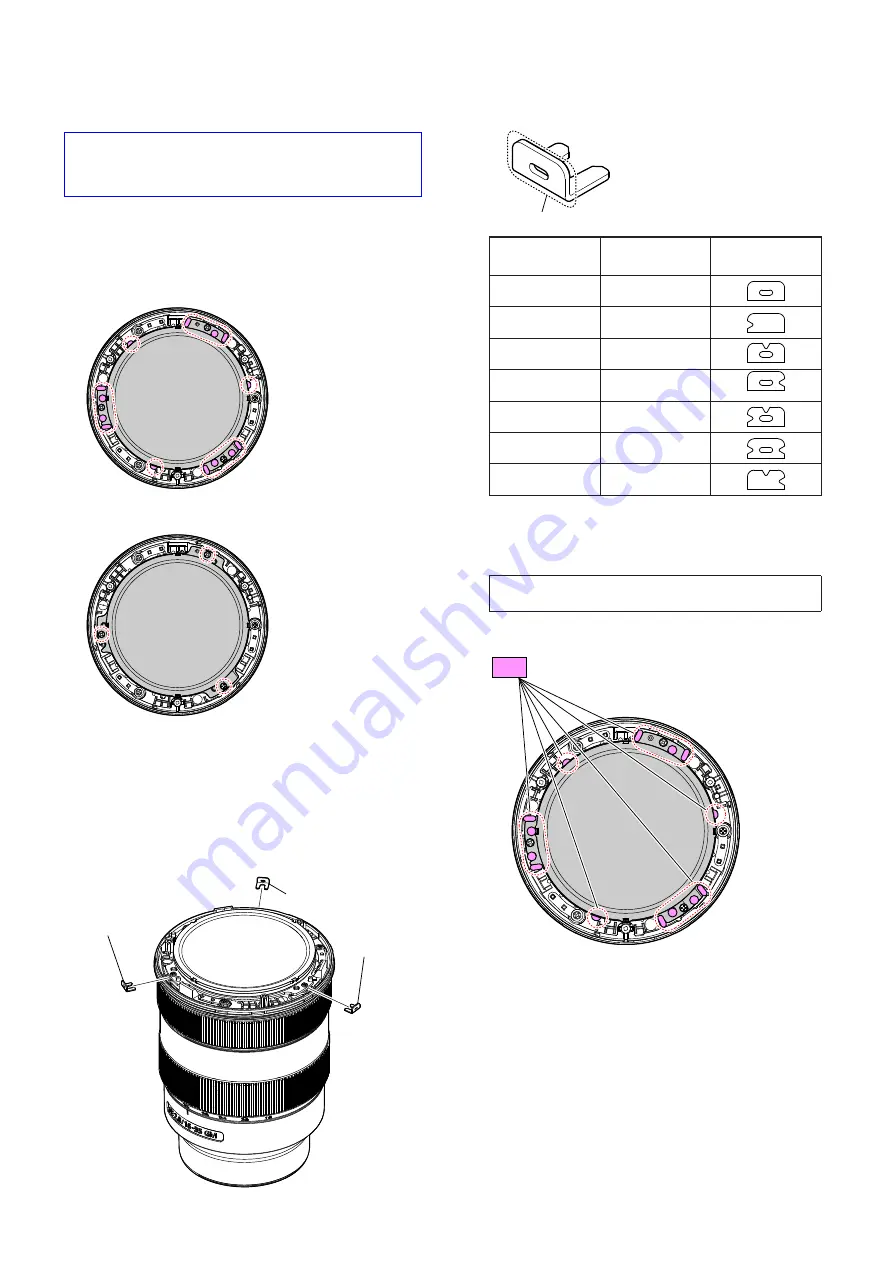
1. Remove the filter screw barrel and peel off the adhesive of the
1st lens assy, referring to the “2-2. DISASSEMBLY”.
2. Loosen the three screws to fixing the 1st lens assy.
3. Increase or decrease the thickness of the adjustment washer C
to adjust the partial blur/curvature.
Partial blur: Set the zoom to the TELE end, and change the
thickness of the side where blurring occurs.
Curvature: Set the zoom to the TELE end, and change the
thickness of the whole.
Front focus: Make the washer thicker.
Rear focus: Make the washer thinner.
adjustment
washer C
adjustment washer C
adjustment
washer C
ADJUSTMENT WASHER C
shape confirmation
Part No.
Thickness t
(mm)
Shape
4-689-786-01
0.03
4-689-786-11
0.05
4-689-786-21
0.08
4-689-786-31
0.1
4-689-786-41
0.2
4-689-786-51
0.3
4-689-786-61
0.5
4. Tighten the three screws loosened at step 2.
5. Perform the check and adjustment repeatedly until the partial
blur/curvature is resolved.
Note:
If the partial blur/curvature cannot be resolved even after
the adjustment, replace the 1st lens assy.
6. Apply the adhesive bond (B-110) to the following 14 places.
B-110


