Using a USB Wireless LAN Module
21
P
repa
ra
ti
ons
For details about the menu settings and entering a
character string, see
“Setup Menu Operations”
(page 39)
.
Making a connection
1
Set “Wi-Fi” in “Wi-Fi”
(page 50)
of the
System menu to “Enable.”
2
Make a Wi-Fi connection by inputting
the SSID and Password onto the device,
or by using the Wi-Fi direct connection
function.
You can check the SSID and password of the
camcorder on “SSID & Password” in “Wi-
Fi”
(page 50)
of the System menu.
When using the Wi-Fi direct connection
function, proceed to the following step.
3
Select “Execute” for “Wi-Fi Direct
Connection” in “Wi-Fi” of the System
menu.
The setup menu disappears, and the
connection wait message for the Wi-Fi direct
connection function appears.
Using the Push-Button method
When you perform the Push-Button method
on the device, the message for connection
permission appears on the connection wait
screen. Select “Execute.”
Using the PIN code method
When you perform the PIN code method on
the device, the device name and PIN code
appears on the connection wait screen.
Complete the connecting process by
inputting the PIN code to the device.
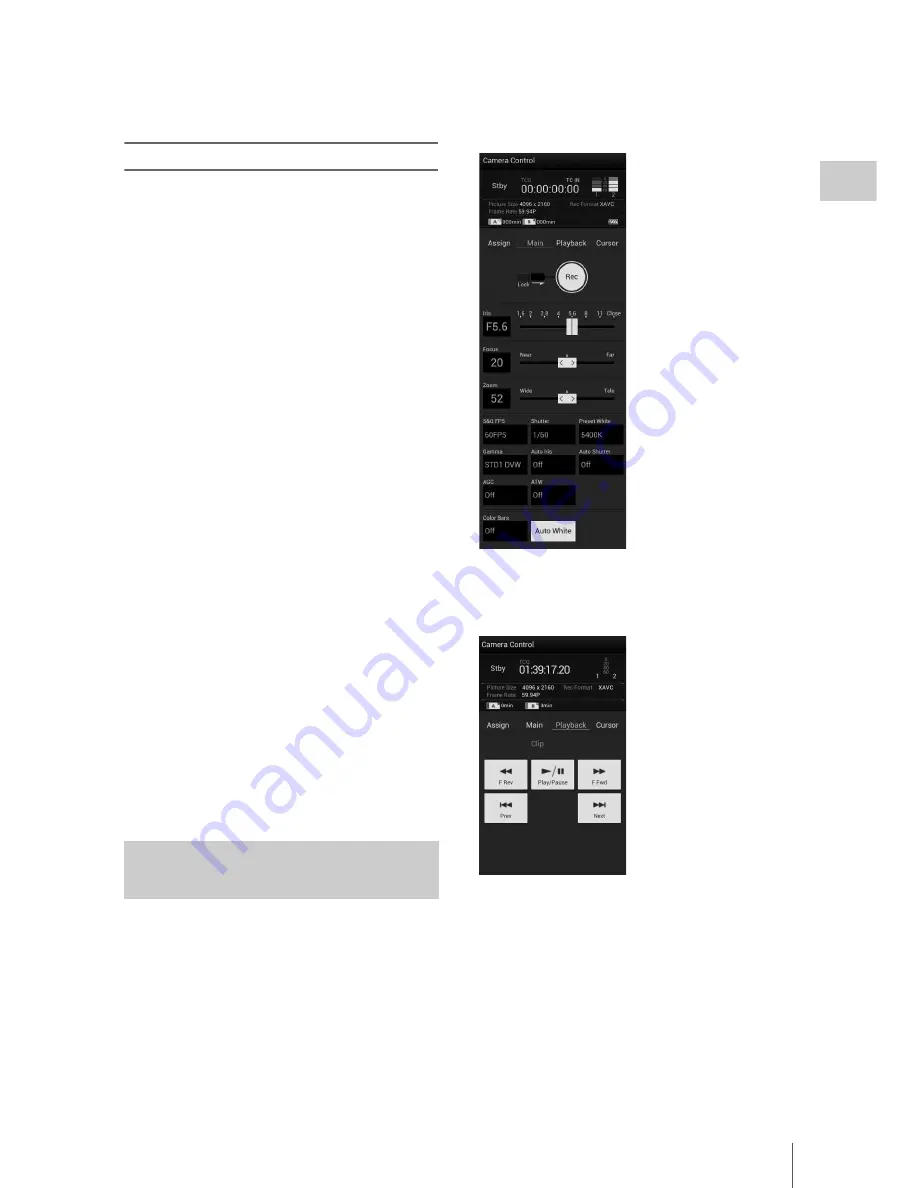
When a Wi-Fi connection is established between
a device such as smartphone, tablet, etc., and the
camcorder, the Wi-Fi remote commander appears
on the device screen and the device can be used as
a remote commander.
You can start/stop recording and adjust the
recording settings with a Wi-Fi connected device.
This function is useful for setting the camcorder
in a remote place, such as the top of a crane, etc.
Wi-Fi remote commander displays
Smartphone
Main screen
Playback screen
Using the Wi-Fi remote
commander
• Recording settings
indication:
S&Q FPS, Shutter,
Preset White, Gamma,
Auto Iris, Auto
Shutter, AGC, ATW,
Color Bars, Auto
White
• Status indication
• Playback operation
button:
F Rev, Play/Pause,
F Fwd, Prev, Stop,
Next
Summary of Contents for PXWZ100
Page 72: ...Printed in China ...


