


O
per
at
ing
t
he
Came
ra
Configuration of Main Viewer
21
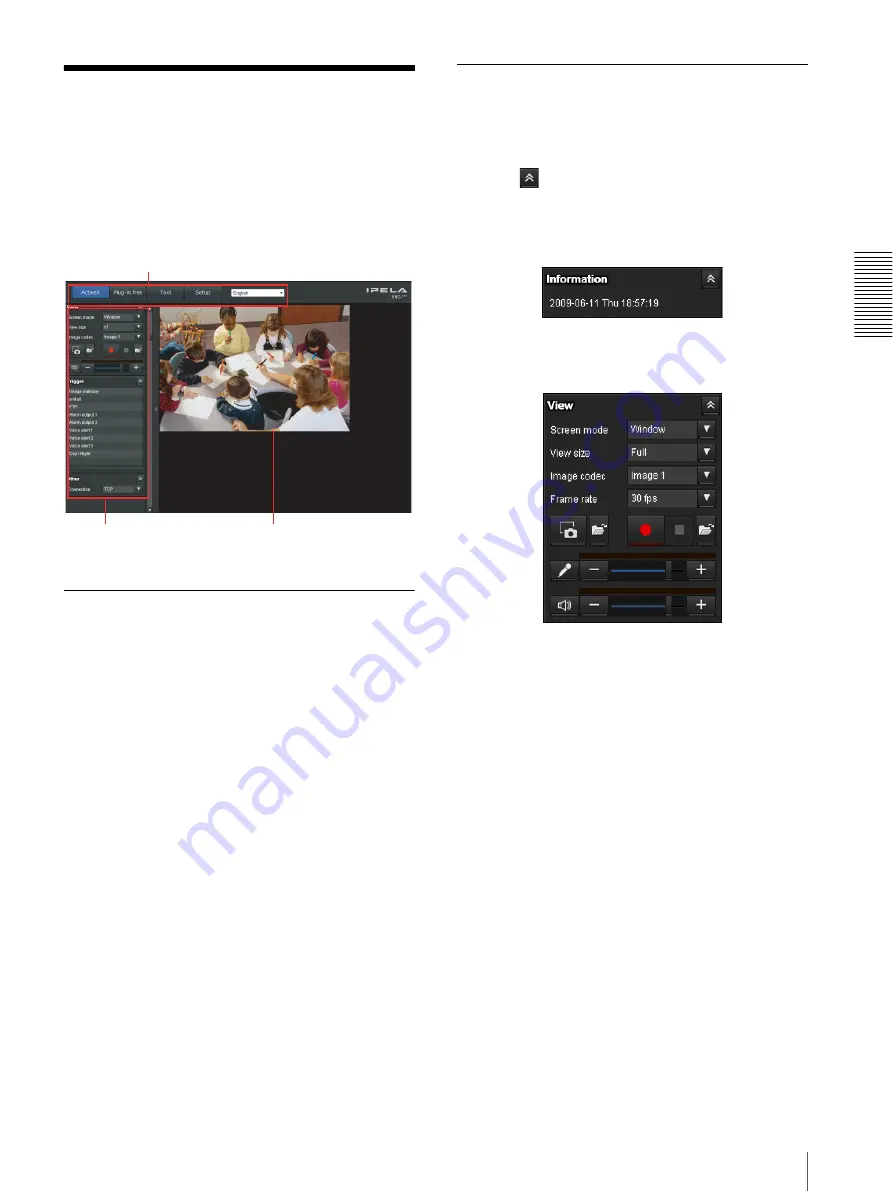
Configuration of Main
Viewer
This section explains the functions of the parts and
controls of the main viewer. For a detailed explanation
on each part or control, see the specified pages.
Main viewer using ActiveX viewer
Main menu
ActiveX
Displays the ActiveX viewer.
Plug-in free
Displays the Plug-in free viewer.
Tool
You can download system utility from here. (page 29)
This operation is only available when you are logged in
as administrator.
Setup
Click to display the Administrator menu. (page 33)
You can operate this function only when logging in as
the administrator.
Language
Set language from pull-down.
Control panel section
You can drag the panels to the monitor screen and
configure them.
To return to the operation panel, drag the panel and
configure the operation panel.
Click the
to hide the detail setting menu or click it
again to show the menu.
Information panel
Check the date and time here.
View panel
You can change the screen mode, size of the image,
image codec mode and frame rate. Also, still images and
movies can be saved (movie saving can also be stopped)
from here. Microphone and audio output levels can be
adjusted.
Screen Mode
Select Window or Full Screen.
View size
Selects the view size to be displayed.
Click
View size
list box to select the view size.
Select
x1
to display images set in
Image size
of the
Camera menu. (page 47)
Select
Full
to display images according to the view size.
Select
Fit
to display images according to the view size,
with fixed aspect ratio.
Image Codec
Select an image codec mode.
Frame rate
(Displayed only when the camera image is in JPEG.)
Selects the frame rate to transmit images.
Control panel
section
Monitor image
section
Main menu


