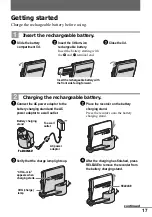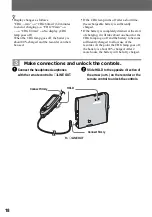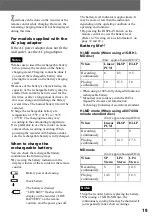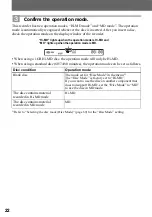
24
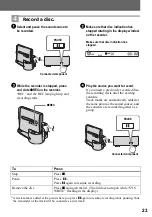
If the recording does not start
•
Make sure the recorder is not locked (pages
14, 18).
•
Make sure the disc is not record-protected
(pages 21, 78).
•
Premastered discs cannot be recorded over.
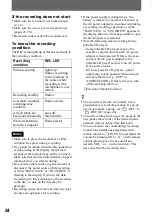
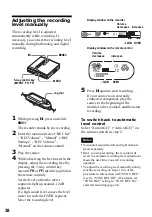
To know the recording
condition
The REC lamp lights up or flashes according to
the recording condition.
•
Make sure to place the recorder at a stable,
vibration-free place during recording.
•
If you start recording when the disc indication
is still rotating in the display, the first few
seconds of the material may not be recorded.
Make sure that the disc indication has stopped
rotating before you start recording.
•
Do not move the recorder, jog the recorder or
disconnect the power source while recording,
or while “DATA SAVE” or “SYS WRITE” is
flashing in the display. If you do, the data
recorded up to that point may not be recorded
to the disc, or data on the disc may be
damaged.
•
Recording cannot be done when the disc does
not have enough space for recording.
•
If the power supply is disrupted (i.e. the
battery is removed or becomes exhausted or
the AC power adaptor is disconnected) during
a recording or editing operation, or while
“DATA SAVE” or “SYS WRITE” appears in
the display, then it will not be possible to open
the lid until power is restored.
•
Note the following when recording from a
portable CD player:
—Some portable CD players may not be
capable of digital out when the AC power
adaptor is disconnected. If this is the case,
connect the AC power adaptor to the
portable CD player and use it on AC power
as the power source.
—On some portable CD players, optical
output may not be possible when using an
anti-skip function (e.g., ESP* or
G-PROTECTION). If this is the case, turn
off the anti-skip function.
∗
Electronic Shock Protection
z
•
The recorder is factory set to make a new
group whenever recording is done. If you do
not want to make a group, set “
:REC” to
“
:REC Off” (page 40).
•
To start recording from a specific point on the
disc, pause the recorder at the desired point,
and then start recording from that point.
•
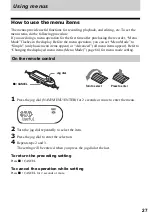
You can monitor the sound during recording.
Connect the headphones/earphones with
remote control to
i
/LINE OUT and adjust the
volume by pressing VOL + or – on the remote
control (pressing the 5-way control key
towards VOL + or – on the recorder). This
does not affect the recording level.
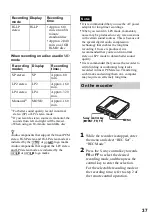
Recording
condition
REC LED
While recording
lights up
flashes according
to the loudness of
the source while
recording with a
microphone (voice
mirror)
Recording standby
flashes
Less than 3 minutes’
recording time
available
flashes slowly
A track mark has
been added manually
goes off
momentarily
While transferring
from the computer
flashes faster
Notes
Summary of Contents for Hi-MD Walkman MZ-NH1
Page 5: ...5 ...
Page 8: ...8 Troubleshooting and explanations 80 Troubleshooting 80 Messages 88 Explanations 93 ...
Page 125: ......
Page 126: ......
Page 127: ......
Page 128: ...Printed in Japan 3 2 6 6 4 5 0 1 1 3 This warranty is valid only in the United States ...


