


1-25
DSC-P31/P31M
54
For Macintosh users
Follow the steps below, according to your
OS.
1
Installing the USB driver
(For Mac OS 8.5.1, 8.6, or 9.0 users
only)
1
Turn on your computer, and set the
supplied CD-ROM to the CD-ROM
drive.
The “PIXELA ImageMixer” window
appears.
2
Double-click
(Setup
Menu).
3
Click “USB Driver.”
The “USB Driver” window appears.
4
Double-click the icon of the hard disk
containing the OS to open the window.
5
Drag and drop the following two files
from the window opened in step 3 to the
System Folder icon in the window
opened in step 4.
• Sony USB Driver
• Sony USB Shim
6
When the message “Do you want to put
these items into Extension Folder?” is
shown, click “OK.”
7
Restart your computer.
2
Preparing your camera
For details, see page 46.
3
Connecting your camera to
your computer
For details, see page 47.
Removing the USB cable from your
computer or the “Memory Stick” from
your camera during a USB connection.
Drag and drop the drive icon of the
“Memory Stick” to the “Trash” icon, then
remove the USB cable or “Memory Stick.”
*
If you are using Mac OS X, remove the USB
cable, etc., after you have turned your computer
off.
4
Copying images
1
Double-click the newly recognized icon
on the desktop.
The contents of the “Memory Stick”
inserted in your camera appear.
2
Double-click “DCIM.”
3
Double-click “100MSDCF.”
4
Drag and drop the image files to the hard
disk icon.
The image files are copied to your hard
disk.
5
Viewing the images on your
computer
1
Double-click the hard disk icon.
2
Double-click the desired image file in
the folder containing the copied files.
The image file opens.
•
You can use the “PIXELA ImageMixer for
Sony” software to copy images to your
computer and view the images on your
computer. To install the software, insert the
supplied CD-ROM drive, then click “PIXELA
ImageMixer” on the opening window and
follow the instructions on each window. For
details, see the software's help files.
OS
Steps
Mac OS 8.5.1/8.6/9.0
Steps
1
to
5
Mac OS 9.1/9.2/
Mac OS X(v10.0/v10.1)
Steps
2
to
5
55
Be
fo
re
advanced oper
at
ions
How to setup and
operate your camera
Here we will explain the most commonly
used menus and the SET UP screen.
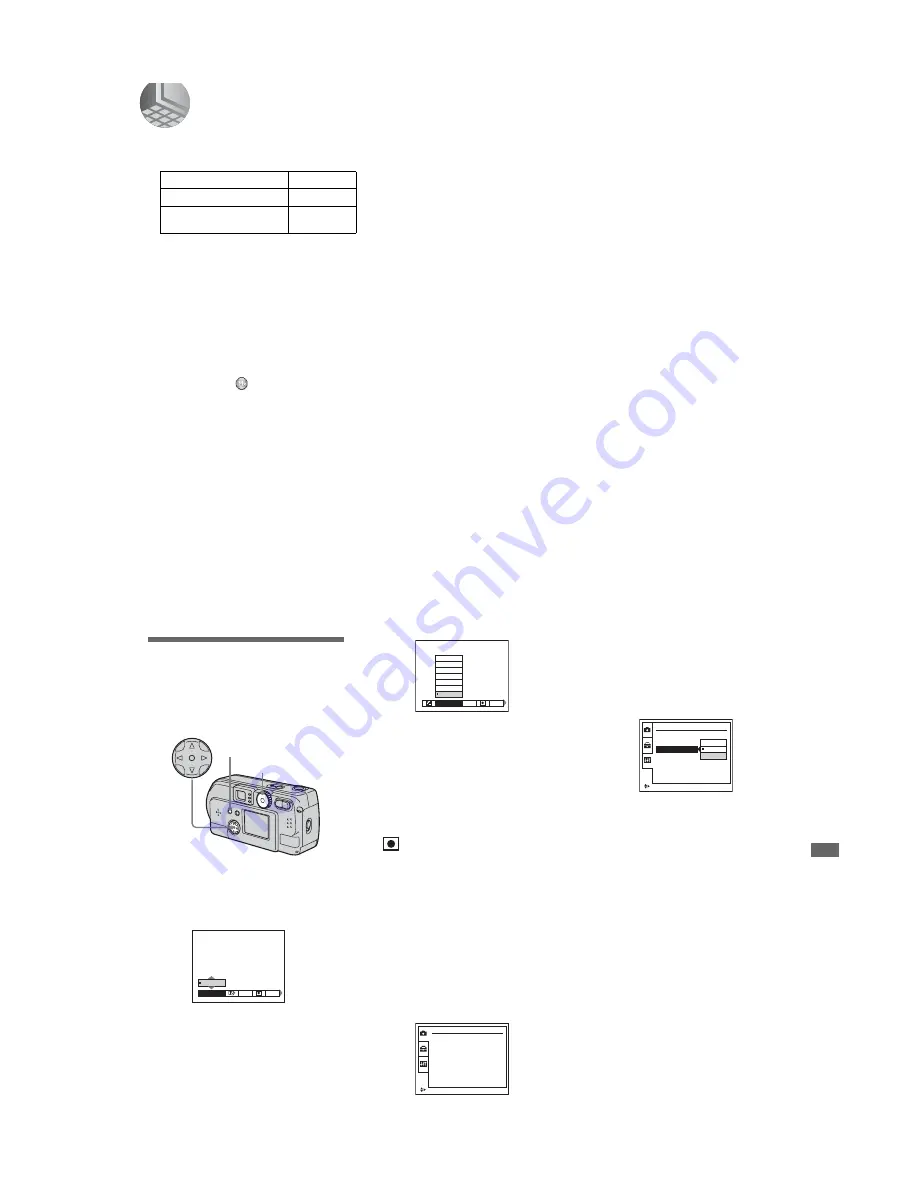
Changing menu settings
a
Press the MENU button and
the menu will be displayed.
b
Select the setting item you
want to change using
b
/
B
on
the control button.
The letters and symbols of the item
you select will turn yellow.
c
Select the desired setting
using
v
/
V
on the control
button.
The frame of the selected setting will
turn yellow, and the setting will be
made.
•
(Spot light-metering) is not displayed on
the menu of the DSC-P31 (page 61).
To turn off the menu display
Press the MENU button.
Changing items in the SET
UP screen
a
Turn the Mode dial to SET UP,
and the SET UP screen
appears.
b
Select the setting item you
want to change using
v
/
V
/
b
/
B
on the control button.
The frame of the item you select will
turn yellow.
c
Press the center
z
on the
control button to enter the
setting.
•
On the DSC-P31, the "DIGITAL ZOOM"
(page 28) and "POWER SAVE" (page 16)
items are not displayed.
To turn off the SET UP screen
display
Turn the Mode dial to anything other than
SET UP.
Mode Dial
Control button
MENU button
WB
EV
ISO
0EV
0EV
WB
FOCUS
ISO
MULTI AF
CENTER AF
0.5m
1.0m
3.0m
7.0m
∞
CAMERA
MOVING IMAGE :
DATE/TIME :
DIGITAL ZOOM :
RED EYE REDUCTION :
AF ILLUMINATOR :
MPEG MOVIE
OFF
ON
OFF
ON
SELECT
SETUP 2
SELECT
SHUTTER
ON
OFF
LCD BRIGHTNESS :
LCD BACKLIGHT :
BEEP :
VIDEO OUT :
USB CONNECT :
POWER SAVE :
Before advanced operations
Summary of Contents for DSC-P31
Page 94: ...DSC P31 P31M 4 45 4 46 SY 075 MS SOCET 6 5 4 3 2 1 11 21 ...
Page 99: ...DSC P31 P31M 4 55 FP 527 FLEXIBLE 4 56 FP 527 FLEXIBLE BOARD 11 ...
Page 167: ...DSC P31 P31M 11 12 SY 075 1 4 5 8 1 4 5 8 A K K A K A A K MS SOCET 12 22 6 5 4 3 2 1 ...
Page 174: ... 26 DSC P31 P31M Sony EMCS Co 9 929 948 82 2002D0500 1 2002 4 Published by DI Customer Center ...


