background image

34

Searching for a Scene

Searching for a Particular 
Point on a Disc

 (Scan, Slow-

motion Play) 

You can locate a particular point on a disc 
quickly by monitoring the picture or playing 
back slowly.

Note

Depending on the DVD/VIDEO CD, you may not be 
able to do some of the operations described.

Locating a point quickly by playing a 
disc in fast forward or fast reverse 
(Scan)

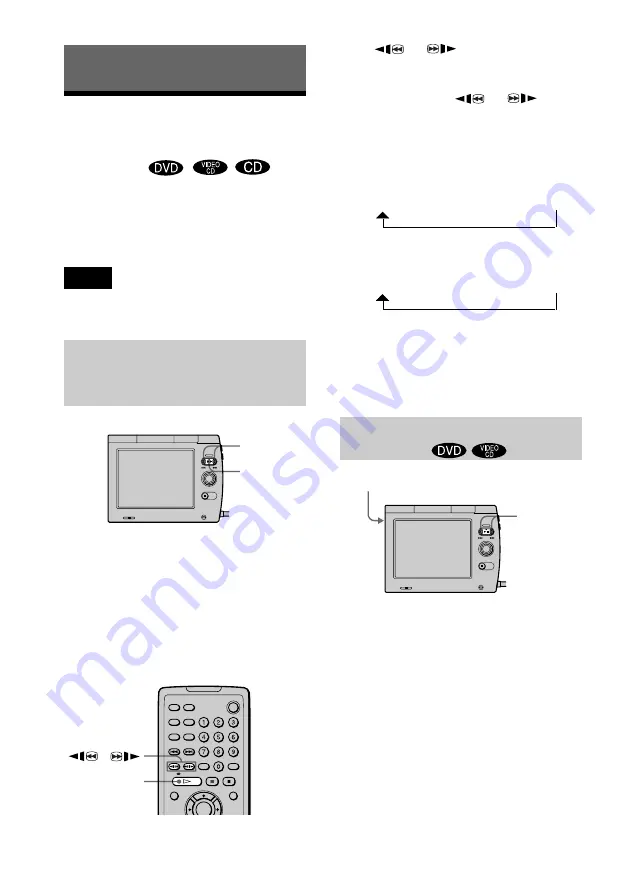
Press and hold 

.

 or 

>

 while playing a 

disc. When you find the point you want, 
release the button to return to the normal 
speed. 
The playback speed is fixed. 

Using the remote

Press 

 or 

 while playing a disc. 

When you find the point you want, press 

H


to return to the normal speed. 
Each time you press 

 or 

 during 

scan, the playback speed changes. Three 
speeds are available. With each press the 
indication changes as follows:

Playback direction

x2

B

 (DVD/CD only) 

t

 1

M


t

 2

M

Opposite direction

x2

b

 (DVD only) 

t

 1

m


t

 2

m

The “x2

B

”/”x2

b

” playback speed is about 

twice the normal speed. The “2

M

”/”2

m

” 

playback speed is faster than “1

M

”/

”1

m

.”

Watching frame by frame (Slow-
motion Play) 

While pressing SHIFT, hold 

.

 or 

>


down. To return to the normal speed, release 

.

 or 

>

.

The slow-motion speed does not change.

NX

.

/

>

H

/

SHIFT

.

/

>

Summary of Contents for D-VM1 Operating Instructions (primary manual)

Page 1: ...Operating Instructions 2001 Sony Corporation D VM1 3 234 851 14 1 Portable CD DVD Player ...

Page 2: ...ul to eyes do not attempt to disassemble the cabinet Refer servicing to qualified personnel only The following caution label is located on the bottom of the player This symbol is intended to alert the user to the presence of uninsulated dangerous voltage within the product s enclosure that may be of sufficient magnitude to constitute a risk of electric shock to persons This symbol is intended to a...

Page 3: ...ust or sand moisture rain mechanical shock on an unlevel surface or in a car with its windows closed If the player causes interference to radio or television reception turn off the player or move it away from the radio or television If the player is brought directly from a cold to a warm location or is placed in a very damp place moisture may condense on the lenses of the player Should this occur ...

Page 4: ...t touch the AC power adaptor with wet hands Connect the AC power adaptor to a wall outlet within your reach so that you can disconnect the AC power adaptor as soon as something unusual occurs For the customers in the U S A Use a commercially available AC plug adaptor a if necessary depending on the design of the wall outlet b On headphones If the supplied headphones cause any skin trouble immediat...

Page 5: ... For the customers in the U S A and Canada Replace the AC power adaptor with model AC E1020 only if replacement is necessary Replace the Car battery cord with model DCC E8 only if replacement is necessary RECYCLING LITHIUM ION BATTERIES Lithium Ion batteries are recyclable You can help preserve our environment by returning your used rechargeable batteries to the collection and recycling location n...

Page 6: ...Point Where You Stopped the Disc Resume Play 25 Using the DVD s Menu 26 Playing VIDEO CDs with PBC Functions PBC Playback 27 Various Play Mode Functions Program Play Shuffle Play Repeat Play A B Repeat Play 28 Searching for a Scene 34 Searching for a Particular Point on a Disc Scan Slow motion Play 34 Searching for a Title or Chapter 35 Searching by Scene VIEWER 37 Dividing a Scene into 9 Sections...

Page 7: ...Audio Cords 52 Step 4 Connecting the Power Cord 60 Step 5 Quick Setup 60 Step 6 Settings for the Digital Output Signal 61 Watching a Video on the TV 62 Settings 63 Using the Setup Display 63 Setting the Display or Sound Track Language LANGUAGE SETUP 64 Custom Settings CUSTOM SETUP 65 Additional Information 70 Troubleshooting 70 Self diagnosis Function When letters numbers appear in the display 72 ...

Page 8: ... color system Note Some DVD Rs DVD RWs CD Rs or CD RWs cannot be played on this player depending upon the recording quality or physical condition of the disc or the characteristics of the recording device Furthermore the disc will not play if it has not been correctly finalized For more information see the operating instructions for the recording device Region code Your player has a region code pr...

Page 9: ...ding on the disc no indexes may be recorded Scene On a VIDEO CD with PBC functions the menu screens moving pictures and still pictures are divided into sections called scenes Each scene is assigned a scene number enabling you to locate the scene you want Example of discs that the player cannot play The player cannot play the following discs xDVD DVD ROM DVD RAM DVD Audio discs DVD RWs recorded in ...

Page 10: ...tion technology must be authorized by Macrovision Corporation and is intended for home and other limited viewing uses only unless otherwise authorized by Macrovision Corporation Reverse engineering or disassembly is prohibited Notes about the Discs On handling discs To keep the disc clean handle the disc by its edge Do not touch the surface Do not stick paper or tape on the disc On storing Do not ...

Page 11: ...22 The VOL button has a tactile dot G previous next buttons 24 H NX play pause button 22 24 The NX button has a tactile dot I x OFF stop power off button 22 J Rechargeable battery terminal 18 K A V OUT audio video output jack 50 L DC IN 10V jack 18 M MONITOR jack 21 N i headphones jack 21 O AVLS Automatic Volume Limiter System switch 48 P NTSC PAL switch 8 62 Hong Kong China and tourist models onl...

Page 12: ...button has a tactile dot When operated with SHIFT TIME TEXT button 39 CLEAR button 28 G NX play pause button 22 The NX button has a tactile dot When operated with SHIFT SOUND MODE button 43 H b v V B ENTER buttons 28 When operated with SHIFT b ORETURN button 27 v MENU button 26 V DISPLAY button 28 B TOP MENU button 26 ENTER TIMER button 48 I x OFF stop power off button 22 When operated with SHIFT ...

Page 13: ... 31 G PREV previous NEXT buttons 24 H SCAN SLOW buttons 34 I H PLAY button 21 J TOP MENU button 26 K DISPLAY button 28 L SOUND MODE button 43 M Number buttons N TIME TEXT button 39 O CLEAR button 28 P x STOP power off button 21 Q X PAUSE button 24 R MENU button 26 S ENTER button 28 T ORETURN button 27 U C X x c buttons 28 ...

Page 14: ...FT button 1 9 C 00 02 04 30 Chapter number of the DVD or the index number of the VIDEO CD or CD Title number of the DVD or the track number of the VIDEO CD or CD Playing time etc Remaining battery power DTS angle timer 12 27 NORMAL NORMAL SOUND MODE Select Cancel V SUR 1 V SUR 2 18 34 DVD PLAY C 00 09 57 ENTER RETURN Total number of titles or tracks recorded Currently playing title number VIDEO CD...

Page 15: ...itles all tracks or one title chapter track repeatedly A B REPEAT page 32 Specifies the parts you want to play repeatedly SETUP page 63 QUICK Setup page 60 Use Quick Setup to choose the aspect ratio of the TV to be connected CUSTOM Setup Use Custom Setup to choose the desired language for the on screen display set the digital output signal the parental control etc PROGRAM page 28 Selects the title...

Page 16: ...LE VIEWER the Control Menu icon lights up in green when you can select an angle To return to the previous item Press b ORETURN while pressing SHIFT To execute Press ENTER To turn off the Status Bar Control Menu Press V DISPLAY while pressing SHIFT repeatedly STROBE PLAYBACK page 39 Displays the 9 consecutive scenes on the screen Status Bar m Control Menu display 1 m Control Menu display 2 m On scr...

Page 17: ...ents on page 50 Step 1 Unpacking Check that you have the following items AC power adaptor 1 AC power cord mains lead 1 Rechargeable battery LIP 30 1 Headphones 1 Remote commander remote 1 Audio video cord miniplug x 2 y pinplug x 3 1 Monitor unit 1 AV output adaptor 1 The cable shape will be different depending on the models Stand 1 Carrying porch 1 Strap for the monitor unit 1 AC plug adaptor 1 F...

Page 18: ...place Do not drop any foreign object into the remote casing particularly when replacing the batteries Do not expose the remote sensor to direct light from the sun or lighting apparatus Doing so may cause a malfunction If you do not use the remote for an extended period of time remove the batteries to avoid possible damage from battery leakage and corrosion Step 2 Charging the Rechargeable Battery ...

Page 19: ...of the player B Fasten the screw Hold the screw and turn it C Connect the power cord to the AC power adaptor D Connect the AC power adaptor to the player and plug the power cord into an AC outlet Charging starts and the CHG indicator lights up If you charge for about 2 hours you can use the battery for about 2 hours The CHG indicator goes out after about 6 hours when charging has completed E Disco...

Page 20: ...uring charging charging is suspended until you turn off the player Do not touch the jacks on the player or those on the rechargeable battery Doing so may cause a malfunction The indicator sections of roughly shows the remaining battery power One section does not always indicate one third of the battery power however z If you do not intend to use the rechargeable battery for a long time use up the ...

Page 21: ...e i jacks on both the monitor unit and player two people can listen together B Slide OPEN to one side and unhook the buckle to open the lid C Place the disc on the tray with the playback side facing down and close the lid Press the center of the disc until it clicks Make sure there is no space between the disc and the disc tray Monitor unit supplied Headphones supplied to MONITOR to i With the pla...

Page 22: ...s lit in green If you replace a disc and close the lid within this period playback starts automatically To turn off the player Press and hold x until the POWER indicator goes out Do not disconnect the rechargeable battery or the power cord before turning off the player Doing so may cancel the menu settings When you turn off the player first press x to stop playback and then turn off the player Not...

Page 23: ...ned off automatically Auto Power Off To disconnect the monitor unit Pull the plug while holding the knobs on both sides of the plug To use the stand You may place the player on the supplied stand Place the player facing as shown below so that the player stands stably Note Make sure that the player is placed in a stable location to prevent it from falling or toppling over continued ...

Page 24: ...ng a CD The screen saver appears If you operate the screen saver will disappear To Operations Power indicator Player Monitor unit Remote Stop Press x Press x Press x Lit goes out after 3 minutes Pause Press NX Press NX Press X Flash Resume play after pause Press NX Press NX Press H Lit Go to the next chapter track or scene in continuous play mode Press lightly Press lightly Press Lit Go back to th...

Page 25: ... Play is not available 2 Press NX The player starts playback from the point where you stopped the disc in Step 1 Using the remote 1 Press x 2 Press H z To play from the beginning of the disc while pressing SHIFT press x when the player is stopped You can play from the beginning also by opening the buckle and fasten again Notes Depending on where you stopped the disc the player may not resume playb...

Page 26: ...he language for the sound select these items using the MENU button 1 While pressing SHIFT press B TOP MENU or v MENU The disc s menu appears on the TV screen The contents of the menu vary from disc to disc 2 Press b v V B to select the item you want to play or change 3 Press ENTER Using the remote 1 Press TOP MENU or MENU 2 Press C X x c to select the item you want to play or change 3 Press ENTER ...

Page 27: ...ER 4 Follow the instructions in the menu for interactive operations To go back to the menu Press b while pressing SHIFT On the remote press ORETURN To play with PBC turned off Press while the player is stopped to select a track then press NX H or ENTER Play without PBC appears on the TV screen and the player starts continuous play You cannot play still pictures such as a menu z To return to PBC pl...

Page 28: ...acks to create your own program You can program up to 99 titles chapters and tracks 1 When the player is stopped while pressing SHIFT press V 3 times for a DVD or twice for a CD or VIDEO CD The Control Menu is displayed 2 Press v V to select PROGRAM then press ENTER The options for PROGRAM appear 3 Press v V to select SETt then press ENTER The display for programming appears 4 Press B Now you can ...

Page 29: ...s Steps 4 to 6 in case of the monitor unit Use X x c instead of v V B You can use the number buttons to select the titles chapters or tracks 3 Press H z You can also display the Control Menu by pressing DISPLAY To return to normal play While pressing SHIFT press VOL CLEAR or select OFF in Step 3 To play the same program again select ON in Step 3 and press NX H on the remote 06 PROGRAM T C ALL CLEA...

Page 30: ... titles chapters or tracks recorded on a disc Playing in random order Shuffle Play You can have the player shuffle titles chapters or tracks and play them in a random order Subsequent shuffling may produce a different playing order 1 While pressing SHIFT press V 3 times for DVD or twice for VIDEO CD CD during playback The Control Menu is displayed 2 Press v V to select SHUFFLE then press ENTER The...

Page 31: ...m Play modes 1 While pressing SHIFT press V twice The Control Menu is displayed 2 Press v V to select REPEAT then press ENTER The options for REPEAT appear 3 Press v V to select the item x When playing a DVD DISC Repeats all of the titles TITLE Repeats the current title on a disc CHAPTER Repeats the current chapter x When playing a VIDEO CD or CD DISC Repeats all of the tracks on a disc TRACK Repe...

Page 32: ...elect A B REPEAT then press ENTER The options for A B REPEAT appear 3 Press v V to select SETt then press ENTER The A B REPEAT setting display appears 4 Find the starting point point A of the portion to be played repeatedly then press ENTER The starting point point A is set 5 Find the ending point point B then press ENTER The set points are displayed and the player starts repeating this specific p...

Page 33: ... Menu press DISPLAY twice for a DVD To return to normal play While pressing SHIFT press VOL CLEAR on the remote or select OFF in Step 3 Notes You can set A B Repeat Play for only one specific section When you set A B Repeat Play the settings for Shuffle Play Repeat Play and Program Play are canceled Depending on the Super VCD A B Repeat Play function may not work correctly CLEAR DISPLAY ENTER X x ...

Page 34: ...rn to the normal speed The playback speed is fixed Using the remote Press or while playing a disc When you find the point you want press H to return to the normal speed Each time you press or during scan the playback speed changes Three speeds are available With each press the indication changes as follows Playback direction x2B DVD CD only t 1M t 2M Opposite direction x2b DVD only t 1m t 2m The x...

Page 35: ...nit While pressing SHIFT press to go to the next frame or to go to the preceding frame DVD only Searching for a Title or Chapter You can search a DVD disc by title or chapter and you can search a VIDEO CD or CD by track index or scene As title and tracks are assigned unique numbers on the disc you can select the desired one by entering its number 1 While pressing SHIFT press V twice The Control Me...

Page 36: ...rs or tracks recorded on the disc on a screen divided into 9 scenes You can start playback directly by selecting one of the scenes For details see Searching by Scene VIEWER on page 37 Note The title chapter or track number displayed is the same number recorded on the disc Searching for a scene using the time code Time search DVD only This function is available only with the remote You can search t...

Page 37: ...imes The Control Menu is displayed 2 Press v V to select the item x When playing a DVD TITLE VIEWER CHAPTER VIEWER x When playing a VIDEO CD TRACK VIEWER 3 Press ENTER The initial scenes of titles or chapters appear To start playback from the selected scene Select the scene using b v V B then press ENTER The playback starts from the selected scene z If there are more than 9 titles chapters or trac...

Page 38: ...e at the chosen angle The angles are displayed on a screen divided into 9 sections 1 While pressing SHIFT press V 3 times during playback The Control Menu is displayed 2 Press v V to select ANGLE VIEWER then press ENTER The scenes in recorded angles appear To start playback in the selected angle Select the angle using b v V B then press ENTER Using the remote Press DISPLAY to display the Control M...

Page 39: ...Remaining Time You can check the playing time and remaining time of the current title chapter or track and the playing time or remaining time of the disc Also you can check the DVD CD text recorded on the disc 1 While pressing SHIFT press V during playback The Status Bar is displayed 2 While pressing SHIFT press VOL repeatedly to change the time information The display and the kinds of time that y...

Page 40: ...ation directly While pressing SHIFT press VOL repeatedly The display is turned off automatically Using the remote Press DISPLAY to display the Status Bar or Control Menu and press TIME TEXT to change the time information You can change the time information also by pressing TIME TEXT repeatedly during playback Checking the DVD CD text While pressing SHIFT press VOL TIME TEXT on the remote repeatedl...

Page 41: ...ss ENTER The options for AUDIO appear 3 Press v V to select the desired audio signal x When playing a DVD Depending on the disc the choice of language varies When 4 digits are displayed they represent the language code Refer to the language code list on page 77 to see which language the code represents x When playing a VIDEO CD or CD The default setting is underlined STEREO The standard stereo sou...

Page 42: ...om monaural to 5 1 channel signals can be recorded on a DVD Depending on the DVD the number of the recorded channels may differ PCM DTS MPEG or DOLBY DIGITAL is displayed In the case of DOLBY DIGITAL the channels in the playing track are displayed by numbers as follows For Dolby Digital 5 1 channel The letters in the program format display mean the following sound component AUDIO DISPLAY ENTER X x...

Page 43: ...to create virtual speakers from the sound of the headphones or front speakers L left R right without using actual speakers You can also enjoy more powerful bass sound by emphasizing the bass boosted sound Selecting the sound mode directly While pressing SHIFT press NX repeatedly during playback Each time you press the button the sound mode changes as follows PROGRAM FORMAT PCM 96kHz 24bit L C R S ...

Page 44: ...nected you cannot select MEGABASS1 or MEGABASS2 The sound mode setting is stored in the player individually depending on whether the audio cord is connected or not The sound mode selected when the audio cord is connected or not depends on the conditions required by the respective sound modes xV SUR Virtual Surround i1 V SUR i2 Uses sound imaging to create virtual speakers from the sound of headpho...

Page 45: ...the bass sound more than MEGABASS1 Notes When you select an effect the sound cuts off for a moment When the playing signal does not contain a signal for the rear speakers page 42 the surround effects may be difficult to hear Depending on the headphones the surround effect may be difficult to hear When you select one of the virtual surround items in sound mode turn off the surround setting of the c...

Page 46: ...he number of the angle changes to 4 Select the angle number using v V then press ENTER The angle changes to the selected angle 5 While pressing SHIFT press V twice to turn off the Control Menu Using the remote Press ANGLE repeatedly during playback to select the angle z You can also display the Control Menu by pressing DISPLAY Use X x instead of v V To select the angle you may use the number butto...

Page 47: ...age Depending on the DVD the choice of language varies When 4 digits are displayed they indicate the language code Refer to the language code list on page 77 to see which language the code represents 4 Press ENTER 5 While pressing SHIFT press V twice to turn off the Control Menu To turn off the subtitles Select OFF in Step 3 Using the remote Press SUBTITLE repeatedly during playback to select the ...

Page 48: ... beeps sound To stop alarm Press any button on the monitor unit or player If you are using the player on the AC power adaptor press any button on the remote z Alarm setting is reset when the rechargeable battery or the power cord is disconnected z Time remaining appears on the Status Bar page 14 Protecting Your Hearing AVLS The AVLS Automatic Volume Limiter System function keeps down the maximum v...

Page 49: ...ction with both the monitor unit and player If HOLD on the player is activated the buttons on the player is locked If HOLD on the monitor unit is activated the buttons on the monitor unit is locked If you press an operation button when the HOLD function is on the POWER indicator flashes in red To unlock the controls Slide HOLD in the direction that of opposite of the arrow POWER indicator POWER in...

Page 50: ...the power of all the components to be connected Notes Plug cords securely to prevent unwanted noise Refer to the instructions supplied with the components to be connected Step 1 Connecting the AV output adaptor By attaching the supplied AV output adaptor to the player you can connect the player to your TV or AV amplifier receiver etc To remove the AV output adaptor While pressing the part marked P...

Page 51: ...pplied to the yellow video jacks You will enjoy standard quality images Use the black plug to connect to the audio input jack page 53 B If you are connecting to an S VIDEO input jack Connect the S VIDEO cord not supplied You will enjoy high quality images Audio video cord supplied S video cord not supplied CD DVD player AC power adaptor supplied TV projector AV amplifier receiver yellow yellow TV ...

Page 52: ...he USA and Canadian models DTS is a registered trademark of Digital Theater Systems Inc Connection Components to be connected page 53 TV stereo page 54 Stereo amplifier receiver having L and R audio input jacks only or having a digital input jack 2 speakers front L and R page 54 MD deck DAT deck page 56 AV amplifier receiver with a Dolby Surround Pro Logic decoder having L and R audio input jacks ...

Page 53: ...nd xRecommended surround sound effects for this connection V SUR 5 page 43 The yellow plug is used for video signals page 51 A Audio video cord supplied CD DVD player AC power adaptor supplied TV white red l Signal flow to audio input to AUDIO OUT black AC power cord supplied to a wall outlet continued ...

Page 54: ...as a digital input jack you may use When connecting to an MD deck or a DAT deck use In this case you can also connect the player directly to the MD deck or DAT deck without using your stereo amplifier receiver xRecommended surround sound effects for the connection only V SUR 5 page 43 z To realize better surround sound effects make sure that your listening position is in between your speakers Note...

Page 55: ...ptical digital cord not supplied to audio input to optical digital input white red black Speakers Front L Front R MD deck DAT deck or l Signal flow to AUDIO OUT to OPTICAL AC power adaptor supplied AC power cord supplied Audio video cord supplied to a wall outlet continued ...

Page 56: ...o or multichannel audio Dolby Digital discs Pro Logic uses a minimum of 3 speakers front L and R and rear monaural The surround effects are enhanced if 6 speakers front L and R center rear L and R and subwoofer are used If your amplifier receiver has R and L audio input jacks only use If your amplifier receiver has a digital input jack use xRecommended surround sound effects using this connection ...

Page 57: ...al digital cord not supplied to optical digital input white black red Amplifier receiver with Dolby Surround decoder Speakers Speakers Rear L Rear R Subwoofer Center Rear mono Front L Front R l Signal flow or to AUDIO OUT to OPTICAL AC power cord supplied AC power adaptor supplied Audio video cord supplied to a wall outlet continued ...

Page 58: ... DTS 5 1ch MPEG audio 5 1ch Set SOUND MODE to NORMAL in either cases z To enhance the surround sound effects refer to the operating instructions of the amplifier receiver for correct speaker setting location Note After you have completed the connection be sure to set DOLBY DIGITAL to DOLBY DIGITAL page 61 If your AV amplifier receiver has a DTS decoder set DTS to ON page 61 If your AV amplifier re...

Page 59: ...al input Optical digital cord not supplied CD DVD player Speakers Speakers AV amplifier receiver with a decoder Front R Front L Center Rear R Rear L Subwoofer to OPTICAL AC power cord supplied AC power adaptor supplied to a wall outlet l Signal flow ...

Page 60: ...lifier receiver the settings for the player may be lost Step 5 Quick Setup Follow the steps below to make the basic settings The on screen displays differ depending upon the player model 1 Turn on the TV 2 Switch the input selector on the TV to the player 3 Press NX on the player or H on the remote to turn on the power 4 Press DISPLAY without inserting a disc or in stop mode 5 Press X x to select ...

Page 61: ...use no optical digital cord is used If the AV amplifier receiver has a Dolby Digital decoder Set SOUND MODE to NORMAL page 43 If the AV amplifier receiver has a DTS decoder Set SOUND MODE to NORMAL page 43 TV Type Select Page A wide screen TV or 4 3 standard TV with the wide screen mode 16 9 65 4 3 standard TV 4 3 LETTER BOX or 4 3 PAN SCAN 65 12 27 QUICK CUSTOM QUICK 18 34 C 00 09 57 STOP DVD CUS...

Page 62: ...TS appears on the Status Bar Watching a Video on the TV 1 Turn on your TV 2 Switch the input selector on the TV to the player When using an amplifier receiver Turn on the amplifier receiver and select the appropriate channel 3 Place the disc on the tray with the playback side facing down 4 Press NX If you use the remote press H The player starts playback Adjust the volume on the TV or the amplifie...

Page 63: ...s displayed 2 Press v V to select SETUP then press ENTER The options for SETUP appear 3 Press v V to select CUSTOM then press ENTER The Setup Display appears 4 Press v V to select the setup item from the displayed list LANGUAGE SETUP in this case Then press ENTER The selected setup item appears 5 Select an item OSD in this case using v V then press ENTER The options for the selected item appear SH...

Page 64: ...ack Select LANGUAGE SETUP in the Setup Display For details on using the display see Using the Setup Display page 63 The on screen displays differ depending upon the player model xOSD On Screen Display Switches the display language on the screen Selects the language from the displayed list xMENU DVD only When you play the DVD that plural menu languages are recorded selects the desired language for ...

Page 65: ... and other settings according to the connected components Select CUSTOM SETUP in the Setup Display For details on using the display see Using the Setup Display page 63 The on screen displays differ depending upon the player model xTV TYPE Selects the aspect ratio of the connected TV 4 3 standard or wide The default setting differ depending upon the player model 16 9 Select this when you connect a ...

Page 66: ...tal cord via the OPTICAL jack AUDIO OUT jack Amplifier receiver with digital input jack Amplifier receiver with a built in DTS MPEG audio or DOLBY DIGITAL decoder MD or DAT deck For connection details see page 52 The on screen displays differ depending upon the player model xDOLBY DIGITAL Selects the Dolby Digital signals output via the OPTICAL jack AUDIO OUT jack ON Displays the angle mark OFF Do...

Page 67: ... no sound will come out from the speakers affecting your ears or causing the speakers to be damaged PCM Select this when the player is connected to an audio component lacking a built in MPEG decoder If you play MPEG audio sound tracks the player outputs stereo signals via the OPTICAL jack AUDIO OUT jack MPEG Select this when the player is connected to an audio component having a built in MPEG deco...

Page 68: ...itation xIf you make a mistake Press ORETURN to go back to the previous screen xTo turn off the Control Menu Press DISPLAY repeatedly until the Control Menu is turned off xTo turn off the Parental Control function Set LEVEL to OFF in Step 7 xTo change the password 1 Follow Steps 2 and 3 of Limiting playback by children Parental Control 2 Select CHANGE PASSWORD t using x then press ENTER The displa...

Page 69: ...inland 2165 France 2174 Germany 2109 Hong Kong 2219 India 2248 Indonesia 2238 Italy 2254 Japan 2276 Standard Code number Korea 2304 Malaysia 2363 Mexico 2362 Netherlands 2376 New Zealand 2390 Norway 2379 Pakistan 2427 Philippines 2424 Portugal 2436 Russia 2489 Singapore 2501 Spain 2149 Sweden 2499 Switzerland 2086 Taiwan 2543 Thailand 2528 United Kingdom 2184 ...

Page 70: ... system Picture noise appears The disc is dirty or flawed If the picture output from your player goes through your VCR to get to your TV the copy protection signal applied to some DVD programs could affect picture quality If you still experience problems even when you connect your player directly to your TV please try connecting your player to your TV s S video input page 53 If the color system of...

Page 71: ...page 8 Moisture has condensed inside the player Remove the disc and leave the player for about half an hour page 3 The disc does not start playing from the beginning Program Play Shuffle Play Repeat Play or A B Repeat Play has been selected page 28 While pressing SHIFT press VOL CLEAR to cancel these functions before playing a disc Resume Play has been selected While the player is stopped press x ...

Page 72: ...e player does not operate properly When static electricity etc causes the player to operate abnormally disconnect the rechargeable battery or AC power adaptor leave the player for about 30 seconds then try operating it again The player and monitor unit become warm The player and monitor unit will become warm if they are used for a long time This is not a malfunction Self diagnosis Function When le...

Page 73: ...ioration is realized because all channel data processing is digital DVD page 8 A disc that contains up to 8 hours of moving pictures even though its diameter is the same as a CD The data capacity of a single layer and single sided DVD is 4 7 GB Giga Byte which is 7 times that of a CD The data capacity of a double layer and single sided DVD is 8 5 GB a single layer and double sided DVD is 9 4 GB an...

Page 74: ...s region code The player can also play discs with the mark Even when the region code is not shown on the DVD the region limit may still be activated Scene page 14 On a VIDEO CD with PBC playback control functions the menu screens moving pictures and still pictures are divided into sections called scenes Title page 14 The longest section of a picture or music feature on a DVD movie etc in video sof...

Page 75: ...4 Hz to 22 kHz 1 dB CD 4 Hz to 20 kHz 1 dB Signal to noise ratio S N ratio 110 dB AUDIO OUT jack only Harmonic distortion 0 005 Dynamic range DVD 103 dB CD 99 dB Wow and flutter Less than detected value 0 001 W PEAK Maximum power output at DC 25 mW 25 mW 16 ohms The signals from AUDIO OUT jack are measured When you play PCM sound tracks with a 96 kHz sampling frequency the output signal from the O...

Page 76: ... OUT jack 4 pin mini DIN Maximum output level Luminance signal 1 0 Vp p Load impedance 75 ohms sync negative Color signal 0 3 Vp p PAL 0 286 Vp p NTSC Load impedance 75 ohms terminated AC power adaptor Power requirements 100 to 240 V AC 50 60 Hz Supplied accessories See page 17 Optional accessories Active speakers SRS Z1000 SRS Z750 Headphones MDR E888LP MDR F1 MDR DS5100 Digital cords POC 5 10 15...

Page 77: ...ddish 1283 Javanese 1287 Georgian 1297 Kazakh 1298 Greenlandic 1299 Cambodian 1300 Kannada 1301 Korean 1305 Kashmiri 1307 Kurdish 1311 Kirghiz 1313 Latin 1326 Lingala 1327 Laothian 1332 Lithuanian 1334 Latvian Lettish 1345 Malagasy 1347 Maori 1349 Macedonian 1350 Malayalam 1352 Mongolian 1353 Moldavian 1356 Marathi 1357 Malay 1358 Maltese 1363 Burmese 1365 Nauru 1369 Nepali 1376 Dutch 1379 Norwegi...

Page 78: ...SPANISH PORTUGUESE GERMAN ITALIAN DUTCH CHINESE JAPANESE DANISH SWEDISH FINNISH NORWEGIAN RUSSIAN OTHERS t ENGLISH FRANÇAIS DEUTSCH ITALIANO ESPAÑOL NEDERLANDS DANSK SVENSKA SUOMI NORSK PORTUGUÊS CHINESE JAPANESE OTHERS t ENGLISH CHINESE JAPANESE FRENCH GERMAN ITALIAN SPANISH DUTCH DANISH SWEDISH FINNISH NORWEGIAN PORTUGUESE RUSSIAN OTHERS t AUDIO ORIGINAL All other selections are same as the MENU...

Page 79: ... player by holding the x button If you turn off the player by turning off the ignition key of the car when the rechargeable battery is not attached the settings may be cleared You can connect the player to a car cassette deck through the i jack using a Sony CPA 9C car connecting pack not supplied USA and Canadian models European Hong Kong China and tourist models TV TYPE 4 3 LETTER BOX 4 3 PAN SCA...

Page 80: ...NDEX 35 Index 73 L LANGUAGE SETUP 64 Locating a specific point by watching the TV screen 34 M MEGABASS 43 MENU 64 Monitor unit 21 MPEG 41 67 73 O On screen display Control Menu display 14 Setup Display 63 Status Bar 14 OSD 64 P PARENTAL CONTROL 66 67 PBC Playback 27 PROGRAM 28 Program Play 28 Q QUICK 60 Quick Setup 60 R Rechargeable battery 18 Remote 18 REPEAT 31 Repeat Play 31 Resume Play 25 S S ...

Reviews: