


1-18
72
7
When
“
CHANGE MEMORY
STICK
”
is displayed, eject the
“
Memory Stick.
”
“INSERT MEMORY STICK”
appears.
8
Insert another
“
Memory
Stick.
”
“RECORDING” appears. When
copying is completed,
“COMPLETE” appears.
To end copying, select [EXIT]
with
v
/
V
, then press
z
.
To copy the image to
another “Memory Stick”
Select [CONTINUE] with
v
/
V
, press
z
, then repeat steps
7
and
8
.
To cancel copying part-way
Select [CANCEL] with
b
/
B
in step
3
or [EXIT] with
b
/
B
in step
6
, then
press
z
.
Notes
•
If you do not select [EXIT] after
“COMPLETE” appears and instead insert
a new “Memory Stick,” the same image is
copied again.
•
You cannot copy uncompressed images.
•
You cannot copy images that are bigger
than 5 MB at once. If “NOT ENOUGH
MEMORY” appears or
flashes on the
INDEX screen, cancel some images to
copy and try again.
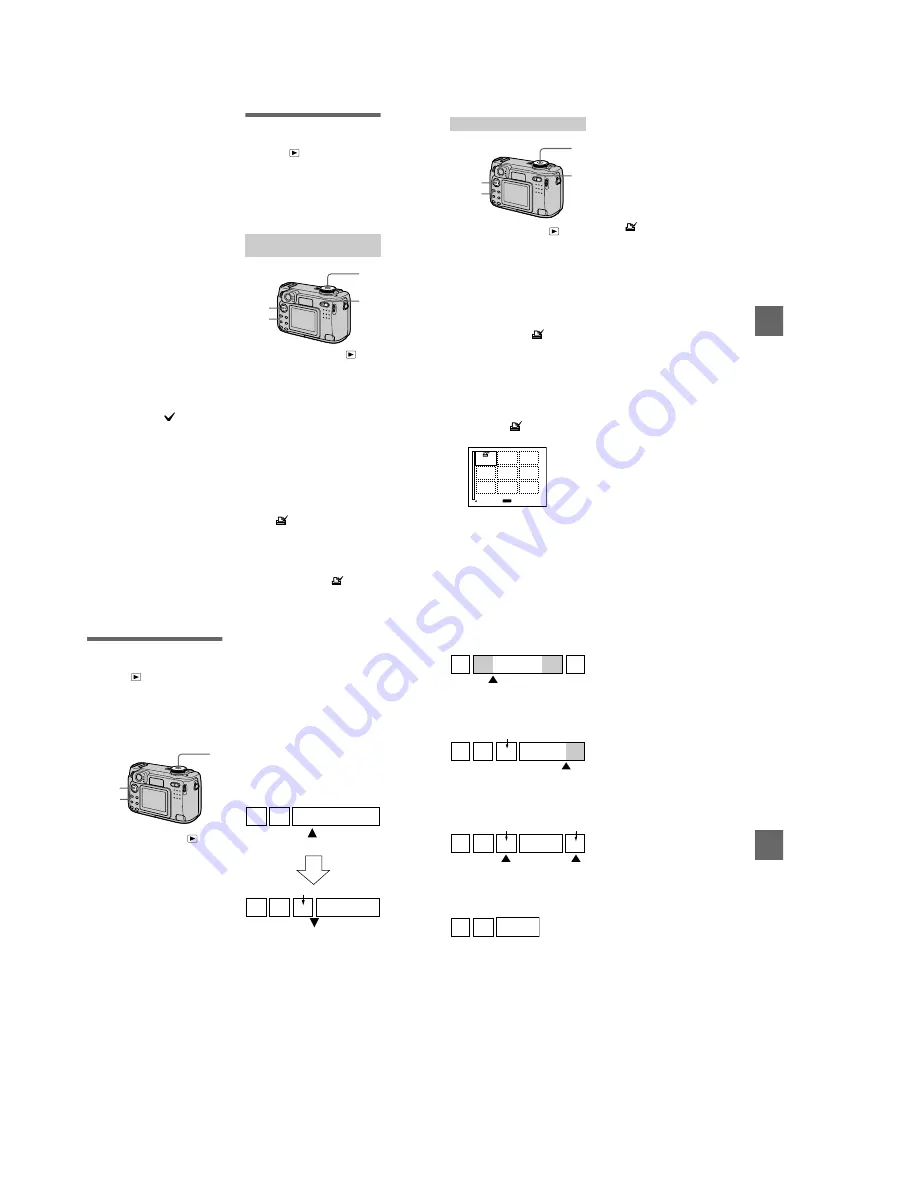
Selecting still images
to print (PRINT)
Mode dial:
You can mark a print mark on still
images recorded with your camera.
This mark is convenient when you
have images printed at a shop that
conforms with the DPOF (Digital Print
Order Format) standard.
.
1
Set the mode dial to
.
2
In single-image mode
Display the image you want to
print with
b
/
B
.
In triple-image mode
Press the zoom W button twice to
turn to the triple-image mode.
Display the image you want to
print with
b
/
B
.
3
Press MENU.
The menu appears.
4
Select [PRINT] with
b
/
B
in
single-image mode, or with
v
/
V
in triple-image mode,
then press
z
.
The
(print) mark is marked on
the displayed image (or the
middle-positioned image in triple-
image mode).
To unmark the print mark
Press
z
again in step
4
.
mark
disappears.
In single-image or triple-
image mode
2,4
3
1
W
BBBB
Edi
ting
73
1
Set the mode dial to
, then
display the index screen with
the zoom W button.
2
Press MENU.
The menu appears.
3
Select [PRINT] with
b
/
B
, then
press
z
.
4
Select [SELECT] with
b
/
B
,
then press
z
.
When marking the
mark, you
cannot select [ALL].
The frame of the selected image
turns green.
5
Select the images to be
marked with the control
button, then press
z
.
To cancel, press
z
again.
Repeat this step to select other
images. The
mark appears on
the selected image.
6
Press MENU.
The menu appears.
7
Select [OK] with
b
/
B
, then
press
z
.
In index mode
3–5,7
2,6
1
W
MENU
SET
TO NEXT
To unmark selected print
marks
Select the images to be unmarked in
step
5
with the control button, then
press
z
.
To unmark all the print
marks
Select [ALL] with
b
/
B
in step
4
, then
press
z
. Select [OFF] with
b
/
B
, then
press
z
.
The
marks on all images are
unmarked.
To cancel marking the print
mark
Select [CANCEL] with
b
/
B
in step
4
or select [EXIT] with
b
/
B
in step
7
,
then press
z
.
Notes
•
You cannot mark moving images, Clip
Motion images or images recorded in
TEXT mode.
•
If you mark an image recorded in TIFF
mode with a print mark, only the
uncompressed image is printed, and the
JPEG image recorded at the same time is
not printed.
•
In E-mail mode, a print mark is marked on
the normal size image that is recorded at
the same time.
74
Dividing a moving
image file (DIVIDE)
Mode dial:
You can divide moving images
recorded in MPEG MOVIE mode. This
is convenient when there is not enough
space on a “Memory Stick” or when
attaching moving images to e-mails.
1
Set the mode dial to
and
display the moving image
you want to divide.
2
Press MENU.
The menu appears.
3
Select [DIVIDE] with
b
/
B
,
then press
z
, select [OK]
with
v
/
V
, then press
z
.
4
Play the moving image.
If you press
z
at this time,
c
,
C
(frame forward, frame
reverse), [CANCEL] and [EXIT]
appear on the screen. If you select
[
c
,
C
], you can finely adjust
the divide location using
b
/
B
.
If you select [CANCEL], moving
image playback restarts and you
can reselect the divide location.
5
When you have decided the
divide point, select [OK] then
press
z
.
6
[OK], [CANCEL] and [EXIT]
appear on the screen. Select
[OK], then press
z
.
The moving image file is divided.
3,4,5
2
1
You cannot divide the
following types of files:
•
Clip Motion files
•
Still image files
•
Moving image files that are too short
to divide
The file number changes as
follows when you divide a
file.
<eg.> If you divide the MOV0003.mpg
file, the divided file numbers become
MOV0004.mpg and MOV0005.mpg,
and MOV0003.mpg is skipped. The
divided files are saved as the latest
files.
To cancel file division
Press [EXIT]. The image playback
screen appears.
To delete unwanted portions
1
Display the portion of the moving
image you want to delete and press
MENU.
2
Select [DELETE] with
b
/
B
, then
press
z
.
3
Select [OK] with
v
/
V
, then press
z
.
1
MOV0003.mpg
2
1
2
MOV0005.mpg
MOV0004.mpg
DIVIDE point
Divided at the designated point
BBBB
Edi
ting
75
Step 1: Divide the unwanted scene A.
Step 2: Divide the unwanted scene B.
Step 3:Delete the unwanted scenes
A and B.
Step 4:Only the desired scene
remains.
Notes
•
You cannot divide Clip Motion files.
•
You cannot recombine divided files.
•
The original undivided file is not saved.
1
MOV0002.mpg
3
A
B
DIVIDE point
MOV0004.mpg
1
MOV0005.mpg
3
B
A
DIVIDE point
1
3
MOV0006.mpg
MOV0004.mpg
MOV0007.mpg
A
B
DELETE
DELETE
1
3
MOV0006.mpg