


1-4
16
To cancel the date and time setting
Select [CANCEL] with
v
/
V
/
b
/
B
on the control button, then press the center
z
.
Note
If the rechargeable button battery is ever fully discharged (page 80), the CLOCK SET screen will
appear again. When this happens, reset the date and time, by starting from step
3
above.
4
Select the year, month, day, hour or minute
item you want to set with
b
/
B
on the control
button.
The item to be set is indicated with
v
/
V
.
5
Set the numeric value with
v
/
V
on the
control button, then press the center
z
to
enter it.
After entering the number,
v
/
V
moves to the next
item.
If you selected [D/M/Y] in step
3
, set the time on a
24-hour cycle.
6
Select [OK] with
B
on the control button,
then press the center
z
at the desired
moment to begin clock movement.
The date and time are entered.
2001
/
:
/ 1
1
12
00
AM
Y / M / D
D / M / Y
OK
CANCEL
M / D / Y
CLOCK SET
OK
2001
/
:
/ 1
7
12
00
AM
Y / M / D
D / M / Y
OK
CANCEL
M / D / Y
CLOCK SET
OK
2001
/
:
/ 4
7
10
30
PM
Y / M / D
D / M / Y
OK
CANCEL
M / D / Y
CLOCK SET
OK
Getting
sta
rted
17
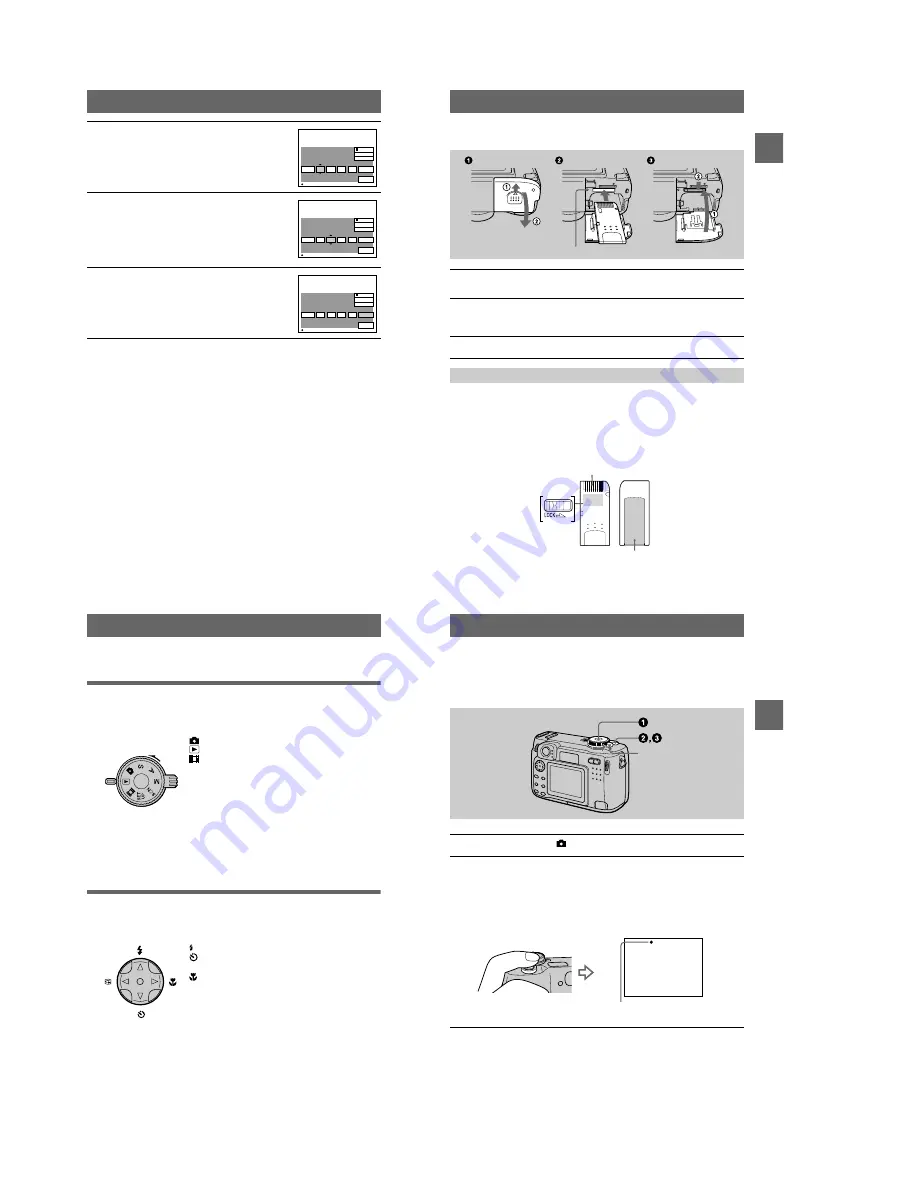
Inserting the “Memory Stick”
Open the battery/“Memory Stick” cover, then press the “Memory Stick” once lightly.
Notes
•
Insert the “Memory Stick” firmly until it clicks, otherwise a message such as “MEMORY
STICK ERROR” will be displayed.
•
Never remove the “Memory Stick” or turn off the power while the access lamp is lit up.
•
You cannot record or edit images on a “Memory Stick” if the erasure prevention switch is set to
the LOCK position.
The position and shape of the erasure prevention switch may differ depending on the types of
“Memory Stick” used.
1
Open the battery/“Memory Stick” cover.
Slide the cover in the direction of the arrow.
2
Insert the “Memory Stick.”
Insert the “Memory Stick” with the
B
mark facing toward the battery
compartment as illustrated until it clicks.
3
Close the battery/“Memory Stick” cover.
Removing the “Memory Stick”
Access lamp
Erasure
prevention
switch
Connector
Label space
18
Basic operations
B
Recording
Basic operations
How to use the mode dial
The mode dial switches the function which is used for recording, playback, or
editing. Set the dial as follows before starting to operate your camera.
How to use the control button
When the menu is not displayed, the control button is used to perform the following
operations.
:
To record still images, VOICE mode audio data
:
To play back or edit images
:
To record moving images or Clip Motion images
SET UP: To display the setup items (The SET UP position
changes the settings of infrequently-used
items.)
M:
To record with the shutter speed and aperture set
manually
A:
To record in the aperture priority mode
S:
To record in the shutter speed priority mode
SCN:
To record in the SCENE SELECTION mode (Set in
advance the SCENE SELECTION in SET UP
screen)
(
v
): Recording with flash
(
V
): Recording with self-timer
7
(
b
): Checking the last recorded image
(
B
): Recording close subjects
BBBB
Rec
or
ding
19
Recording still images
Still images are recorded in JPEG format.
Before recording still images, slide the POWER switch in the direction of the arrow
to turn on the power and insert a “Memory Stick.”
1
Set the mode dial to
, S, A, M or SCN.
2
Press and hold the shutter button halfway down.
The image freezes momentarily, but is not yet recorded. While the AE/AF lock
indicator
z
is flashing, the camera automatically adjusts the exposure and
focus of the captured image. When the camera finishes the automatic
adjustments, the AE/AF lock indicator
z
stops flashing, then lights up and the
camera is ready for recording.*
If you release the shutter button, the recording will be canceled.
POWER switch
AE/AF lock indicator (green) flashes
t
lights up