background image

Ta
ble
 of
 

co
nte
n

ts

Op
e

rat

io

S

ear

ch

MENU/Settin

g

Se
ar

ch

In

de
x

29

GB

Program Auto

Allows you to shoot with the exposure adjusted automatically (both the shutter speed and the 
aperture (F value)). Also you can select various settings using the menu.

1

Set the mode dial to   (Program Auto)

2

Shoot with the shutter button

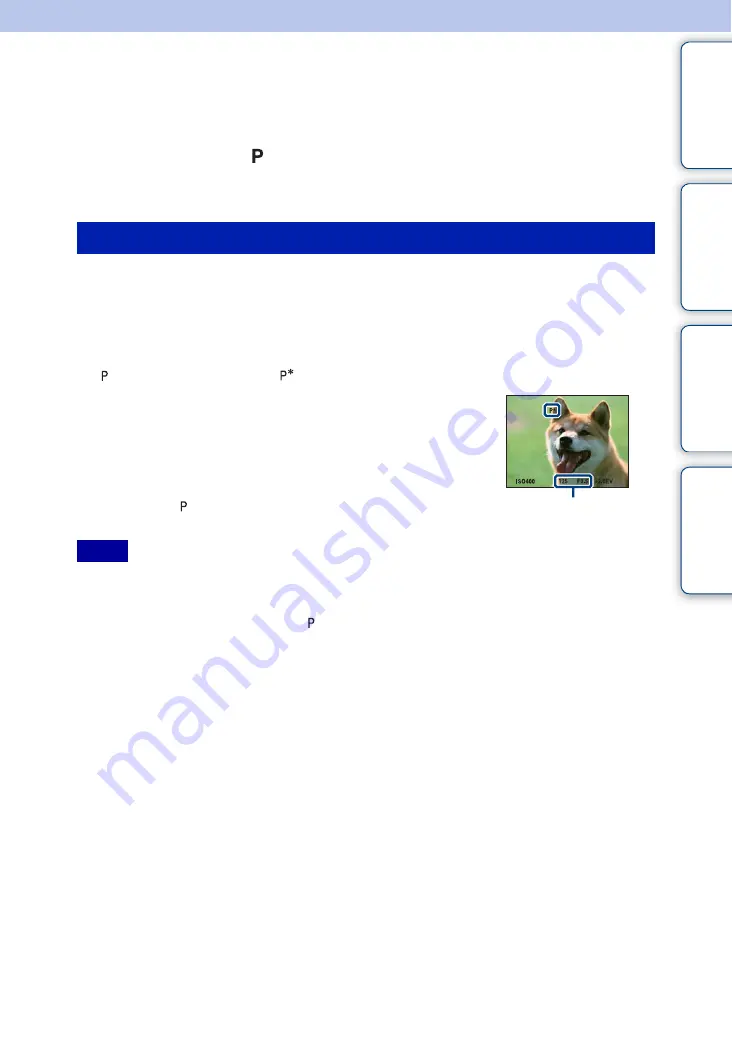
You can change the aperture (F value) and shutter speed combination while keeping the 
exposure fixed.

1

Press the jog dial

2

Turn the jog dial

“ ” on the screen changes to “

” and the shooting mode changes to program shift.

3

Turn the jog dial to select the aperture (F value) 
and shutter speed combination

You can set the EV or ISO setting with the jog dial.

4

Shoot with the shutter button

To cancel program shift, turn the jog dial to return the 
indication to “ ”.

• You cannot shift the aperture value and shutter speed combination when the shutter button is pressed 

halfway down.

• According to the brightness of the environment, the program shift may not be used.
• Set the mode dial to the one other than “ ” or turn off the power to cancel the setting you made.
• When the brightness changes, the aperture (F value) and shutter speed also change while maintaining the 

shift amount.

• When the flash mode setting is changed, program shift is canceled.

Program shift

Notes

Shutter speed/
aperture (F value)

Summary of Contents for Cyber-shot DSC-HX1

Page 1: ... 2009 Sony Corporation 4 132 054 11 1 GB Cyber shot Handbook DSC HX1 Table of contents Operation Search MENU Settings Search Index ...

Page 2: ...ation in a listing of MENU Settings items Search for information by keyword Marks and notations used in this handbook Table of contents Operation Search MENU Settings Search Index In this handbook the sequence of operations is shown by arrows t Operate the camera in the order indicated Marks are shown as they appear in the camera s default setting The default setting is indicated by Indicates caut...

Page 3: ... see page 171 Notes on the LCD screen the LCD finder and lens The LCD screen and the LCD finder are manufactured using extremely high precision technology so over 99 99 of the pixels are operational for effective use However some tiny black and or bright dots white red blue or green may appear on the LCD screen These dots are a normal result of the manufacturing process and do not affect the recor...

Page 4: ...g dial 17 Changing the DISP screen display setting 18 Using the internal memory 20 Shooting Intelligent Auto Adjustment 21 Scene Selection 22 Easy Shooting 24 Manual Exposure Shooting 26 Shutter Speed Priority Shooting 27 Aperture Priority Shooting 28 Program Auto 29 Hand held Twilight 30 Anti Motion Blur 31 Sweep Panorama 32 Movie Mode 34 Smile Shutter 35 Zoom 36 Self Timer 37 Macro 38 Flash 39 F...

Page 5: ...tems Viewing 12 Settings Setting items 13 TV Viewing images on a TV with SD Standard Definition 129 Viewing images on an HD High Definition TV 130 Computer Enjoying your Windows computer 135 Installing the software supplied 137 On PMB Picture Motion Browser supplied 138 Enjoying images on your computer 139 Using the Music Transfer supplied 143 Using your Macintosh computer 144 Viewing Cyber shot S...

Page 6: ...mages directly using a PictBridge compliant printer 149 Printing at a shop 151 Troubleshooting Troubleshooting 152 Warning indicators and messages 162 Others Using the camera abroad Power sources 168 On the Memory Stick Duo media 169 On the InfoLITHIUM battery pack 171 On the battery charger 172 Index Index 173 ...

Page 7: ... Shutter 35 Scene Recognition 62 Face Detection 65 Anti Blink 68 Red Eye Reduction 69 Shooting images manually Manual Exposure Shooting 26 Shutter Speed Priority Shooting 27 Aperture Priority Shooting 28 Program Auto 29 Shooting panoramic images Sweep Panorama 32 Shooting food arrangements Gourmet 22 Shooting close to objects Macro 38 Shooting moving objects Advanced Sports Shooting 22 Movie Mode ...

Page 8: ...2 DRO 70 Shooting in dark places High Sensitivity 22 Anti Motion Blur 31 Slow Synchro Flash On 39 ISO 45 Adjusting exposure Histogram 19 EV 44 Changing focus position Focus 40 Face Detection 65 Changing image size Image Size 54 Deleting images Delete 49 94 Format 121 Displaying enlarged images Playback zoom 47 Trimming 91 Editing images Retouch 91 Multi Purpose Resize 93 Playing back a series of i...

Page 9: ...he PMB Picture Motion Browser 138 Changing date and time settings Area Setting 127 Date Time Setting 128 Initializing settings Initialize 111 Printing images Printing still images 148 Viewing on TVs Viewing images on a TV with SD Standard Definition 129 Viewing images on a HD High Definition TV 130 Information about optional accessories Cyber shot Step up Guide 147 ...

Page 10: ...is available and that it is unavailable Click each item in the menu items to jump to the corresponding page The operation is limited according to the selected Scene Selection mode MENU items Shooting Mode dial Menu items Scene Selection Movie shooting mode Shooting Direction Image Size Flash White Balance Metering Mode Bracket Set Scene Recognition Smile Detection Sensitivity Face Detection Flash ...

Page 11: ...Table of contents Operation Search MENU Settings Search Index 11GB Only the items that are available for each mode are displayed on the screen Note ...

Page 12: ...the menu items to jump to the corresponding page Only the items that are available for each mode are displayed on the screen When the mode dial is set to Easy Shooting if you press MENU the delete screen appears You can select between Delete Single Image or Delete All Images MENU items Viewing View Mode Menu items Memory Stick Duo media Internal Memory Date View Event View Favorites Folder View Fo...

Page 13: ... setting then press z Click each items of the menu items to jump to the corresponding page Setting items Categories Items Shooting Settings AF Illuminator Grid Line Digital Zoom Conversion Lens Flash Sync Auto Orientation Auto Review Expanded Focus Custom Button Main Settings Beep Language Setting Function Guide Initialize Demo Mode HDMI Resolution CTRL FOR HDMI COMPONENT Video Out Wide Zoom Displ...

Page 14: ...ve been entered from shooting mode Memory Stick Tool appears only when a Memory Stick Duo media is inserted in the camera while Internal Memory Tool appears only when a Memory Stick Duo media is not inserted Internal Memory Tool Format File Number Clock Settings Area Setting Date Time Setting Notes Categories Items ...

Page 15: ... Lens I Flash J Finder adjustment dial K FINDER LCD button L Hook for shoulder strap M DC IN jack DC IN jack cover N Multi connector O Stereo microphone P Finder Q Playback button 46 R LCD screen S Delete button 49 T Custom button 107 U Jog dial 17 V Hook for shoulder strap W MENU button 10 X Control button Menu on v V b B z Menu off DISP Y Speaker Z Battery insertion slot wj Battery eject lever w...

Page 16: ...re Priority Shooting Allows you to shoot after adjusting the aperture value manually page 28 Manual Exposure Shooting Allows you to shoot after adjusting the exposure manually both the shutter speed and the aperture F value page 26 You can set various functions using the menu Anti Motion Blur Allows you to shoot with reduced blur without using the flash when composing burst shots taken in high spe...

Page 17: ...al you can easily view the next previous image You can also adjust the EV settings in Intelligent Auto Adjustment or Scene Selection In Advanced Sports Shooting you can set the EV and ISO settings with the jog dial 1 Press the jog dial to select an item in the shooting screen The item to set is displayed larger 2 Turn the jog dial to select the setting value Turn right to increase the value turn l...

Page 18: ...side light adjust the screen brightness up However the battery power may decrease faster under such condition Bright Image Only Sets screen brighter and displays only images Bright Histogram Sets screen brighter and displays a graph of the image brightness Image information is also displayed during playback Bright Sets screen brighter and displays the information Normal Sets screen to standard bri...

Page 19: ...playing back a single image but you cannot adjust the exposure The histogram does not appear when Recording movies Playing back movies Viewing vertical orientation images Rotating still images Shooting with Sweep Panorama Viewing images shot with Sweep Panorama Viewing main images A large difference in the histogram displayed during shooting and playback may occur when The flash strobes The shutte...

Page 20: ...25 You cannot transfer image data on a Memory Stick Duo media to the internal memory By making a USB connection between the camera and a computer with a cable for multi use terminal you can transfer data stored in the internal memory to a computer However you cannot transfer data on a computer to the internal memory When a Memory Stick Duo media is inserted Recording Images are recorded on the Mem...

Page 21: ...rait and displays an icon on the LCD screen when the scene is recognized For details see page 62 Scene Recognition icon zIf you shoot a still image of a subject that is difficult to focus on The shortest shooting distance is approximately 1 cm 13 32 inches W 150 cm 4 feet 11 1 8 inches T from the lens When the camera cannot focus on the subject automatically the AE AF lock indicator changes to fla...

Page 22: ...e movement of the subject is predicted and the focus will be adjusted Landscape Allows easy shooting of distant scenes by focusing in the distance Shoots vivid blue sky and flora colors Twilight Portrait Allows you to shoot sharp images of people with the night view in the background without compromising the atmosphere Twilight Allows you to shoot night scenes at far distance without losing the da...

Page 23: ...condition a combination of functions is determined by the camera indicates a function is available and that it is unavailable The icons below Flash indicate the available flash modes Some functions are not available depending on the Scene Selection mode Off for Face Detection cannot be selected Flash for White Balance cannot be selected Note Functions you can use in Scene Selection Self Timer Macr...

Page 24: ...tton t desired mode t z Select between Large or Small size Self Timer on the control button t desired mode Select between Self Timer 10sec or Self Timer Off mode Flash on the control button t desired mode Select between Flash Auto or Flash Off mode MENU t Flash t z t desired mode t z Select between Auto or Off mode zOn Scene Recognition Scene Recognition operates in Easy Shooting mode This functio...

Page 25: ...addition the functions that can be used are limited View Mode is set to Folder View If you set the mode dial to a mode other than Easy Shooting then playback images the images are displayed in the preselected View Mode Delete button You can delete the currently displayed image Select OK t z MENU button You can delete the currently displayed image with Delete Single Image delete all images in a fol...

Page 26: ... jog dial to set the value 4 Shoot with the shutter button If the proper exposure is not obtained after making the settings the setting value indicators on the screen flash when the shutter button is pressed halfway down You can shoot in this condition but we recommend that you adjust the flashing value again The flash is set to Flash On or Flash Off Notes F value Shutter speed EV value zIf you se...

Page 27: ...ay down You can shoot in this condition but we recommend that you adjust the flashing values again Notes Shutter speed zThe setting range of the shutter speed Shutter speed of one second or longer are indicated by for example 1 When you set the shutter speed slower using a tripod is recommended to prevent the effects of vibration If you select slow shutter speeds it takes time to process the data ...

Page 28: ... Flash On or Flash Off If the proper exposure is not obtained after making the settings the setting value indicators on the screen flash when the shutter button is pressed halfway down You can shoot in this condition but we recommend that you adjust the flashing values again Notes Aperture F value zAbout the aperture priority The lower the aperture F value the wider the hole that lets light pass t...

Page 29: ...dial to select the aperture F value and shutter speed combination You can set the EV or ISO setting with the jog dial 4 Shoot with the shutter button To cancel program shift turn the jog dial to return the indication to You cannot shift the aperture value and shutter speed combination when the shutter button is pressed halfway down According to the brightness of the environment the program shift m...

Page 30: ...er button and image processing is applied to reduce blur and noise 1 Set the mode dial to Hand held Twilight 2 Shoot with the shutter button The shutter sound beeps 6 times and an image is recorded Reducing blur is less effective in the following situations Image with erratic movement Image with a main subject too close to the camera Image with little contrast such as sky sandy beach or lawn Image...

Page 31: ...s applied to reduce subject blur and noise 1 Set the mode dial to Anti Motion Blur 2 Shoot with the shutter button The shutter sound beeps 6 times and an image is recorded Reducing blur does not effective in the following situations Image with erratic movement Image with a main subject too close to the camera Image with little contrast such as sky sandy beach or lawn Image with constant change suc...

Page 32: ...ject within the given time a gray area occurs in the composed image If this happens move the camera fast to record a full panoramic image Since several images are stitched together the stitched part will not be recorded smoothly You cannot create panoramic images in the following situations You pan the camera too fast or too slow There is too much camera shake You pan the camera in a different dir...

Page 33: ...s are moving Objects are too close to the camera Image with a repeating pattern such as tiles and image with little contrast such as sky sandy beach or lawn Image with constant change such as waves or water falls Under lights that flicker such as fluorescent light the brightness or color of the combined image is not always the same Horizontal direction Vertical direction Radius as short as possibl...

Page 34: ...ion Search MENU Settings Search Index 34GB Movie Mode Allows you to record movies with audio 1 Set the mode dial to Movie Mode 2 Press the shutter button fully down 3 To stop recording press the shutter button fully down again ...

Page 35: ...cted you cannot use the Smile Shutter function You cannot use the Smile Shutter if you set Metering Mode or White Balance to the Custom button Set Smile Shutter with the Custom Button in Shooting Settings page 107 Notes Smile Detection Sensitivity indicator Face Detection frame zHints for better capturing of smiles The shutter operates when any person whose face is being detected smiles You can se...

Page 36: ...ide to zoom out Turning the lever slightly zooms slowly and turning the lever fully zooms fast When the zoom scale exceeds 20 see page 101 The operating sound of the lens might be recorded while shooting a movie A beep sound of other buttons such as the jog dial or W T Zoom lever might be recorded Even if you turn the lever fully the camera zooms slowly while shooting a movie Zoom is not valid whe...

Page 37: ...oting or Sweep Panorama Self Timer Off Does not use the self timer Self Timer 10sec Sets the 10 second delay self timer When you press the shutter button the self timer lamp flashes and a beep sounds until the shutter operates To cancel press again Self Timer 2sec Sets the 2 second delay self timer Notes zReducing blurring with the 2 second self timer Use the 2 second delay self timer to prevent b...

Page 38: ...ton The Auto Focus speed becomes slower when you shoot images in the Macro mode Macro mode is fixed to Auto when the camera is in Intelligent Auto Adjustment mode or in Movie Mode Auto Adjusts the focus automatically from distant subjects to close up Normally put the camera in this mode Macro On Adjusts the focus with priority on close up subjects Set Macro On when shooting close subjects Setting ...

Page 39: ...sufficient light or backlight Flash On Flash always operates Slow Synchro Flash On Flash always operates The shutter speed is slow in a dark place to clearly shoot the background that is out of flash light Flash Off Flash does not operate Notes zWhen the White circular spots appears in flash photos This is caused by particles dust pollen etc floating close to the lens When they are accentuated by ...

Page 40: ... held Twilight Anti Motion Blur or Smile Shutter Multi AF Focuses on a subject in all ranges of the finder frame automatically When you press the shutter button halfway down in still image shooting mode a green frame is displayed around the area that is in focus When the Face Detection function is active AF operates with priority on faces Center AF Focuses on a subject in the center of the finder ...

Page 41: ...adjust to the distance where you want to focus by using the manual focus bar then press z To reset the setting press z in the center again You can adjust the rough position by using the jog dial If the focus distance is set very close the image may show dust or fingerprints on the lens Wipe the lens with a soft cloth etc The focus distance range is limited according to the zoom scaling or the sett...

Page 42: ...osure are fixed to be adjusted for the first image VGA image size will be set while recording on internal memory Normal Shoots a single image Burst High Shoots up to 10 images in succession Burst Mid Shoots up to 5 images in succession Burst Low Shoots up to 2 images in succession Bracket Shoots a series of 3 images with the exposure values automatically shifted For details on the bracket setting ...

Page 43: ...cessing are recorded zPlaying back grouped burst images Burst shots are recorded in a group and you can play them back automatically Display Main Image Only When a face is detected in burst images a most suitable image is displayed as a main image When a face is not detected the first image will become a main image The main image can be changed Display All The burst images can be displayed in a li...

Page 44: ...he exposure adjustment may not be effective Notes zAdjusting the exposure for better looking images You can create various images by adjusting the exposure and the ISO sensitivity Exposure is the amount of light that the camera will receive when you release the shutter Shutter speed Length of time the camera receives light Aperture Size of the opening allowing light to pass through ISO sensitivity...

Page 45: ...pt in Advanced Sports Shooting Auto Sets the ISO sensitivity automatically You can reduce image blurring in dark locations or moving subjects by increasing ISO sensitivity select a larger number Notes zAdjusting ISO Sensitivity Recommended Exposure Index ISO sensitivity is a speed rating for recording media that incorporates an image sensor that receives light Even when the exposure is the same im...

Page 46: ...layed back in Folder View and the available function are limited If you want to use all viewing functions set the mode dial to a mode other than Notes zViewing images taken with a different camera The screen to select a viewing method is displayed if you plug into this camera a Memory Stick Duo media containing both images taken with this camera and images taken with another camera Playback only r...

Page 47: ...oramic image is displayed in full screen Note Shows the displayed area of the whole image zTo save enlarged images You can save an enlarged image by using the trimming function Press MENU t Retouch t Trimming zTo view the next previous image while zooming When you turn the jog dial while playing back still images you can view the enlarged next previous image However enlarged view will return to no...

Page 48: ...n the lever again to display an index screen with even more images You can select the next previous image with the jog dial 3 To return to the single image screen select an image with the control button then press z When the mode dial is set to Easy Shooting you cannot view images in index mode Note zDisplaying images of the desired date event folder Select the left side bar with the control butto...

Page 49: ...ple images Do as the following after step 2 1Select an image then press z Repeat the above steps until there are no more images to be deleted Select an image with a mark again to release the mark 2MENU t OK t z All in This Folder All in Date Range All in Event All Except Main Image All In This Group Deletes all images in the selected folder date range event group or burst group at once After step ...

Page 50: ...ameras Display the control panel you can control slow movie playback and adjust the volume 1 Press V on the control button The control panel appears 2 Select a desired button with b B and press z Control button Playback feature z Pause B Fast forward b Fast rewind V Displays the control panel Note Displaying the control panel Button Available functions Rewind Playback Pause Fast forward Play slow ...

Page 51: ... viewing screen Select the image you want to display using b B on the control button and press z The Playback bar appears you can check a playback position of a movie Playback bar or appears on the movie viewing screen The icon displayed may vary depending on image size and quality ...

Page 52: ...oting mode Allows you to shoot movies with preset settings according to the scene 1 Set the mode dial to Movie Mode 2 MENU t Movie shooting mode t desired mode Auto Adjusts the setting automatically High Sensitivity Shoots movies with high sensitivity under low light conditions ...

Page 53: ... Direction Set the direction to pan the camera when you shoot a Sweep Panorama images 1 Set the mode dial to Sweep Panorama 2 MENU t Shooting Direction t desired direction Right Pan from left to right Left Pan from right to left Up Pan from down to up Down Pan from up to down ...

Page 54: ... size that matches the way you will view your images 1 MENU t Image Size t desired size When you print images recorded with 16 9 aspect ratio both edges may be cut off When shooting still images Image size Usage guidelines No of images Printing 3456 2592 For prints up to A3 size Less More Fine Rough 2592 1944 For prints up to A4 size 2048 1536 For prints up to L 2L size 640 480 For e mail attachme...

Page 55: ...O Duo media set the movie image size to VGA In Easy Shooting mode Large Shoots images in 9M size Small Shoots images in 3M size When shooting the Sweep Panorama images Standard Vertical direction 3424 1920 Horizontal direction 4912 1080 Shoot the Sweep Panorama images using standard size Wide Vertical direction 4912 1920 Horizontal direction 7152 1080 Shoot the Sweep Panorama images using wide siz...

Page 56: ...etail Image size is shown by the number of pixels Although you cannot see the differences on the screen of the camera the fine detail and data processing time differ when the image is printed or displayed on a computer screen Description of the pixels and the image size 1 Image size 9M 3456 pixels 2592 pixels 8 957 952 pixels 2 Image size VGA 640 pixels 480 pixels 307 200 pixels Many pixels Fine i...

Page 57: ...Easy Shooting mode you can select the Flash setting also from the MENU button 1 Set the mode dial to Easy Shooting 2 MENU t Flash t z on the control button 3 Select the desired mode t z Auto Flash strobes when there is insufficient light or backlight Off Does not use the flash ...

Page 58: ...ite balance can only be adjusted to Auto Flash One Push or One Push Set One Push Set is unable to be selected while charging the flash Auto Adjusts the white balance automatically so that the colors appear natural Daylight Adjusts for outdoors conditions on a fine day evening views night scenes neon signs fireworks etc Cloudy Adjusts for a cloudy sky or a shady location Fluorescent Light 1 Fluores...

Page 59: ... Push Set is in progress When flash mode is set to Flash On or Slow Synchro Flash On the white balance is adjusted to the condition with the flash emitting The basic white color will be used when Color Filter is set to Off To capture the basic white color in One Push Set mode Notes zEffects of lighting conditions The apparent color of the subject is affected by the lighting conditions The color to...

Page 60: ...ter AF is recommended to focus on the metering position The Metering Mode is fixed to Multi while the Smile Shutter function is activated Multi Divides into multiple regions and measures each region The camera determines a well balanced exposure Multi pattern metering Center Measures the center of the image and determines the exposure based on the brightness of the subject there Center weighted me...

Page 61: ... 3 images with the exposure shifted in the following order bright standard and dark The larger the bracket step value the larger the shift of the exposure value EXP 0 7 EXP 1 0 White Balance Records a series of 3 images with the white balance shifted in the following order current color tone toward blue and toward red When you set White Balance to other than Auto the color tone is shifted based on...

Page 62: ...ne Recognition icon appears regardless of the screen display settings These scenes may not be recognized depending on the situation Auto When the camera recognizes the scene it switches to the optimal settings and shoots the image Advanced When the camera recognizes the scene it switches to the optimal settings If the camera recognizes Twilight Twilight Portrait Twilight using a tripod Backlight o...

Page 63: ...h with Slow Synchro Flash On Shoots by increasing sensitivity based on the face to reduce blur Shoots with Slow Synchro Flash On Shoots without increasing sensitivity from the slow shutter Shoots with flash Shoots by adjusting the background brightness and contrast DRO plus Shoots based on the face illuminated by flash Shoots by adjusting the face and background brightness and contrast DRO plus zW...

Page 64: ...ectly depending on the conditions You cannot adjust the Smile Detection Sensitivity when Easy Shooting Sweep Panorama Hand held Twilight Anti Motion Blur or Movie Mode is selected You can change the Smile Detection Sensitivity setting when High Sensitivity Portrait Twilight Portrait Beach or Snow mode is selected in Scene Selection mode Big Smile Detects a big smile Normal Smile Detects a normal s...

Page 65: ...n be detected However only up to 4 faces of your subjects can be detected when Portrait mode is selected in the Scene Selection mode Adults and children may not be recognized correctly depending on the conditions During Smile Shutter shooting Face Detection is automatically set to Auto even if it is set to Off Off Does not use Face Detection function Auto Selects the face the camera is to automati...

Page 66: ...e the battery from the camera the face registration is reset When the registered face disappears from the LCD screen the camera returns to the setting selected by Face Detection When the registered face is shown on the LCD screen again the camera focuses on the registered face It may not be possible to detect the registered face correctly depending on the surrounding brightness the subject s hairs...

Page 67: ...crements 1 MENU t 0EV Flash Level t desired mode You can select the Flash Level only when the mode dial is set to Program Auto Shutter Speed Priority Shooting Aperture Priority Shooting or Manual Exposure Shooting The value is not displayed on the screen It is indicated as or If the subject is too bright or dark this adjustment may have no effect Notes ...

Page 68: ...function in the following situations When using the flash During burst or bracket shooting When the Face Detection function does not work When the Smile Shutter function is activated Sometimes Anti Blink function does not work depending on the situation When the Anti Blink function is set to Auto but only images with the subject s eyes closed are recorded the message Blinked eye detected is displa...

Page 69: ... and conditions such as distance to the subject or if the subject looked away from the pre strobe If you do not use the Face Detection function Red Eye Reduction does not work even when you select Auto Auto When the Face Detection function is activated the flash strobes automatically to reduce the red eye phenomenon On The flash always strobes to reduce the red eye phenomenon Off Does not use Red ...

Page 70: ... t DRO t desired mode You can set DRO only when the mode dial is selected to Program Auto Shutter Speed Priority Shooting Aperture Priority Shooting or Manual Exposure Shooting Depending on shooting conditions it may not be possible to obtain correction effects Only ISO AUTO or values from ISO 125 to ISO 800 can be set for the ISO value when DRO plus is set Off Does not adjust DRO standard Adjusts...

Page 71: ...tion only when the mode dial is selected to Program Auto Shutter Speed Priority Shooting Aperture Priority Shooting or Manual Exposure Shooting Depending on the settings at the time of recording the Noise Reduction level cannot be adjusted Weakens noise reduction This setting puts emphasis on resolution of images Standard Strengthens noise reduction This setting puts emphasis on elimination of noi...

Page 72: ...Adjustment Shooting with Scene Selection Shooting with Sweep Panorama Shooting with Hand held Twilight Shooting with Anti Motion Blur Easy Shooting You can select only Normal Sepia or B W when shooting movies When Bracket Set is set to Color Mode Normal is set Normal Sets the image to standard color Vivid Sets the image to bright and deep color Real Sets the image similar to real color Sepia Sets ...

Page 73: ...m Auto Shutter Speed Priority Shooting Aperture Priority Shooting Manual Exposure Shooting or Sweep Panorama Off Does not use the color filter Red Makes the color which emphasizes red of dusk etc Green Makes the color which emphasizes green of tender and young leaves etc Blue Makes the color which emphasizes blue of sky and sea etc Warm Makes image colors of people and landscapes etc warm Cool Mak...

Page 74: ...lor Saturation of the image 1 MENU t Color Saturation t desired mode You can set Color Saturation only when the mode dial is selected to Program Auto Shutter Speed Priority Shooting Aperture Priority Shooting Manual Exposure Shooting or Sweep Panorama Produces muted colors Standard Produces bright colors Note ...

Page 75: ...e contrast of the image 1 MENU t Contrast t desired mode You can set Contrast only when the mode dial is selected to Program Auto Shutter Speed Priority Shooting Aperture Priority Shooting Manual Exposure Shooting or Sweep Panorama Reduces the contrast Standard Enhances the contrast Note ...

Page 76: ...the sharpness of the image 1 MENU t Sharpness t desired mode You can set Sharpness only when the mode dial is selected to Program Auto Shutter Speed Priority Shooting Aperture Priority Shooting Manual Exposure Shooting or Sweep Panorama Softens the image Standard Sharpens the image Note ...

Page 77: ...and if the subject moved when you took the image it is called subject blur Besides camera shake and subject blur occur frequently under low light or slow shutter speed conditions such as those encountered in Twilight Portrait or Twilight mode In such case shoot with the below tips in mind Camera shake Your hands or body shake while you hold the camera and press the shutter button and the entire sc...

Page 78: ...he Playback button to switch to playback mode 2 MENU t Slideshow t desired slideshow t z on the control button Continuous Playback Playbacks all the images in succession For details see page 79 Slideshow with music Playbacks images along with effects and music You can set the how to playback in the setting display For details see page 80 ...

Page 79: ...p is On only the first image is displayed Control button Playback feature z Pause v Sets the display settings V Displays the volume control screen Adjust the volume with v V b Forwards image B Rewinds image Note zViewing panoramic images during continuous playback The whole panoramic image is displayed for 3 seconds You can scroll a panoramic image by pressing z Press z again while scrolling the s...

Page 80: ...the selected favorite group when the view mode starts from Favorites When Display Burst Group is Display Main Image Only only the main image is displayed When the Effects are set to other than Simple the main image and images before and after the main image are displayed Note Playback images All Plays a slideshow of all the still images in order This Date Plays a slideshow of still images with the...

Page 81: ...e volume control screen then press v V to adjust the volume The sound of movies is not activated Sets the screen switching interval The setting is fixed to Auto when Simple is not selected as the Effects Effects Simple A simple slideshow switching still images at a preset interval The playback interval is adjustable in Interval and you can thoroughly enjoy your images Nostalgic A moody slideshow r...

Page 82: ...rom your CDs or MP3 files to the camera to play back during slideshow To transfer music install the Music Transfer software supplied to your computer For details see pages 143 and 146 You can record up to four pieces of music on the camera The 4 preset pieces Music1 Music4 can be replaced with the ones you transferred A maximum length of each music file for music playback of the camera is about 5 ...

Page 83: ...set 1 Press the Playback button to switch to playback mode 2 MENU t View Mode t Date View t z on the control button 3 MENU t Date List t z 4 Select the date you want to display t z This item is not displayed when the internal memory is used to record images Note zOn the Date List screen Select the month you want to display with To exit from Date List select with the control button then press z ...

Page 84: ...back button to switch to playback mode 2 MENU t View Mode t Event View t z on the control button 3 MENU t Event List t z 4 Select the event group you want to display t z This item is not displayed when the internal memory is used to record images Note zOn the Event List screen The month indicator on the right of the screen displays the event month located at the top of the screen Select the event ...

Page 85: ...ges into groups and displays them Select Event List from the menu to select the event group to view Favorites Displays images registered as Favorites Select the number of the Favorites you want to display Folder View Images are displayed organized by folders When a recording folder is already created select Select Folder from the menu to select a folder to view Notes zViewing images taken with a d...

Page 86: ...at the camera analyzes the dates shots and frequency automatically organizes the images into groups and displays them You can give convenient names to each event when using the supplied PMB software No photo taken Pet shots Travel shots Wedding ceremony shots Event Pet Passage of time Event Event Travel Wedding ...

Page 87: ...ol button This item is not displayed when the internal memory is used to record images When the View Mode is set to Folder View you cannot use the Filter by Faces function Sometimes images are mistakenly displayed or hidden Sometimes filtering cannot be performed with images shot using other cameras Off Images are not filtered All people Images are filtered according to specified conditions and th...

Page 88: ...u can change the main image of the burst group to your desired image 1 Press the Playback button to switch to playback mode 2 Select the main image from the burst images 3 MENU t Change Main Image t OK t z on the control button Change Main Image only displays in burst group playback Note ...

Page 89: ...Folder View you cannot add or remove images as Favorites This Image Registers or removes the currently displayed image to from Favorites Multiple Images Allows you to select and register remove multiple images to from Favorites Do as the following after step 3 1Select an image then press z Repeat the above steps until there are no more images to be added removed Select an image with a mark to rele...

Page 90: ...t desired setting t z on the control button When you burst images and group only one image the group will be canceled and the image is displayed as single image You can group the burst images only when View Mode is set to Date View or Event View Display Main Image Only Displays the main image only Display All Displays all the burst images Notes zChanging the main image The main image is selected b...

Page 91: ...z The quality of trimmed images may deteriorate The image size that you can trim may vary depending on the image Red Eye Correction Corrects the red eye phenomenon caused by flash 1 Select OK with the control button t z You may not be able to correct the red eye phenomenon depending on the image Unsharp masking Sharpens the image within a chosen frame 1 Select the area frame of the desired image t...

Page 92: ...he level of retouch with the control button t z 2 Adjust the desired length to retouch with the W T Zoom lever t OK t z Radial Blur Decides the center point for expressing movement in the still image 1 Select the center point of the desired image to retouch with the control button t MENU 2 Adjust the desired range to retouch with the W T Zoom lever t OK t z Retro Softens the image by blurring the ...

Page 93: ... to switch to playback mode 2 MENU t Multi Purpose Resize t desired mode t z on the control button 3 Zoom to the range you want to trim with the W T zoom lever 4 Specify the area you want to trim with the control button 5 MENU t OK t z You cannot resize movies Images shot in VGA size cannot be resized to HDTV size Enlarging the image and multi resizing can reduce the image quality HDTV Changes the...

Page 94: ... or Delete All Images When the View Mode is set to Favorites you cannot delete images This Image Deletes the currently displayed image in single image mode Multiple Images You can select and delete multiple images Do as the following after step 2 1Select an image then press z Repeat the above steps until there are no more images to be deleted Select an image with a mark to release the mark 2MENU t...

Page 95: ...y displayed image in single image mode Multiple Images You can select and protect multiple images Do as the following after step 2 1Select an image then press z Repeat the above steps until there are no more images to be protected Select an image with a mark to release the mark 2MENU t OK t z zTo cancel the protection Select the image for which you want to cancel protection and unlock it by pressi...

Page 96: ...s in the internal memory You can add a Print order mark to a maximum 999 images This Image Orders printing the currently displayed image in single image mode Multiple Images You can select and order printing multiple images Do as the following after step 2 1Select an image then press z Repeat the above steps until there are no more images to be printed Select an image with a mark to release the ma...

Page 97: ...ion 1 Press the Playback button to switch to playback mode 2 MENU t Rotate t z on the control button 3 Rotate the image with t b B 4 OK t z You cannot rotate movies or protected still images You may not be able to rotate images shot with other cameras When viewing images on a computer the image rotation information may not be reflected depending on the software Notes ...

Page 98: ...utton to switch to playback mode 2 MENU t View Mode t Folder View t z on the control button 3 MENU t Select Folder t z 4 Select the folder with b B 5 OK t z This item is not displayed when the internal memory is used to record images Note zViewing images across multiple folders When multiple folders are created the following indicators appear on the first and last images in the folder Moves to the...

Page 99: ...ject regardless of whether light fails to reach the center of the subject You cannot use the AF Illuminator when Shooting with Sweep Panorama Focus is set to Semi Manual or Manual Focus Conversion Lens is set to Tele Advanced Sports Shooting Landscape mode Twilight mode or Fireworks mode is selected in the Scene Selection mode When you use AF Illuminator the normal AF range finder frame is disable...

Page 100: ...the grid lines you can easily set a subject in a horizontal vertical position 1 Set the camera to shooting mode 2 MENU t Settings t Shooting Settings t Grid Line t desired mode t z on the control button On Displays the grid lines The grid lines are not recorded Off Does not display the grid lines ...

Page 101: ...eep Panorama The smart zoom is not available when the image size is set to 9M 3 2 8M or 16 9 6M The Face Detection function does not work when using the digital zoom The supported zoom ratio differs depending on the image size Smart Enlarges the image digitally within the range where the image will not be distorted according to the image size Smart zoom Precision Enlarges all image sizes by the to...

Page 102: ...etween this lens and the conversion lens The macro setting is fixed to Auto The available zoom area is limited The available focusing area is limited AF Illuminator does not emit light You cannot select Semi Manual If you shoot images with a conversion lens the camera may also focus on close subjects in Landscape mode and Twilight mode If you shoot images with a conversion lens you may not be able...

Page 103: ...e When the Red Eye Reduction is selected the red eye reduction effect may not be available at slower shutter speeds in the Rear setting Front Since the flash strobes right after the shutter is released this allows you to get your shot closer to the time you release the shutter Normally use this setting Rear REAR Since the flash strobes right before the shutter is closed this allows you to reflect ...

Page 104: ...ation t desired mode t z on the control button Black is displayed to the left and right of vertical orientation images Depending on the shooting angle of the camera the orientation of the image may not be recorded correctly You cannot use Auto Orientation in Movie Mode On Records the image with the correct orientation Off Does not use Auto Orientation Notes zRotating images after recording If the ...

Page 105: ... mode t z on the control button On Uses the Auto Review Off Does not use Auto Review zShooting another image without delay When you press the shutter button halfway down the display of the recorded image disappears and you can shoot another image immediately even if Auto Review is set to On zContinuing to view an Auto Review image When you keep the shutter button pressed down after shooting the Au...

Page 106: ...U Settings Search Index 106GB Expanded Focus Expands the center of the screen double in Manual Focus mode 1 MENU t Settings t Shooting Settings t Expanded Focus t desired mode t z on the control button On Expands double Off Does not expand ...

Page 107: ...ustom Button Set the commonly used function to the Custom button 1 MENU t Settings t Shooting Settings t Custom Button t desired mode t z on the control button Smile Shutter Sets the Smile Shutter White Balance Sets the White Balance Metering Mode Sets the Metering Mode ...

Page 108: ... desired mode t z on the control button When the camera is connected to a TV using the HDMI cable sold separately the beep sound is fixed to Shutter Shutter Turns on the shutter sound when you press the shutter button High Turns on the beep shutter sound when you press the control shutter button If you want to lower the volume select Low Low Off Turns off the beep shutter sound Note ...

Page 109: ...ion Search MENU Settings Search Index 109GB Language Setting Selects the language to be used in the menu items warnings and messages 1 MENU t Settings t Main Settings t Language Setting t desired mode t z on the control button ...

Page 110: ...GB Function Guide You can select whether or not function guide is displayed when you operate the camera 1 MENU t Settings t Main Settings t Function Guide t desired mode t z on the control button On Displays the function guide Off Does not display the function guide ...

Page 111: ...ex 111GB Initialize Initializes the setting to the default setting Even if you execute this function the images are retained 1 MENU t Settings t Main Settings t Initialize t OK t z on the control button Be sure not to turn off the camera while initializing Note ...

Page 112: ...2 Press the shutter button The image is recorded as a normal shooting 1 Press Custom button 2 Point the camera at the subject The camera automatically operates the shutter when a smiling face is detected but no image is recorded 3 Press Custom button again to exit the demo mode Custom Button is fixed to Smile Shutter in Demo Mode Auto Review is fixed to On When demonstrating the Scene Recognition ...

Page 113: ...e If the screen does not appear correctly select 1080i or 480p 576p according to the connected TV Set Video Out to select the HDMI Resolution according to the connected TV s color system Auto Set the output resolution automatically according to the information of the connected device 1080i Outputs with HD High Definition image quality 1080i 480p 576p Outputs with SD Standard Definition image quali...

Page 114: ... HDMI cable sold separately For details on BRAVIA Sync see page 132 1 MENU t Settings t Main Settings t CTRL FOR HDMI t desired mode t z on the control button You can perform the operation of the camera with the remote controller of your TV by connecting your camera to a BRAVIA Sync compatible TV On Allows remote controlled operation Off Disallows remote controlled operation Note ...

Page 115: ...Adaptor Cable sold separately according to the TV connected Use a Type2d compliant HD Output Adaptor Cable sold separately 1 MENU t Settings t Main Settings t COMPONENT t desired mode t z on the control button HD 1080i Select this item to connect the camera to a 1080i capable High Definition TV SD Select this item to connect the camera to a TV that is not compatible with an HD 1080i signal ...

Page 116: ...TV color systems differ depending on the country and region To view images on a TV screen check the TV color system of the country or region of use page 134 1 MENU t Settings t Main Settings t Video Out t desired mode t z on the control button NTSC Sets the video output signal to NTSC mode e g for the USA Japan PAL Sets the video output signal to PAL mode e g for Europe China ...

Page 117: ...n Settings t Wide Zoom Display t desired mode t z on the control button Wide Zoom Display is not available for panoramic images movies 16 9 images and portrait vertical images The image displayed on the LCD screen of the camera does not change Wide Zoom Display is not available when the camera is connected to the TV with the cable for multi use terminal supplied On Plays at a 16 9 aspect ratio Off...

Page 118: ...vice with the Auto setting select Mass Storage When USB Connect is set to PTP MTP you cannot export movies to a computer To export movies to a computer set USB Connect to Auto or Mass Storage Auto The camera recognizes automatically and sets up communication with a computer or PictBridge compliant printer PictBridge Connects the camera to a PictBridge compliant printer PTP MTP When you connect the...

Page 119: ...n the CD ROM supplied to change background music tracks 1 MENU t Settings t Main Settings t Download Music t z on the control button The message Connect to PC appears 2 Make a USB connection between the camera and a computer then start Music Transfer 3 Follow the instructions on the screen to change music files ...

Page 120: ... and cannot be played 1 MENU t Settings t Main Settings t Format Music t OK t z on the control button zRestoring the music preset at the factory to the camera You can use Music Transfer in the CD ROM supplied to reset music files to the preset ones 1Make a USB connection between the camera and a computer 2Start Music Transfer then restore the default music For details on using Music Transfer see t...

Page 121: ...a or the internal memory A commercially available Memory Stick Duo media is already formatted and can be used immediately 1 MENU t Settings t Memory Stick Tool or Internal Memory Tool t Format t OK t z on the control button Note that formatting permanently erases all data including even protected images Note ...

Page 122: ... z on the control button This item is not displayed when the internal memory is used to record images When you insert a Memory Stick Duo media that was used with other equipment into the camera and shoot images a new folder may be automatically created Up to 4 000 images can be stored in one folder When the folder capacity is exceeded a new folder is automatically created Notes zOn the folders Aft...

Page 123: ...U t Settings t Memory Stick Tool t Change REC Folder 2 Select a folder with b B on the control button 3 OK t z This item is not displayed when the internal memory is used to record images The following folder cannot be selected as a recording folder 100 folder A folder with a number that has only either sssMSDCF or sssANV01 You cannot move recorded images to another folder Notes ...

Page 124: ...ontrol button 3 OK t z This item is not displayed when the internal memory is used to record images If you delete the folder set as the recording folder using Delete REC Folder the folder that has the largest folder number is selected as the next recording folder You can delete only empty folders If a folder contains images or files that cannot be played back by the camera first delete these image...

Page 125: ...les using a battery pack with little remaining charge the battery pack may run out causing copying to fail or possibly corrupting the data Images cannot be copied individually The original images in the internal memory are retained even after copying To delete the contents of the internal memory remove the Memory Stick Duo media after copying then format the internal memory Format in Internal Memo...

Page 126: ...ntrol button Series Assigns numbers to files in sequence even if the recording folder or the Memory Stick Duo media is changed When the replaced Memory Stick Duo media contains a file with a number higher than the last assigned number a number one higher than the largest number is assigned Reset Starts from 0001 each time the folder is changed When the recording folder contains a file a number one...

Page 127: ...om your home area you must make the Area Setting Destination You use the camera set to the time at your destination Set the destination area zChanging Area Setting Setting a frequently visited destination lets you easily adjust the time when you visit that destination 1Select the area part for Destination then press z on the control button 2Select an area with b B on the control button and select ...

Page 128: ...etting t desired setting t z on the control button The camera does not have a feature for superimposing dates on images By using PMB in the CD ROM supplied you can print or save images with the date Date Time Format You can select the date and time display format Daylight Savings You can select Daylight Savings On Off Date Time You can set the date and time Note ...

Page 129: ...d set the input 4 Press Playback button to turn on the camera Images shot with the camera appear on the TV Select the desired image with the control button When using the camera abroad it may be necessary to switch the video signal output to match that of your TV system page 116 The shooting image will not be displayed on the TV when the movie is shot under the condition of the camera and TV conne...

Page 130: ...easy viewing is invalid When using the camera abroad it may be necessary to switch the video signal output to match that of your TV system page 116 Notes zViewing images shot with an image size other than 16 9 full screen on an HD High Definition TV When you select Multi Purpose Resize in the viewing menu the aspect ratio can be converted to 16 9 and saved as a new file for viewing on an HD High D...

Page 131: ...splayed on the TV Select an image with the control button Set HDMI Resolution to Auto or 1080i in Main Settings page 113 Beep is fixed to Shutter Do not connect the device output terminal to the output terminal of other devices The images and sounds will not be output Also this may result in malfunction Some devices may not work properly Use an HDMI cable with the HDMI logo mark Viewing an image b...

Page 132: ...s When you connect the camera to other company s TV the remote control of the TV may activate the camera incorrectly Select On in CTRL FOR HDMI on Main Settings in the menu Viewing images on a BRAVIA Sync TV Operation items Descriptions Slideshow with music Plays back a slideshow of images with music Single Image Displays images one by one Image Index Displays multiple images at the same time Wide...

Page 133: ...HD Output Adaptor Cable sold separately 2 Turn on the TV and set the input 3 Press the Playback button to turn on the camera The shooting images are displayed on the TV Select an image with the control button Set COMPONENT to HD 1080i beforehand page 115 Viewing an image by connecting the camera to an HD High Definition TV with an HD Output Adaptor Cable sold separately Note HD Output Adaptor Cabl...

Page 134: ...C system Bahama Islands Bolivia Canada Central America Chile Colombia Ecuador Jamaica Japan Korea Mexico Peru Surinam Taiwan the Philippines the U S A Venezuela etc PAL system Australia Austria Belgium China Czech Republic Denmark Finland Germany Holland Hong Kong Hungary Italy Kuwait Malaysia New Zealand Norway Poland Portugal Singapore Slovak Republic Spain Sweden Switzerland Thailand United Kin...

Page 135: ...e camera Editing images Displaying the shooting locations of still images on maps online this requires an Internet connection Creating a disc with the images shot this requires CD or DVD disc writing drive Printing or saving still images with the date Uploading images to a media service this requires an Internet connection Changing Music for slideshow using Music Transfer Install the software supp...

Page 136: ...mputer Auto default setting Mass Storage PictBridge and PTP MTP modes This section describes the Auto and Mass Storage as examples For details on PictBridge and PTP MTP see page 118 When your computer resumes from a suspend or sleep mode communication between the camera and your computer may not recover at the same time Recommended computer environment OS pre installed Others For using PMB and Mus...

Page 137: ... the installation 2 Click Install The Choose Setup Language screen appears 3 Select the desired language then click Next The License Agreement screen appears 4 Read the license agreement carefully If you agree click the radio button changes to then Next 5 Follow the instructions on the screen to complete the installation When the restarting confirmation message appears restart the computer followi...

Page 138: ...the shooting date You can display information on the positions where you shot the images on a map This requires an Internet connection You can print or save the still images with the date You can create a data disc using a CD burner drive or DVD burner drive You can upload the image to a media service This requires an internet connection 1 Double click the PMB Guide icon on the desktop To access P...

Page 139: ...ears on the screen of the camera When a USB connection is established for the first time your computer automatically runs a program to recognize the camera Wait for a while When you import export images from to your computer using a battery pack with little remaining charge transferring may fail or image data may become corrupted if the battery pack shuts down too soon is displayed on the screen d...

Page 140: ... event name of Event List 3 View images on your computer When importing is complete the PMB starts Thumbnails of the imported images are displayed The Pictures in Windows XP My Pictures folder is set as the default folder in Viewed folders Importing images to a computer without using PMB When the AutoPlay Wizard appears in step 1 click Open folder to view files t OK t DCIM t copy the desired image...

Page 141: ... mark is displayed on the LCD screen You cannot play back some images depending on the image size No guarantees are made for playing back on this camera files containing images which were processed on a computer or images which were shot using other cameras This method cannot be used to export movies Movies should be exported to the camera manually Perform the procedures from step 1 to 3 below bef...

Page 142: ...e images in these folders are available only for viewing You cannot record play back any images of the MISC folder Image files are named as follows Still image files DSC0ssss JPG Movie files 1080 720 MAH0ssss MP4 VGA MAQ0ssss MP4 Index image files that are recorded when you record movies 1080 720 MAH0ssss THM VGA MAQ0ssss THM ssss stands for any number within the range from 0001 to 9999 The numeri...

Page 143: ...U t Settings t Main Settings t Download Music 2 Press z on the control button The message Connect to PC appears 3 Make a USB connection between the camera and your computer 4 Start Music Transfer 5 Follow the instructions on the screen to change music files Changing Music using Music Transfer zRestoring the music preset at the factory to the camera Execute Restore to Preset Tracks in step 5 All mu...

Page 144: ...high speed transfer as the camera is compatible with Hi Speed USB USB 2 0 compliant There are four modes for a USB connection when connecting a computer Auto default setting Mass Storage PictBridge and PTP MTP modes This section describes the Auto and Mass Storage as examples For details on PictBridge and PTP MTP see page 118 When your computer resumes from the suspend or sleep mode communication ...

Page 145: ...6 Drag and drop the image files to the hard disk icon The image files are copied to the hard disk For details on the storage location of the images and file names see page 142 7 Double click the hard disk icon t the desired image file in the folder containing the copied files Displays the images Drag and drop the drive icon or the icon of the Memory Stick Duo media to the Trash icon beforehand whe...

Page 146: ...ware starts 4 MENU t Settings t Main Settings t Download Music 5 Press z on the control button The message Connect to PC appears 6 Make a USB connection between the camera and Macintosh computer 7 Start Music Transfer 8 Follow the instructions on the screen to change music files Shut down all other application software before you install Music Transfer For installation you need to log on as an Adm...

Page 147: ... 1 Copy the stepupguide folder in the stepupguide folder to your computer 2 Select stepupguide language and then GB folder stored in the CD ROM supplied and copy all the files in the GB folder to the img folder in the stepupguide folder that you copied to your computer in step 1 Overwrite the files in the img folder with the files from the GB folder 3 After copying is complete double click stepupg...

Page 148: ...using the supplied PMB software in the CD ROM supplied and print the images You can insert the date on the image and print it For details see the PMB Guide You can take a Memory Stick Duo media containing images shot with the camera to a photo printing service shop You can make a Print order mark on the images which you want to print out in advance When you print images shot in 16 9 mode both edge...

Page 149: ...pending on the printer Prepare the camera for USB connection to the printer using the cable for multi use terminal 1 Insert the sufficiently charged battery pack into the camera 2 Connect the camera to the printer 3 Turn on the printer After the connection is made the indicator appears on the screen If the indicator flashes on the screen of the camera error notification check the connected printer...

Page 150: ...image then press z Repeat the above steps until there are no more images to be printed 2MENU t OK t z Quantity Selects the number of copies of the specified image to be printed The designated number of images may not all fit onto a single sheet depending on the quantity of images Layout Selects the number of images you want to print side by side on a sheet Size Selects the size of the printing she...

Page 151: ...y Stick Duo media then take the Memory Stick Duo media to the print shop page 125 Consult your photo printing service shop as to what types of Memory Stick Duo media they handle If a Memory Stick Duo media is not handled by your photo printing service shop copy the images you want to print out to another medium such as a CD R and take it to the shop The Memory Stick Duo media Adaptor sold separate...

Page 152: ...k then turn on the power 3 Press the RESET button using a fine tipped object and turn on the power page 15 If you do the operation above the date and time setting is cleared 4 Consult your Sony dealer or local authorized Sony service facility Additional information on this product and answers to frequently asked questions can be found at our Customer Support Website http www sony net Battery pack ...

Page 153: ...tor is incorrect The battery charge will quickly get used up and the actual remaining battery charge will be lower than the indicator in the following cases When you use the camera in an extremely hot or cold location When you use the flash and zoom frequently When you repeatedly turn the power on and off When you set the screen brightness higher using DISP screen display settings A discrepancy ar...

Page 154: ...ance bar The speed of the camera moving is too fast or too slow Shoot in a different direction from what you set for If there is too much camera shake during panning the shooting stops Hold the camera firmly when shooting Smile Shutter function does not work No image is shot if a smiling face is not detected Demo Mode is set to On Set Demo Mode to Off page 112 The subject is not visible on the scr...

Page 155: ...select Face Detection only when the focus mode is set to Multi AF and the metering mode is set to Multi The flash does not work You cannot use the flash when REC Mode is set to burst or exposure bracket page 42 High Sensitivity Advanced Sports Shooting Twilight or Fireworks mode is selected in the Scene Selection Shooting movies The mode dial is set to Sweep Panorama Hand held Twilight and Anti Mo...

Page 156: ...rrect Set Color Mode to Normal page 72 Set Color Filter to Off page 73 Adjust the White Balance page 58 Noise appears in the image when you view the screen in a dark place The camera is attempting to increase the visibility of the screen by temporarily brightening the image under conditions of low illumination There is no effect on the recorded image The eyes of the subject come out red Set Red Ey...

Page 157: ...er playback starts This may happen due to image processing This is not a malfunction Left and right sides of the screen are shown in black Auto Orientation is set to On page 104 Cannot display images in index mode The mode dial is set to Easy Shooting Set the mode dial to other modes to play back images Cannot hear music during slideshow Transfer music files to the camera with Music Transfer page ...

Page 158: ...puter and the camera and connect it again firmly Disconnect all equipment other than the camera the keyboard and the mouse from the USB connectors of your computer Connect the camera directly to your computer without passing through a USB hub or other device Cannot import images Connect the camera and your computer correctly making a USB connection page 139 When you shoot images with a Memory Stic...

Page 159: ...Duo media or the computer to the internal memory This feature is not available See PictBridge compliant printer together with the following items Images are printed with both edges cut off Depending on your printer all the edges of the image may be cut off Especially when you print an image shot with the image size set to 16 9 the lateral end of the image may be cut off When printing images using ...

Page 160: ... computer may not be printed Panoramic images may not be printed depending on the printer or may print in cutted off panoramic image Printing is canceled Confirm that you have disconnected the cable for multi use terminal before the PictBridge Connecting mark disappears Cannot insert the date or print images in the index mode The printer does not provide these functions Consult the printer manufac...

Page 161: ... you use it for a long time This is not a malfunction The clock set screen appears when you turn on the camera Set the date and time again page 128 The internal rechargeable backup battery has discharged Insert a charged battery and set aside for 24 hours or more with the power left off You want to change the date or time Change the settings by MENU t Settings t Clock Settings t Date Time Setting ...

Page 162: ...erting the Memory Stick Duo media several times The internal memory has experienced a format error or an unformatted Memory Stick Duo media is inserted Format the internal memory or the Memory Stick Duo media page 121 The inserted Memory Stick Duo media cannot be used with the camera or the data is damaged Insert a new Memory Stick Duo media E 61 ss E 62 ss E 91 ss A camera malfunction has occurre...

Page 163: ... is dirty Memory Stick type error The inserted Memory Stick Duo media cannot be used in the camera page 169 This Memory Stick may not record or play The inserted Memory Stick Duo media cannot be used in the camera page 169 Cannot access Memory Stick Access denied You are using the Memory Stick Duo media with the access controlled Error formatting internal memory Error formatting Memory Stick Forma...

Page 164: ...when the View Mode is set to Favorites You cannot display the panoramic image for 3424 1920 size while HD High Definition output Self Timer is invalid The self timer is unavailable under these settings Folder error A folder with the same first three digit number already exists on the Memory Stick Duo media for example 123MSDCF and 123ABCDE Select another folder or create a new folder pages 122 123...

Page 165: ...0 is not available 1440 1080 Fine 1440 1080 Standard and 1280 720 size movies can be recorded only using Memory Stick PRO Duo media Insert Memory Stick PRO Duo media or set the image size to a size VGA Turn the power off and on again The lens malfunction Maximum number of images already selected Up to 100 files can be selected when using Multiple Images Up to 999 files can be selected when using A...

Page 166: ... on image files that have been processed using a computer or images that were recorded with other cameras Operation cannot be executed when using a PictBridge connection Some functions are restricted while the camera is connected to a PictBridge compliant printer Recovering image management file The camera restores the date information etc in cases where images have been deleted on a PC etc The nu...

Page 167: ...ure has risen You cannot record images until the temperature has dropped When you record movies for a long time the camera temperature rises In this case stop recording movies Recording has stopped due to increased camera temperature Recording has stopped due to a rise in temperature while recording a movie Please wait until the temperature goes down ...

Page 168: ...abroad Power sources You can use the camera the battery charger supplied and the AC Adaptor sold separately in any country or region where the power supply is within 100 V to 240 V AC 50 Hz 60 Hz Do not use an electronic transformer travel converter as this may cause a malfunction Note ...

Page 169: ...ta Data may be corrupted in the following cases When the Memory Stick Duo media is removed or the camera is turned off during a read or write operation When the Memory Stick Duo media is used in locations subject to static electricity or electrical noise We recommend backing up important data Do not press down hard when you write down on the memo area Do not attach a label on the Memory Stick Duo ...

Page 170: ...th a Memory Stick media compliant device make sure that the Memory Stick Duo media Adaptor is inserted facing the correct direction Note that improper use may damage the equipment Do not insert a Memory Stick Duo media Adaptor into a Memory Stick media compliant device without a Memory Stick Duo media attached Doing so may result in malfunction of the unit Notes on using Memory Stick PRO Duo media...

Page 171: ...times the expected shooting time and making trial shots before taking the actual shots Do not expose the battery pack to water The battery pack is not water resistant Do not leave the battery pack in extremely hot places such as in a car or under direct sunlight On the remaining charge indicator When the battery runs off though the remaining battery is sufficient charge the battery after fully use...

Page 172: ...e same battery pack into the battery charger securely again When the CHARGE lamp flashes fast again this may indicate a battery error or that a battery pack other than the specified type has been inserted Check that the battery pack is the specified type If the battery pack is the specified type remove the battery pack replace it with a new one or another one and check if the battery charger opera...

Page 173: ...olor Mode 72 Color Saturation 74 COMPONENT 115 Computer 135 Exporting images 141 Importing images 140 145 Macintosh 144 Recommended environment 136 144 Windows 135 Connecting Computer 139 Printer 149 TV 129 Contrast 75 Control button 15 Conversion Lens 102 Copy 125 Create REC Folder 122 Cross Filter 92 CTRL FOR HDMI 114 Custom Button 107 D Date 150 Date Time Setting 128 Date List 83 Delete 49 94 D...

Page 174: ...109 LCD Screen 18 M Macintosh computer 144 Macro 38 Manual Exposure Shooting 26 Mass Storage 118 Memory Stick Duo media 169 MENU 10 Menu screen 10 Metering Mode 60 Mode dial 16 Movie Mode 34 Movie shooting mode 52 Multi AF 40 Multi connector 129 139 145 149 Multi pattern metering 60 Multi Purpose Resize 93 Music 81 Music Transfer 143 146 N Noise Reduction 71 NTSC 116 O Optical zoom 36 101 OS 136 1...

Page 175: ...lideshow 78 Slow Synchro Flash On 39 Smart zoom 101 Smile Detection Sensitivity 64 Smile Shutter 35 Snow 22 Soft Focus 91 Software 137 138 143 Spot metering 60 SteadyShot 77 Sweep Panorama 32 T Travel converter 168 Trimming 91 Troubleshooting 152 TV 129 Twilight 22 Twilight Portrait 22 U Unsharp masking 91 USB Connect 118 Using the camera abroad 168 V VGA 54 55 Video Out 116 View Mode 85 W Warning...

Page 176: ...LL BE IMPLIED FOR ANY OTHER USE ADDITIONAL INFORMATION MAY BE OBTAINED FROM MPEG LA L L C SEE HTTP MPEGLA COM On GNU GPL LGPL applied software The software that is eligible for the following GNU General Public License hereinafter referred to as GPL or GNU Lesser General Public License hereinafter referred to as LGPL are included in the camera This informs you that you have a right to have access t...

Reviews: