background image

HDR-CX190/CX190E/CX200/CX200E/CX210/CX210E/PJ200/PJ200E/PJ210_L2

3-1E

3. ASSEMBLY

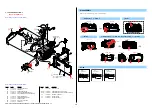
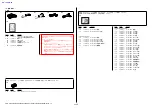
Assembly-1:

 Installation Cautions of the Speaker Unit.

Ribs

Speker Harness
(Red, Black)

Route the Speaker harness.

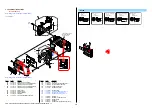
Assembly-2:

 How to distinguish the side of Optical Filter

Block facing to Lens Device.

• IR cut coating surface

  The red coating is reflected.

• The other surface
  The red coating is 
  not reflected.

• Side view
  The red belt
  is seen.

Lens Device side

Lens Device side

Hold it with tweezers or the like.

Optical Filter  Block  

[IR Cut Coated Side]

[The Other Side]

The one side of the Optical Filter Block has treatedwith IR cut coating.
Mount the Optical Filter Block  facing the IR cut coated side to the lens
device.Distinguish the IR cut coated side from the other byapplying the
fluorescent light to the Optical Filter Block in the dark place(cut off the
outside light).

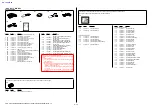
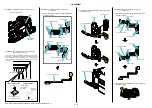
FP-1482 Flexible Board

Hinge Assy

Hinge Cover (M)

FP-1482 Flexible Board

2

Insert the FP-1482 Flexible Board to the Hinge Assy
as shown in figure.

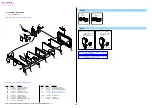
Assembly-4:

 The Method of attachment of FP-1481

Flexible Board.

Adhesive tape

Adhesive tape

FP-1481 Flexible Board

Mountain fold

Mountain fold

Mountain fold

FP-1481 Flexible Board

Adhesive tape

Adhesive tape

Valley fold

Valley fold

Valley fold

1

Fold dotted line parts of the FP-1481 flexible board
as shown in figure.

2

Insert the FP-1481 Flexible Board to the Hinge Assy
as shown in figure.

Assembly-3:

 The Method of attachment of FP-1482

Flexible Board.

1

Fold dotted line parts of the FP-1482 flexible board
as shown in figure.

FP-1482 Flexible Board

FP-1482 Flexible Board

FP-1482 Flexible Board

Mountain fold

Mountain
fold

Mountain fold

Valley fold

Valley fold

Valley fold

Valley fold

Valley fold

Adhesive tape

Adhesive tape

Adhesive tape

Adhesive tape

Adhesive tape

Adhesive tape

Summary of Contents for CX190E

Page 1: ... Model Ver Date History Contents S M Rev issued 1 0 2011 12 Official Release 1 1 2012 01 Revised 1 A1 11 347 Change of SERVICE NOTE Page 1 2 1 3 1 4 1 6 1 7 1 8 1 9 Yes 1 2 2012 05 Revised 2 A2 12 020 Change of EXPLODED VIEWS Page 2 3 2 7 2 9 2 10 Yes 1 3 2012 06 Revised 3 A3 12 164 Correction of ACCESSORIES Page 2 12 2 13 Yes 1 4 2012 08 Revised 4 A4 12 186 Change of REPAIR PARTS LIST Page 2 8 Ye...

Page 2: ...actured under license from Dolby Labo ratories ENGLISH These specifications are extracted from instruction manual of HDR CX190E CX200E CX210E PJ200E These specifications are extracted from instruction manual of HDR CX190 CX200 CX210 PJ200 SPECIFICATIONS System Signal format NTSC color EIA standards HDTV 1080 60i specification Movie recording format HD MPEG 4 AVC H 264 AVCHD format Ver 2 0 compatib...

Page 3: ...14 5 mm 突起部を含む 付属バッテリー装着状態 幅 高さ 奥行き 本体質量 約210 g 本体のみ 撮影時総質量 約252 g 付属バッテリー含む ACアダプター AC L200C AC L200D 電源 AC 100 V 240 V 50 Hz 60 Hz 消費電流 0 35 A 0 18 A 消費電力 18 W 定格出力 DC 8 4 V 動作温度 0 40 保存温度 20 60 外形寸法 約 48 29 81 mm 最大突起部を除く 幅 高さ 奥行き 質量 約170 g 本体のみ その他の仕様についてはACアダプターのラベルを ご覧ください リチャージャブルバッテリーパック NP FV30 最大電圧 DC 8 4 V 公称電圧 DC 7 2 V 最大充電電圧 DC 8 4 V 最大充電電流 2 1 A 容量 公称容量 3 6 Wh 500 mAh 定格 最小 容量 3 6 Wh...

Page 4: ...ot to apply force on the conductor when soldering or unsoldering 1 注意事項をお守りください サービスのとき特に注意を要する個所については キャビ ネット シャーシ 部品などにラベルや捺印で注意事項を 表示しています これらの注意書き及び取扱説明書等の注 意事項を必ずお守り下さい 2 指定部品のご使用を セットの部品は難燃性や耐電圧など安全上の特性を持った ものとなっています 従って交換部品は 使用されていた ものと同じ特性の部品を使用して下さい 特に回路図 部 品表に0印で指定されている安全上重要な部品は必ず指定 のものをご使用下さい 3 部品の取付けや配線の引きまわしはもとどおりに 安全上 チューブやテープなどの絶縁材料を使用したり プリント基板から浮かして取付けた部品があります また 内部配線は引きまわしやクランパによ...

Page 5: ...st Manual in the Adjust Station and execute the USB SERIAL No INPUT Data for projector HDR PJ200 PJ200E PJ210 Before replacing the board with a spare board acquire the following data from the current board Fixed value that shows irradiation performance of the projector Serial number of the projector unit To acquire the data start Adjust Manual from Adjust Station and select Projector Data Referenc...

Page 6: ...e is old the window shown in Fig 1 is displayed Click the OK button Fig 1 2 The Destination Data Write window opens Check the version of the Destination Data file retained in the Adjust manual Destination Ver window 3 Search the model whose new Destination Data file you want to get on the TISS homepage When the Destination Data file has been updated a file with a name Destination File For model na...

Page 7: ...iate step to be taken E g 13 32 Turn on power again Block Detailed Code Blinks at 3 2 Hz C Corrected by customer E Corrected by service engineer Format the memory card LCD screen 1 4 3 Self diagnosis Code Table Self diagnosis Code Symptom State Correction Repaired by Block Function Detailed Code C 0 4 0 0 Non standard battery is used Use the InfoLITHIUM battery C 0 6 0 0 The battery pack temperatu...

Page 8: ...eo light Tempera ture detection Turn power off and turn power on again E 9 2 0 1 Battery current value goes over the max discharge current Check the remaining battery power because this symptom maybe depended on the remaining battery level and confirm whether or not the symptom is occurred after replacing the battery If the symp tom is still occurred overhaul inspection is needed Check each output...

Page 9: ...板に書かれている仕向けデータは元の設定と違っている場合があります Adjust StationからAdjust Manualを起動させて DESTINATION DATA WRITE を実行させてください 補修用基板交換後 電源を入れると内蔵記録メディアエラーが表示される場合がありますが DESTINATION DATA WRITE を実行 させると消えます DESTINATION DATA WRITE 実行しても消えない場合は 内蔵記録メディアをフォーマットしてください USBシリアルセーブ 補修用基板と交換する時 交換前の基板よりUSBシリアルNo を取得してください データの取得はAdjust StationからAdjust Manualを起動させて USB SERIAL SAVE を実行させてください USBシリアルNo セットは 1台毎に異なる固有のID USB Serial N...

Page 10: ...能であること Fig 1 1 3 Destination Data ファイルの追加について Adjust manual に含まれる Destination Data ファイルが古い場合 DESTINATION DATA WRITE が実行できないことがあります その場合は 下記の手順を参考にして TISS ホームページより新しい Destination Data ファイル を入手してください Note1 この機種で仕向け設定を行うには DSC WX50シリーズの Adjust manual がインストールされている必要があります 先に DSC WX50 シリーズの Adjust manual をインストールしてください Note 2 手順中の画像は実際と異なる場合があります 1 使用している Adjust manual の Destination Data ファイルが古い場合 Fig 1 ...

Page 11: ... Remarks欄にはこの Destination Data ファイルが対応するバージョンが記載されています Note バージョンが更新されていなかった場合は サービスヘッドクォーターへお問い合わせください 4 該当機種の Destination Data ファイルをダウンロードし 解凍する 5 Adjust manual の Adjust タブにある DESTINATION DATA WRITE を実行する START ボタンをクリックする 6 ウインドウ内の File Update ボタンをクリックする 7 ファイルを選択する画面が出るので 追加する Destination Data ファイルを選択し 開く ボタンをクリックする 8 ファイルの追加が成功すると 下記のような画面が出る 9 Destination Ver ウインドウを確認し バージョンが更新されていることを確認する De...

Page 12: ...バリアが開いている状態で バッテリまたは電源ケーブル をはずして付け直す その際 レンズ内のアイリス羽根が動作していることを確認する アイリス羽根が動作してない場合は レンズドライブブロックのアイリスモー タドライブ VC 651基板CN1005 qd qk ピン を点検する アイリス羽根が動作する場合は アイリス羽根が完全に閉じきることを確認し 以下の内容を確認する アイリス羽根を正常に閉じることができない場合レンズブロックを交換す る アイリス羽根は正常に閉じているが E 61 30が出る場合CMOSブロック組 立との通信ができているかを確認する 正 常 に 画 面 が 出 て い な い 場 合CM 127基 板 のCN6805とVC 651基 板 の CN1002がFP 1483フレキシブル基板で接続されているかを確認する 正常に画面が出ている場合レンズブロックを交換する E 6 ...

Page 13: ...ェクター不具合の 指摘品受付 修理完了 明るさに 関する指摘 明るさの測定 2 Projector Data Input Fixed valueの入力 ユニット上の貼付シールに記載されている番号を入力 シリアルNoの入力 LD40Syywwnnnn 赤字部分の入力 Projector LED 検査 1 Yes No OK OK NG NG Projector LED 検査 1 OK NG A B 1 Adjust manualのADJUSTタブを参照 2 Adjust manualのSERVICEタブを参照 プロジェクターユニット LED発光部 を交換する 1 PJ基板を交換する 1 プロジェクターユニット LED発光部 とPJ基板の 両方を交換する 1 プロジェクターの不具合確認手順 明るさに関する指摘の場合 プロジェクター不具合の 指摘品受付 修理完了 明るさに 関する指摘 Yes N...

Page 14: ...s identifiés par une marque 0 sont critiques pour la sécurité Ne les remplacer que par une pièce portant le numéro spécifié Color Indication of Appearance Parts Example SILVER Cabinet s Color Silver Parts Color JAPANESE 使用上の注意 ここに記載されている部品は 補修用部品であるため 回路図及び セットに付いている部品と異なる場合があります XX Xは標準化部品のため セットに付いている部品と異なる場合 があります 印の部品は常備在庫しておりません 抵抗の単位Ωは省略してあります 金 被 金属被膜抵抗 サンキン 酸化金属被膜抵抗 インダクタの単位でuHはμHを示します 半導体...

Page 15: ...le that a wire is snapped Do not apply excessive load to the gilded flexible board Cut and remove the part of gilt which comes off at the point Be careful or some pieces of gilt may be left inside JAPANESE ENGLISH 修理時の注意 フラットケーブルおよびフレキシブル基板の端子面に欠け 折れ等 がないことを確認する また コネクタへの接続は 差し込み不足や斜め差しにならないよ うに注意する コネクタを取り外す時に 線材部 極細 を持って引っ張ると断線す る恐れがありますので 絶対に線材部 極細 を持って引っ張らない でください 線材部 極細 を押さえながらコネクタを差し込むと 線材部 ...

Page 16: ...View 12 4 Back View 2 2 Right View Left View 2 2 Top View Bottom View 2 2 2 M1 7 X 4 0 Black 2 635 562 31 4 0 1 7 12 M1 7 X 5 0 Tapping Black 3 080 204 21 1 7 5 0 1 4 412 130 01 ORNAMENT 2781 COVER R 2 A 1855 267 A PANEL ASSY 2781B F BLACK 2 A 1861 022 A PANEL ASSY 2781S F SILVER 3 4 412 135 01 BELT FRONT 4 4 412 131 01 LID MS 5 4 412 136 01 CABINET USB 6 A 1857 765 A CABINET ASSY 2781B TOP BLACK ...

Page 17: ...2 135 01 BELT FRONT 53 4 412 131 01 LID MS 54 4 412 136 01 CABINET USB 55 A 1854 710 A CABINET ASSY 278B TOP CX200 CX200E CX210 CX210E BLACK 55 A 1854 711 A CABINET ASSY 278L TOP CX200 CX200E CX210 CX210E BLUE 55 A 1854 712 A CABINET ASSY 278R TOP CX200 CX200E CX210 CX210E RED 55 A 1854 713 A CABINET ASSY 278S TOP CX200 CX200E CX210 CX210E SILVER 55 A 1854 714 A CABINET ASSY 273B TOP CX190 CX190E ...

Page 18: ...ELT 105 4 412 133 01 SHEET METAL REAR G BELT 106 4 413 435 01 GASKET MM IM Model 107 1 885 623 11 FP 1557 FLEXIBLE BOARD IM Model 108 A 1852 422 A MM 102 8G BOARD COMPLETE IM Model 109 4 412 124 01 CUSHION SP 110 4 412 119 01 PLATE SP FIXED MIC901 1 542 909 11 MICROPHONE UNIT 2 2 635 562 31 SCREW M1 7 IM Model 11 3 078 890 11 SCREW TAPPING 12 3 080 204 21 SCREW TAPPING P2 2 1 3 OVERALL SECTION 2 P...

Page 19: ...2 TYPE GRIP 160 4 412 123 01 HOLDER SP 161 4 412 119 01 PLATE SP FIXED MIC901 1 542 908 11 MICROPHONE UNIT CX190 CX190E MIC901 1 542 909 11 MICROPHONE UNIT CX200 CX200E CX210 CX210E 2 2 635 562 31 SCREW M1 7 IM Model 11 3 078 890 11 SCREW TAPPING 12 3 080 204 21 SCREW TAPPING P2 DISASSEMBLY Screw 2 M1 7 X 4 0 Black 2 635 562 31 4 0 1 7 11 M1 7 X 4 0 Tapping Silver 3 078 890 11 4 0 1 7 12 M1 7 X 5 ...

Page 20: ...2 660 401 01 SCREW M1 7 NEW TRU STAR P2 11 3 078 890 11 SCREW TAPPING 12 3 080 204 21 SCREW TAPPING P2 172 2 178 410 01 TITE UB TITE 1 4 Note 2 Refer to Assembly 2 How to distinguish the side of Optical Filter Block facing to Lens Device Note 5 Refer to Assembly 1 Installation Cautions of the Speaker Unit Note 2 Assembly 2 How to distinguish the side of Optical Filter Block facing to Lens Device を...

Page 21: ...781 PJ WINDOW 252 4 411 932 01 CABINET C 2781 P PJ200 PJ200E BLACK 252 4 411 932 11 CABINET C 2781 P PJ210 BLACK 252 4 411 932 21 CABINET C 2781 P PJ200 PJ200E SILVER 252 4 411 932 31 CABINET C 2781 P PJ210 SILVER 253 4 272 357 01 GASKET P 389 254 4 411 944 01 HEAT SINK 2781 P 255 4 272 354 01 SHEET P RADIATION 256 4 271 688 01 CUSHION M 257 A 1810 716 A FP 1319 FLEXIBLE BOARD COMPLETE 258 4 272 3...

Page 22: ...MENT 2781 COVER C 313 1 884 872 21 FP 1482 FLEXIBLE BOARD Note 2 314 4 419 443 01 SHEET 2781 PD RADIATION 315 4 419 444 01 SHEET 2781 PD CONDUCTIVE LCD901 A 1854 057 A LCD BLOCK ASSY 1 2 635 562 11 SCREW M1 7 11 3 078 890 11 SCREW TAPPING 2 1 7 CABINET R SECTION 2 Projector Model Refer to page 2 10 11 about Non Projector Model Refer to page 2 10 11 about Non Projector Model 1 M1 7 X 2 5 Black 2 63...

Page 23: ... 890 11 SCREW TAPPING 68 2 655 581 01 SCREW 0 P2 M1 7 NEWTRU STAR SG Note 1 2 1 8 CABINET R SECTION Non Projector Model CX190 CX190E Refer to page 2 8 9 about Projector Model Refer to page 2 8 9 about Projector Model 1 M1 7 X 2 5 Black 2 635 562 11 2 5 1 7 2 M1 7 X 4 0 Black 2 635 562 31 4 0 1 7 11 M1 7 X 4 0 Tapping Silver 3 078 890 11 4 0 1 7 68 M1 7 X 4 0 Silver 2 655 581 01 4 0 1 7 Note Note 2...

Page 24: ...1 CUSHION PANEL 413 2 649 300 01 SHEET ADHESIVE Note 3 LCD901 A 1854 057 A LCD BLOCK ASSY 1 2 635 562 11 SCREW M1 7 2 2 635 562 31 SCREW M1 7 11 3 078 890 11 SCREW TAPPING 68 2 655 581 01 SCREW 0 P2 M1 7 NEWTRU STAR SG Note 1 Screw 1 M1 7 X 2 5 Black 2 635 562 11 2 5 1 7 2 M1 7 X 4 0 Black 2 635 562 31 4 0 1 7 11 M1 7 X 4 0 Tapping Silver 3 078 890 11 4 0 1 7 68 M1 7 X 4 0 Silver 2 655 581 01 4 0 ...

Page 25: ...CHINESE CH 907 4 417 076 11 Operating Guide RUSSIAN UKRAINIAN PJ200E JE Note This unit has no bundled CD ROM Contents included in the CD ROM will be supplied to customers as follows User Guide HTML You can access to the URL of support site described in the In struction Manual Application Software By connecting this unit and Windows PC with the USB cable the application software PlayMemories Home L...

Page 26: ... 21 ユーザーガイ ド フランス語 CX190 CX200 CX210 PJ200 991 4 416 965 11 ユーザーガイ ド 英語 991 4 416 965 21 ユーザーガイ ド フランス語 991 4 416 965 31 ユーザーガイ ド スペイン語 991 4 416 965 41 ユーザーガイ ド ポルトガル語 991 4 416 965 51 ユーザーガイ ド 中国語 繁体字 991 4 416 965 61 ユーザーガイ ド 韓国語 Ref No Part No Description CX190E CX200E CX210E PJ200E 991 4 416 966 11 ユーザーガイ ド 英語 991 4 416 966 21 ユーザーガイ ド フランス語 991 4 416 966 31 ユーザーガイ ド ドイツ語 991 4 416 966 41 ユーザ...

Page 27: ...l Filter Block in the dark place cut off the outside light FP 1482 Flexible Board Hinge Assy Hinge Cover M FP 1482 Flexible Board 2 Insert the FP 1482 Flexible Board to the Hinge Assy as shown in figure Assembly 4 The Method of attachment of FP 1481 Flexible Board Adhesive tape Adhesive tape FP 1481 Flexible Board Mountain fold Mountain fold Mountain fold FP 1481 Flexible Board Adhesive tape Adhes...
Reviews: