9(E)
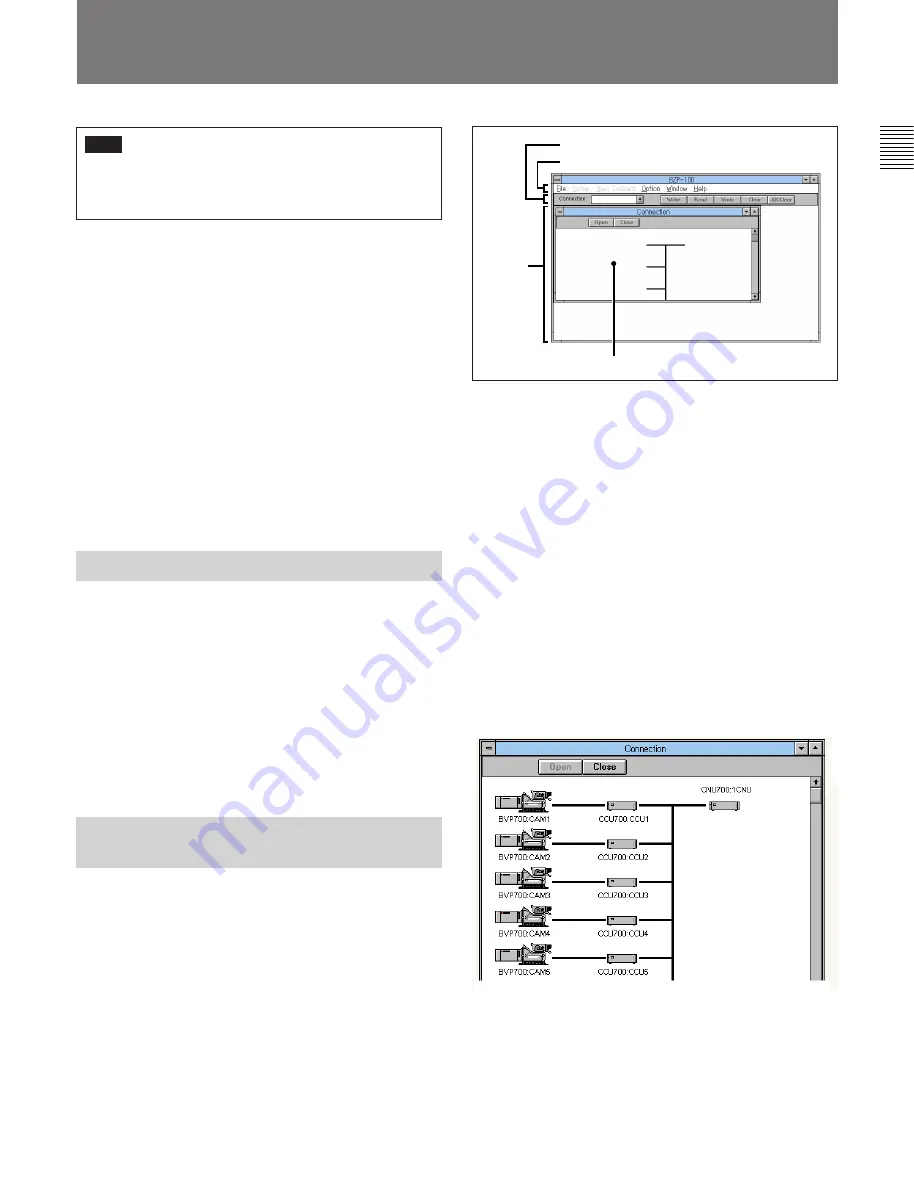
Initial BZP-100 window
The BZP-100 window consists of three main parts:
• Pull-down menus
• Toolbar
• Main window
Use the pull-down menus and toolbar in the usual way.
Initially only the Connection window appears in the
main BZP-100 window.
Step 1: making the initial hardware
connection
To make the initial hardware connection to the camera
system, click the Open button in the Connection
window.
Connectivity display (the Connection window)
Now the Connection window shows schematically the
connectivity of the camera system.
Note
Since this program is always able to change the
settings on any of the connected devices, be careful
to avoid inadvertent operation while on the air.
BZP-100 provides immediate control of camera and
control unit parameters from the personal computer.
The adjustments are made “live”: that is, as you
change a setting on the computer, this is immediately
reflected in the state of the camera or control unit.
Important
Once you have started the BZP-100 software, do not
change the hardware configuration.
Before making any hardware connections or
disconnections, exit BZP-100. After reconfiguring the
hardware, start BZP-100 again to ensure that it reads
the configuration information correctly.
Starting BZP-100
1
Power on the computer system.
2
Power on the camera system.
3
If Windows does not start automatically, at the
MS-DOS command line prompt, enter “win”.
4
Double-click the BZP-100 icon in the BZP-100
group.
Basic Operation of the BZP-100
Software
Once BZP-100 has started, you can use the help
information for detailed guidance on the program. The
following brief summary describes the appearance of
the program and the four basic operation steps.
When you start BZP-100, the window appears as
follows.
Running BZP-100
Connection window
Toolbar
Pull-down menus
Main
window


