background image

-20-

-21-


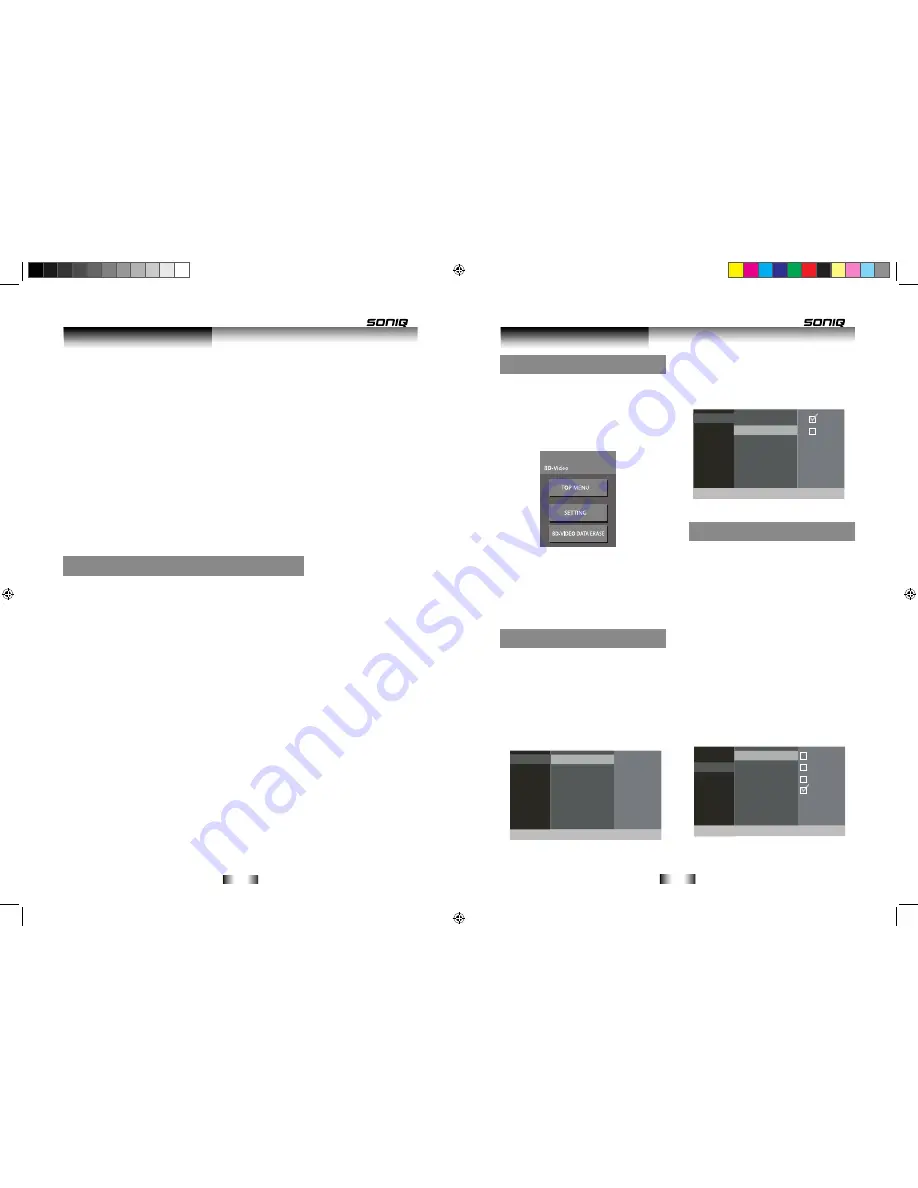
When the 

SETUP

 button is pressed you will 

be faced with a menu, select the 

SETTING 

option to enter the main settings menu.

The options here are split into categories 
for easier navigation : GENERAL, VIDEO, 

A U D I O ,   L A N G U A G E ,   PA R E N TA L  & 
NETWORK.

Use the navigation buttons to navigate the
menu and the 

ENTER 

button to select an

option.

   General Menu

Below is a list of available options and a 

description of each setting.

RESTORE SETTINGS

Select this option of you want to reset all the 
settings to the factory defaults. (On-Screen 

Language, Parental, Network settings remain

unchanged).

Screen Saver

Choose this option you want to set Screen 
saver 

ON

 or 

OFF


Video Menu


TV ASPECT

Use this option to set the required TV Aspect
ratio. The options are as follows:

4:3 PAN-SCAN:

 This is for 4:3 TV’s and will 

stretch the wide image top to bottom and cut 
off the sides.

4:3 LETTERBOX:

 Again this is for 4:3 TV’s 

but this will add black bars top & bottom for 

widescreen material.

16:9: 

This is the standard widescreen format,

4:3 material will be displayed with black bars 

on either side.

16:9  FULL:

  This  setting  will  stretch  all 

material to fill the screen on a widescreen 

TV.

Press the 

POPUP MENU

 button to view the available options.

1. CONTENTS INFORMATION

Select the Contents information option to view details about the highlighted file. Such as image 
resolution, filename, and any other detail stored within the file.

2. SLIDESHOW SETUP

This option allows you to set the viewing duration of each image, and whether they repeat or 

not.

3. SLIDESHOW START/CONTINUE

Use these options when choosing to start a slide show or to resume a slide show. 

SKIP: FAST/FWD ►► 

or

 FAST/REV ◄◄  

buttons will advance to the next or previous image.

ROTATE: 

During playback of a slide show press the 

POPUP MENU

 button to access the rotate 

options.

Erasing Data from a USB device or SD Card 

Should you wish to remove BD-Live data you have stored on a USB device or SD Card . Follow 
this procedure.

1. With the USB drive or SD Card inserted in the slot, press the 

SETUP

 button.

2. Select 

BD-VIDEO DATA ERASE

 using the

navigation buttons, and press 

ENTER

 to activate.

3. Select 

START

 using the navigation buttons, then press the 

ENTER

 button to erase all the 

data from the device. Select 

CANCEL

 to cancel the procedure.

User Instructions

Advanced Operation

Setup Menu

General
Video
Audio
Language
Parental
Network

Restore Settings

Screen Saveru

Yes

General
Video
Audio
Language
Parental
Network

Restore Settings

Screen Saveru

Off

On

General
Video
Audio
Language
Parental
Network

16:9

16:9Full

HDMI

4:3 Letter box

TV Aspect

4:3Pan&Scan

B500说明书.indd   20-21

2011-10-15   9:54:33

Summary of Contents for B500-AU

Page 1: ...1 B500 AU 3D Blu ray Disc Player B500 indd 1 2011 10 15 9 54 29...

Page 2: ...User Instructions Getting started Basic operation Sub menu options Popup menu options Connecting USB SD Device Playing a CD disc Data playback Erasing Data from a USB device or SD Card Advanced Opera...

Page 3: ...se by young children or infirm persons unless they have been adequately supervised by a responsible person to ensure that they can use the appliance safely Young children should be supervised to ensur...

Page 4: ...iscs are divided into tracks Each title chapter or track is assigned a number which is called title number chapter number or track number respectively There may be discs that do not have these numbers...

Page 5: ...on disc to high definition up to 1080p over an HDMI connection A highly detailed picture and increased sharpness delivers a more true to life picture other intellectual property rights Use of this cop...

Page 6: ...ton Remote battery installation Before use the remote control will need batteries fitting These are supplied with the package and need removing from their packaging before fitting 1 Remove the battery...

Page 7: ...3 COMPOSITE This connection only carries video and the cable is usually yellow Connect one end to the Blu ray player the other end to your TV Monitor NOTE YUV and VIDEO will have no signal output unde...

Page 8: ...table for the plug supplied with this unit check with a qualified electrician for replacement The use of multiple connectors or extension cables are not recommended The appliance must be connected to...

Page 9: ...AUSE ll button to pause playback Press the FAST FWD button to advance the playback at X2 X4 X8 X16 X32 speed The main plug is used as the disconnect device the disconnect device shall remain readily o...

Page 10: ...the pop up menu while playing a disc Various functions are available from this pop up menu Use the navigation buttons to choose an option and ENTER to select To resume normal play press the PLAY butt...

Page 11: ...S USING THE NUMBER BUTTONS Press the number button s corresponding to the track number you would like to play then press the ENTER button and the player will start to play your specified track SELECTI...

Page 12: ...options 1 CONTENTS INFORMATION Select the Contents information option to view details about the highlighted file Such as image resolution filename and any other detail stored within the file 2 SLIDES...

Page 13: ...ncement of Dolby digital audio played at low volumes or small speakers PCM DOWN CONVERSION Use this option to turn PCM down sampling ON or OFF Some amplifiers cannot support high sample rates If this...

Page 14: ...mit UNLOCK PLAYER If you select UNLOCK PLAYER after entering the pass code all discs can be played TEMPORARY UNLOCK CHANGE PASSWORD Choose CHANGE PASSWORD to enter a new pass code number NOTE The defa...

Page 15: ...do not have enough storage space for a download connect the usb drive to your computer and remove backup some of the files erase the media or use another usb drive If you receive an error while downlo...

Page 16: ...B500 indd 28 29 2011 10 15 9 54 33...

Page 17: ...30 MD110922 01 HOTLINE AUSTRALIA 1300 765 663 NEW ZEALAND 0800 100 236 B500 indd 30 2011 10 15 9 54 33...

Reviews: