


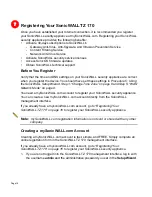


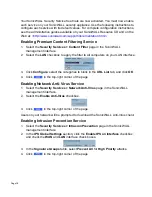
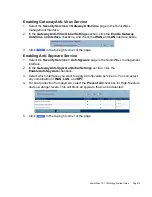


Page 16
Registering Your SonicWALL TZ 170
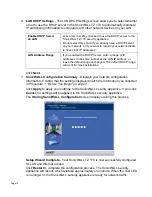
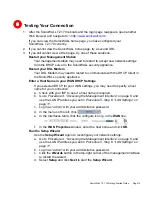
1.
If you are not logged into the SonicWALL TZ 170 management interface, log in with
the username
admin
and the administrative password you set in the
Setup Wizard
.
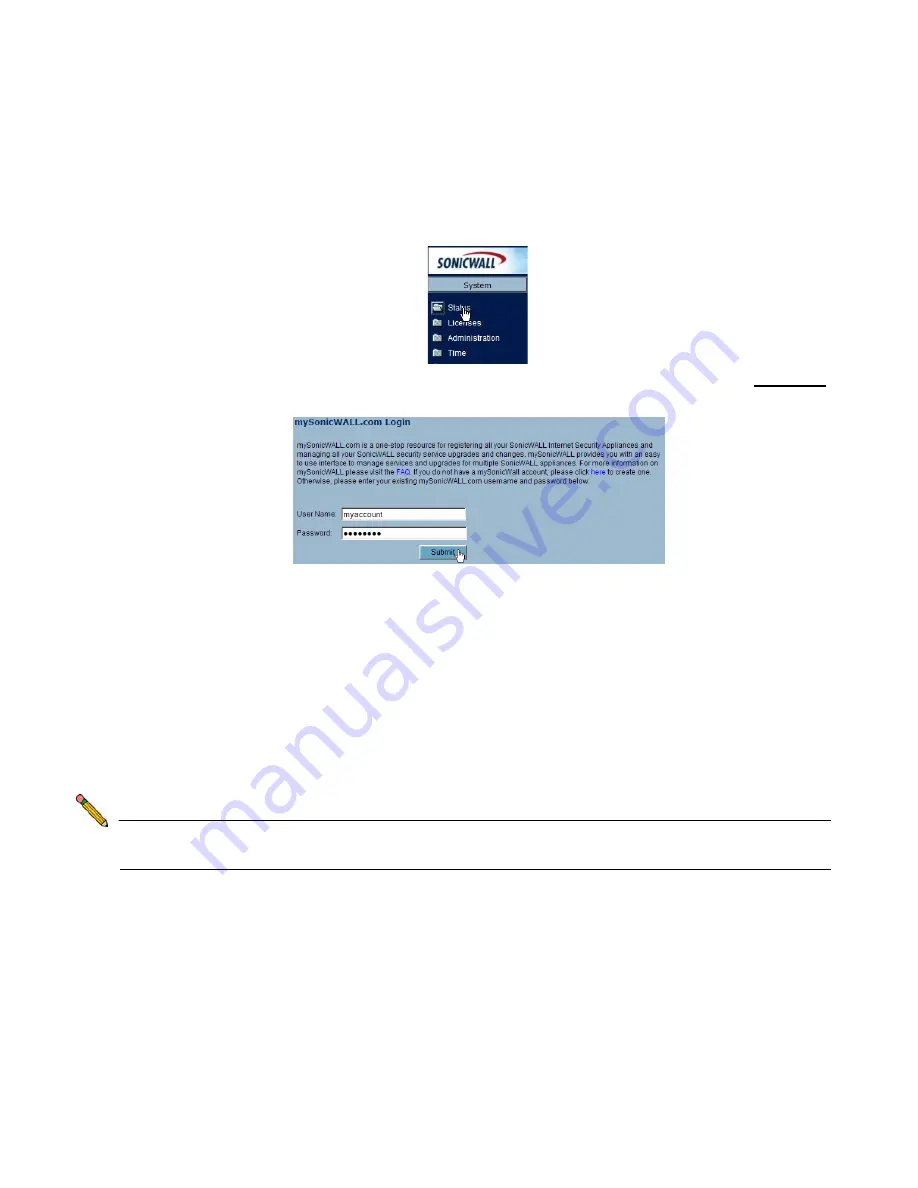
2.
If the
System > Status
page is not displaying in the management interface, click
System
in the left-navigation menu.
3.
On the
System > Status
page, in the
Security Services
section, click the
Register
link. The
mySonicWALL.com Login
page is displayed.
4.
Enter your mySonicWALL.com account username and password in the
User Name
and
Password
fields, then click
Submit.
5.
The next several pages inform you about SonicWALL’s Security Services. Click
Continue
on each page.
6.
At the top of the
Product Survey
page, enter a “friendly name” for your SonicWALL
security appliance in the
Friendly Name
field. The friendly name allows you to easily
identify your SonicWALL security appliance in your mySonicWALL.com account.
7.
Please complete the Product Survey. SonicWALL uses this information to further
tailor services to fit your needs.
Note:
SonicWALL Product Survey information is not sold or shared with any other
company.
8.
Click
Submit
.
9.
When the mySonicWALL.com server has finished processing your registration, you
will see a page informing you that your SonicWALL TZ 170 appliance is registered.
Click
Continue
, and the
System > Licenses
page is displayed showing the
available security services. You can activate the services from this page now or at
any time in the future.


