background image

Additional Usage Notes 

1.


In normal use only the control button for adjusting the headphone level will need to be used. The 
other buttons on the Evo 4 should not be pressed. For example, the “48V” button in the upper left 
corner should always be on (illuminated red). Pressing the control buttons may result in the 
settings being incorrect. See “Resetting All Controls” below for fixing this problem. 

2.


If you have trouble hearing the teleconference participants, you may need to adjust the 
monitoring balance. This allows you to have a comfortable level for hearing the participants and 
yourself. This adjustment also controls the volume in the headphones when using the computer to 

play audio to the teleconference participants. Press the monitor button 

 in the lower right 

corner of the Evo 4. Turning the volume knob counter clockwise will increase the volume of your 
microphone (and the playback audio from the computer). Turn the volume knob clockwise to 
increase the proportion of sound from the teleconference participants. Normally setting the 
monitor level to the middle (12 O’clock position) will give a good balance of the signals. 

3.


If the participants in the teleconference have trouble hearing you because the volume is too low or 

too high, the microphone level can be adjusted by pressing #1 microphone button 

 and then 

turn the large knob to get the proper volume. After adjusting the microphone level, you should 
press the headphone level button again (to avoid accidently changing the microphone level).  

4.


The supplied single-earpiece headphone can be replaced with any type of headphone that you 
prefer for listening to the teleconference, using the included ¼” to 3.5mm headphone adapter.  


Resetting All Controls 

If for some reason any of the required Evo 4 settings are accidentally changed, the default settings can be 
restored with the following steps: 


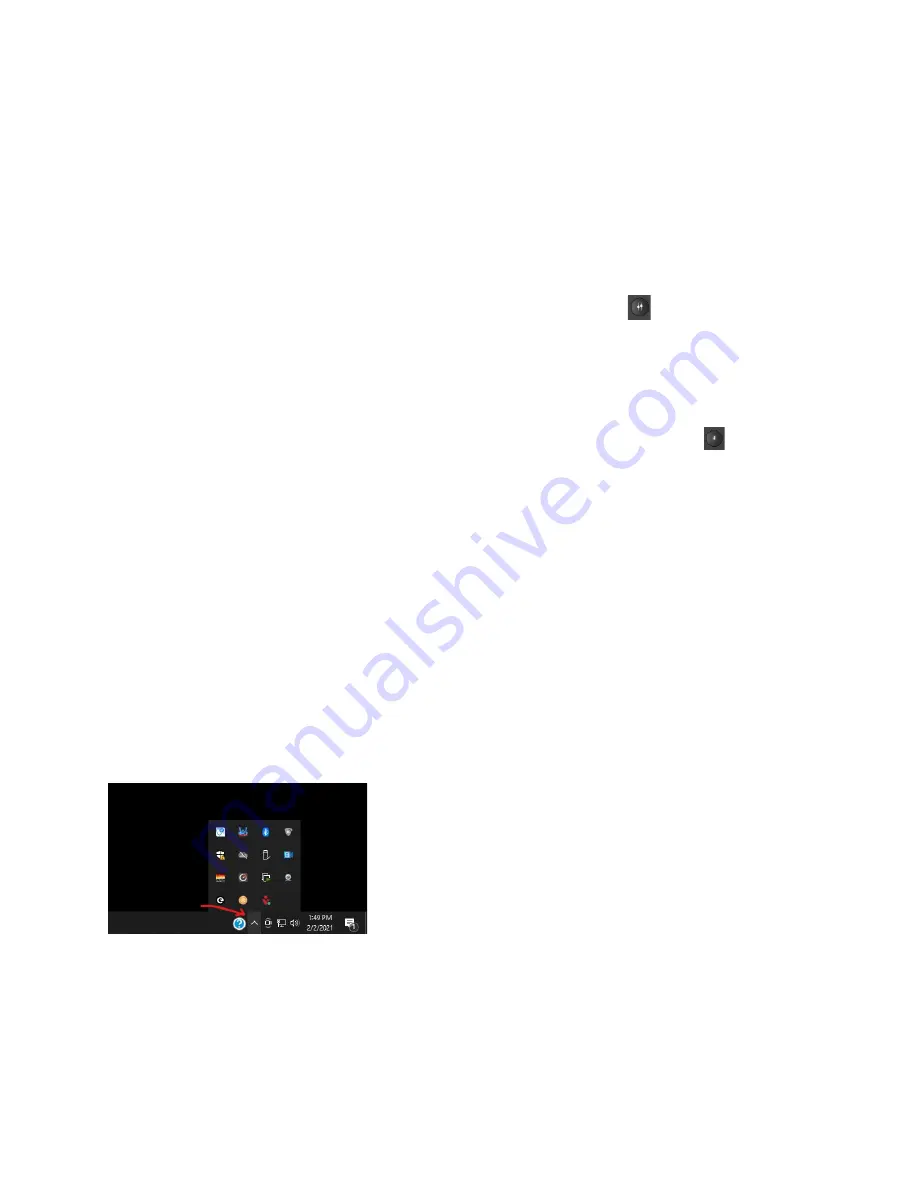
Left click on in the “Windows System Tray”. This is the little up arrow icon in the lower right corner of 
the computer screen: 


Then right click on the Evo control icon: 

Summary of Contents for Evo 4

Page 1: ...Evo 4 Loopback Kit OPERATION GUIDE...

Page 2: ...reserved No part of this publication may be reproduced stored in a retrieval system or transmitted in any form or by any means electronic mechanical photocopying recording or otherwise without the pr...

Page 3: ...vo 4 Software Installation 9 Drivers 9 Loading and Saving Presets 9 Evo 4 Loopback Settings 11 Audio Loopback Cable 12 SoniClear Software Configuration for Evo 4 13 Recording Options Tab Sound Quality...

Page 4: ...Headphone The kit includes a microphone a monitor headphone and the black Evo 4 interface control box for connecting the microphone and headphone to the computer Place the microphone so that it is cl...

Page 5: ...puter Turn the volume knob clockwise to increase the proportion of sound from the teleconference participants Normally setting the monitor level to the middle 12 O clock position will give a good bala...

Page 6: ...Select Show EVO Control to display the Evo 4 control panel Click on the File Open pulldown menu selection to open the Load Mixer window...

Page 7: ...re and click the Load button to reset the Evo 4 to the default values Note that it may appear that the Load button is disabled when it is in fact working Hovering the mouse over that button will cause...

Page 8: ...ub may result in unreliable operation Power Connection The Evo 4 is powered from the USB Port and does not require the use of a power adapter Audio Connections The included microphone is connected to...

Page 9: ...e Loading and Saving Presets The Evo 4 requires special configuration for compatibility with SoniClear A default set of presets for use with SoniClear are available for download After installing these...

Page 10: ...This will display the mixer with the default settings provided with the drivers Click on the File Open pulldown menu selection This opens the Load Mixer window...

Page 11: ...settings in case they pressed one of the setting buttons by accident Evo 4 Loopback Settings The Evo 4 includes a built in mixer that sends audio from the interface back to the computer This makes it...

Page 12: ...rophone on Channel 1 and the hardware loopback from the computer on Channel 2 in comparison to the teleconference participants audio coming from the computer To set the monitor mix press the monitor b...

Page 13: ...ardware tab controls the usage of the sound cards in the computer during recording Default Recording Device This is the sound card input for recording It should be set to Loopback 1 2 Audient EVO4 Not...

Page 14: ...o listen to SoniClear playback through the Evo 4 headphone jack select Main Output 1 2 Audient EVO Removable Recording Device The Use Removable Device If Present and Automatically Set Removable Device...

Page 15: ...Monitor Delay Monitor Delay should be set to the default of 3 seconds Force Recording at 44 1KHz This field should be set to Unchecked...

Page 16: ...e sound cards in the computer during playback Default Speaker Device Selection This is the sound card that will be used for playback into the teleconference call like playing into speakers in the room...

Page 17: ...Monitor Delay Monitor Delay should be set to the default of 3 seconds Force Recording at 44 1KHz This field should be set to Unchecked...

Page 18: ...d by the conference call participants and on the Evo kit monitoring headphone The playback audio will also be recorded in SoniClear A typical application would be to play a video file on the computer...

Reviews: