


©
2017 SOMFY ACTIVITÉS SA, 50 avenue du Nouveau Monde, 74300 Cluses, France REF. 5135987B – 2017-06-30
Page 4/8
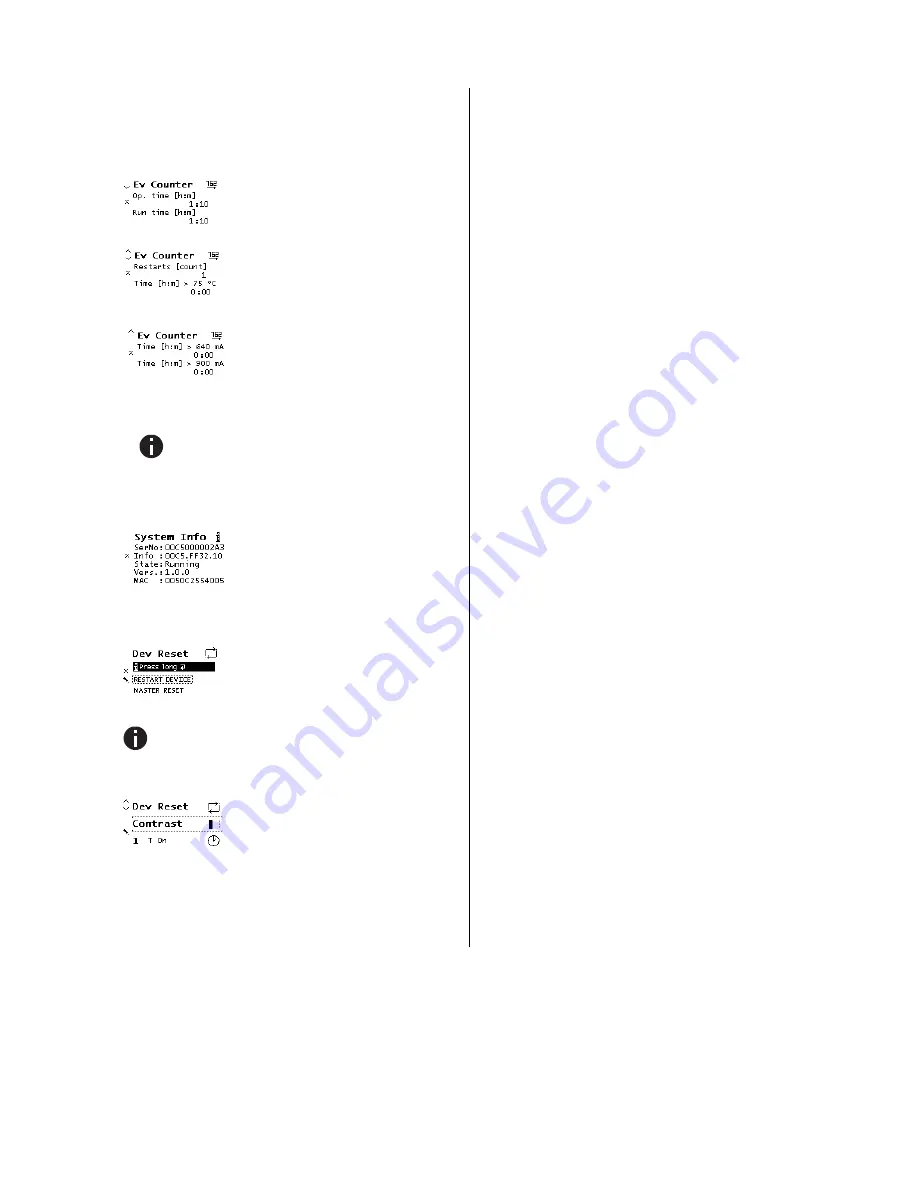
N. Submenu Event Counter
The operating status is logged automatically in the device
and can be viewed in this sub menu. All times as displayed
in the format “hours:minutes”.
Operation time:
Summed up the com-
plete operation time of the device.
Run time:
Time since the last device re-
boot. Timer starts new when device is
powered on.
Restarts:
Number of restarts. Counter
counts up when device is powered on.
Time > 75 °C:
Summed up operation
time with in-device temperature above
75 °C.
Time > 640 mA:
Summed up operation
time with current load over 640 mA; cur-
rent load of both outputs is logged.
Time > 900 mA:
Summed up operation
time with current load over 900 mA; cur-
rent load of both outputs is logged.
To extend the lifespan of the internal memory the
counter writes the log with a dynamic time
span of up to 8 hours. Thus the log data may
be lower if the device power was cut during
a log period.
O. Submenu System Info
This submenu displays
information
about the device
: serial number
(SerNo), Application-ID (Info), App sta-
tus (State),Firmware Revision (Vers.)
and MAC address (MAC).
P. Submenu Device Reset
This submenu allows you to restart the
device or to
reset to factory settings
(master reset). Select one option and
keep
❿
pressed until the small anima-
tion is finished and the option is execut-
ed.
Master reset will make a new ETS application download
necessary.
Q. Submenu Contrast
To set the contrast of the display, select
this entry in the menu. By pressing
❿
(enter) several times you can set the
contrast to different levels.
Interface settings with ETS
Within the ETS Software KNX interfaces can be selected and set
up via the ETS menu "Bus Interfaces".
The ETS can access configured KNX IP LineMaster even with-
out a database entry. If the setup of the KNX IP LineMaster does
not comply with the conditions of the KNX installation it must be
configured via an ETS project. See the ETS database section for
more information.
As factory default the assignment of the IP address is set to
“automatically via DHCP” no further IP settings are necessary.
To use this feature a DHCP server on the LAN must be present
(e.g. many DSL routers have an integrated DHCP server).
After connecting the KNX IP LineMaster to the LAN, it should
automatically appear in the ETS within the menu "Bus" under
"Discovered interfaces".
By clicking on the discovered interface it is selected as the cur-
rent interface. On the right side of the ETS window all specific
information and options of the connection appear.
The indicated device name and the "Host Individual Address"
(individual address of the device) can be changed within your
ETS project then.
Like all programmable KNX devices the KNX IP LineMaster has
an individual address (device address) which can be used to
access the device. It is used, for example, by the ETS when
downloading the application to the KNX IP LineMaster via the
bus.
For the interface function the device contains additional individu-
al addresses that can be set in the ETS (ETS 4.2 or higher).
When a client (e.g. ETS) sends via the KNX IP LineMaster tele-
grams to the bus, they contain a sender address as one from the
additional addresses. Each address is associated with a connec-
tion. Thus response telegrams can be clearly transmitted to the
respective client.
The additional individual addresses must be selected from the
address range of the bus line which the KNX IP LineMaster
provides and may not be used by another device.
Example:
Device address
1.1.0
(address within ETS topology)
Connection 1
1.1.240 (1. additional address)
Connection 2
1.1.241 (2. additional address)
Connection 3
1.1.242 (3. additional address)
Connection 4
1.1.243 (4. additional address)
Connection 5
1.1.244 (5. additional address)
Connection 6
1.1.245 (6. additional address)
The section “Individual Address” enables you to change the
individual KNX address of the currently used KNXnet/IP Tunnel-
ing connection. To check if the address you want to assign is
unique within your KNX installation you can click the button
“Address free?”


