Part B - Buttons
B1: touch
button
B2: Display illumination
B3: Alarm clock
B4: Up arrow
▲
B5: Down arrow
▼
B6:
Change channel (sensor)
B7: Temperature alarm
B8: city settings
B9: Battery compartment
B10: USB output (charger) 5V/1A
B11: Power socket
B12: Stand
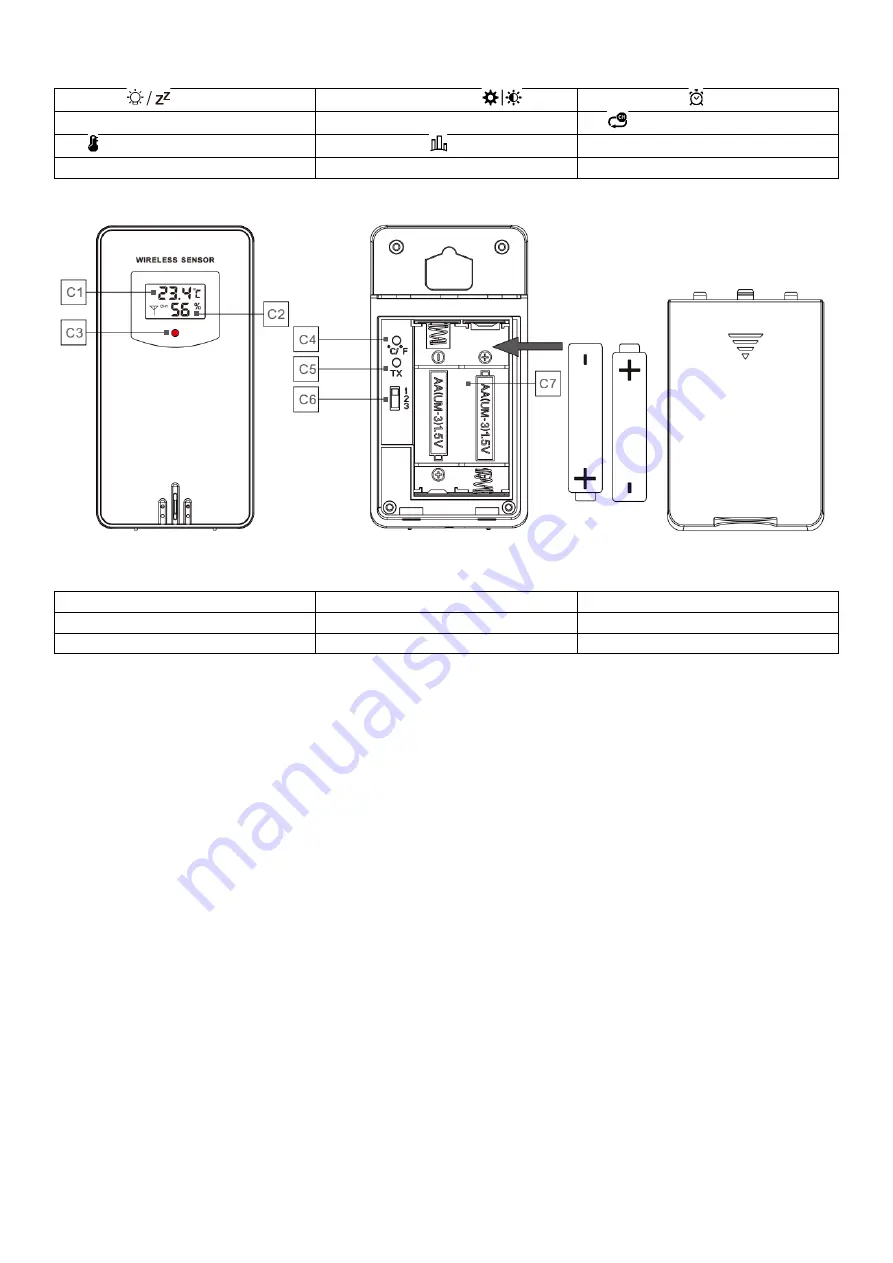
Part C - Wireless sensor
C1: Temperature indicator
C2: Humidity indicator
C3: RF signal transmitting diode
C4: Switching units °C/°F
C5: TX button - start transmitter
C6: Channel switching
C7: Battery compartment
Turn on
•
Insert the batteries while observing the marked polarity. All icons of the weather station will light up for three
seconds, an audible alarm will sound and the internal temperature, humidity and pressure measurements will start
automatically. Then plug in the power supply.
•
The weather station will now start to establish a connection with the wireless sensor. This takes about 3 minutes
and is indicated by a flashing RF symbol in the "OUTDOOR" segment of the display. Insert the batteries into the
wireless sensor, taking care to observe the marked polarity. The wireless signal transmission will start
automatically. Set the desired channel using switch C6 and button B6 on the weather station. When the signal is
received, the measured values are shown on the display.
•
Up to three wireless sensors can be paired to the main unit. Use the B6 button to change channels on the main
unit.
•
If the signal is not received, -- is displayed. Long press the B6 button to invoke manual sensor pairing. Press button
C5 on the sensor to do the same.
Settings
Long press the B2 button to enter the weather station settings. Use the arrow keys B4 or B5 to change the individual
values. Confirm the selected value by pressing B2 briefly to switch to the next item in the settings. The same principle
is used for setting values in other menus. The sequence of setting items is as follows (when setting the language to
English):
BEEP -> TEMP -> PRESS -> AUTO RCC -> AUTO DST -> TIME ZONE -> FORMAT -> HOUR -> MINUTE -> YEAR -> MONTH
--> DATE -> LANGUAGE -> REL PRESSURE -> WEATHER -> EXIT


