PRODUCT MANUAL
8-Zone RGB Remote Control
8-Z
one R
GB R
emot
e C
on
tr
ol
™
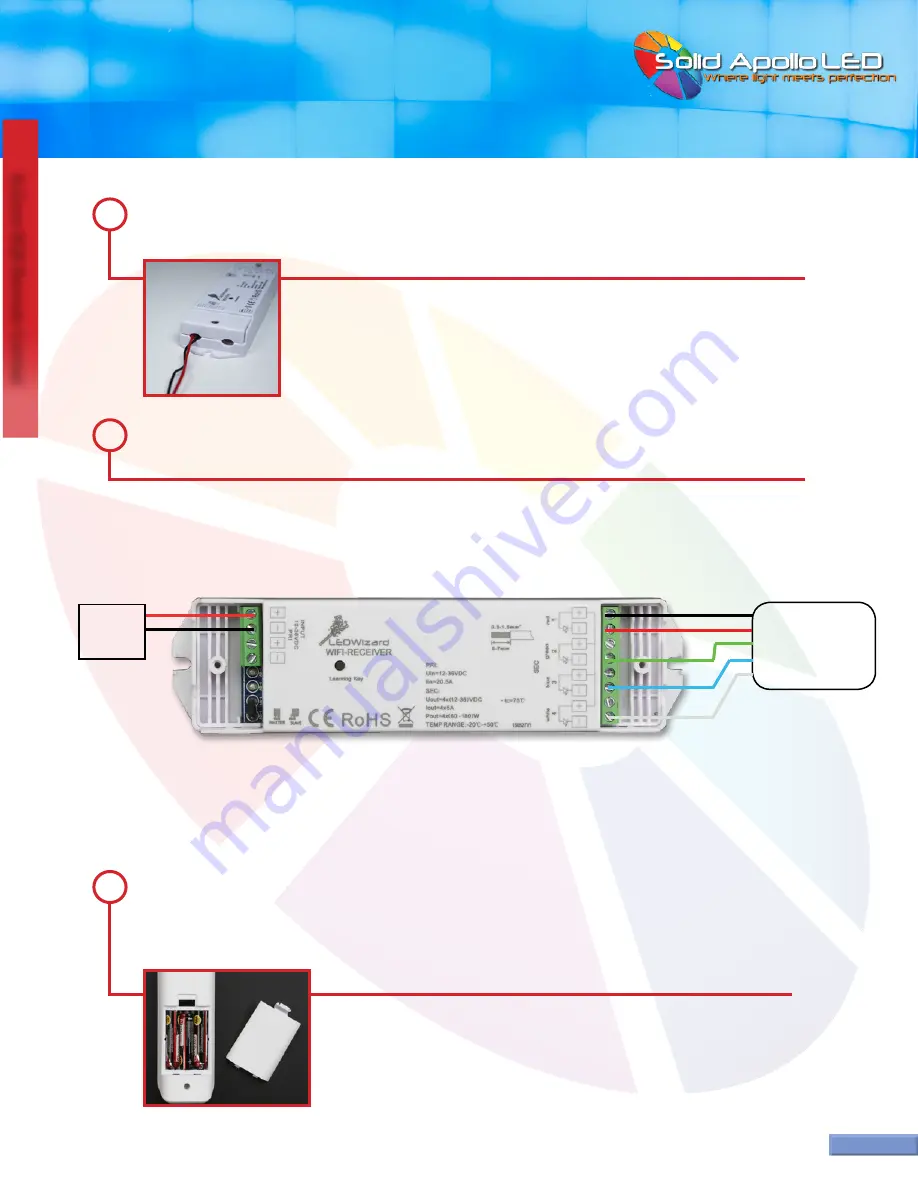
Receiver Wiring Diagram:
The wiring for the receiver is now complete. Place the white receiver end caps back on the receiver and screw them down
securely using the Philips Screwdriver.
7
Plug in the power supply to the wall outlet. The LED fixture will turn on automatically. The unit is now ready to pair
with the 8 Zone Controller.
8
Toll Free: 866.592.3873
Email: [email protected]
www.SolidApollo.com
Power
Source
(+)
(-)
LED
RGB-W
Light Fixture
(+)
(-)
(-)
(-)
(-)
Page 4
...continued on next page
On the backside of the controller, open the battery cover door by pushing down on the upper door tab. The door will
open from the top. Take three AAA batteries and install them in the correct orientation as noted inside the battery
area. Reinstall the battery door by inserting the bottom tabs first then carefully pushing the top down until it snaps
into place.
1
This section will show you how to install the batteries in your new 8 Zone Controller.
Adding Batteries to 8 Zone Controller


