11
Installation Steps
2.9 Step 9 Install the bottom tube assembly
If required, adjust the adjustable angle within the bottom tube assembly as previously
shown. Seal all external tube seams including the angle by applying tape over the seams on
the outside of the tube.
Prior to installing the bottom tube assembly carefully apply tape
apply to the outside of the
tube over the tube seams and around the angle.
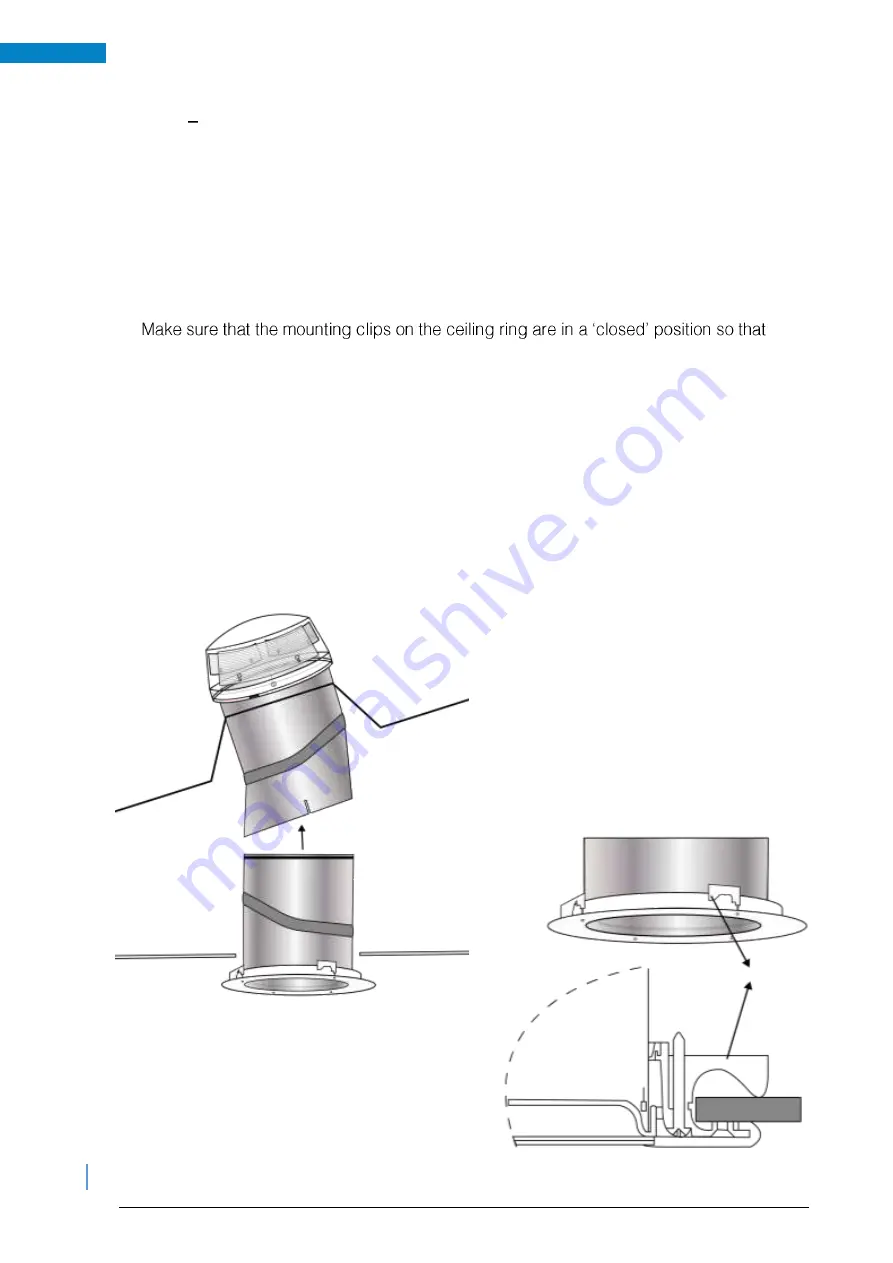
Carefully push the bottom tube assembly up through the opening created in the ceiling and
up into the inside the top tube assembly, until the ceiling ring is flush with the ceiling.
Tip:
they fit through the ceiling opening.
Tighten the four fixings screws within the ceiling ring which will engage the mounting clips,
tightening them down onto the ceiling to clamp the bottom tube assembly in place.
Alternatvely, if the mounting clips cannot be used (for example with a concrete finish or a
double boarded ceiling), or if the ceiling ring does not fit tightly enough, it can be fixed with
screws through the pre-defined fixing points moulded into the ceiling ring. The pre-defined
fixing points in the ceiling ring must be pre-drilled for the screws prior to being fixed in this
way.
Now remove the transparent protective foil from the inside of the bottom tube assembly.
1
2


