background image


Solar Mobility LLC 


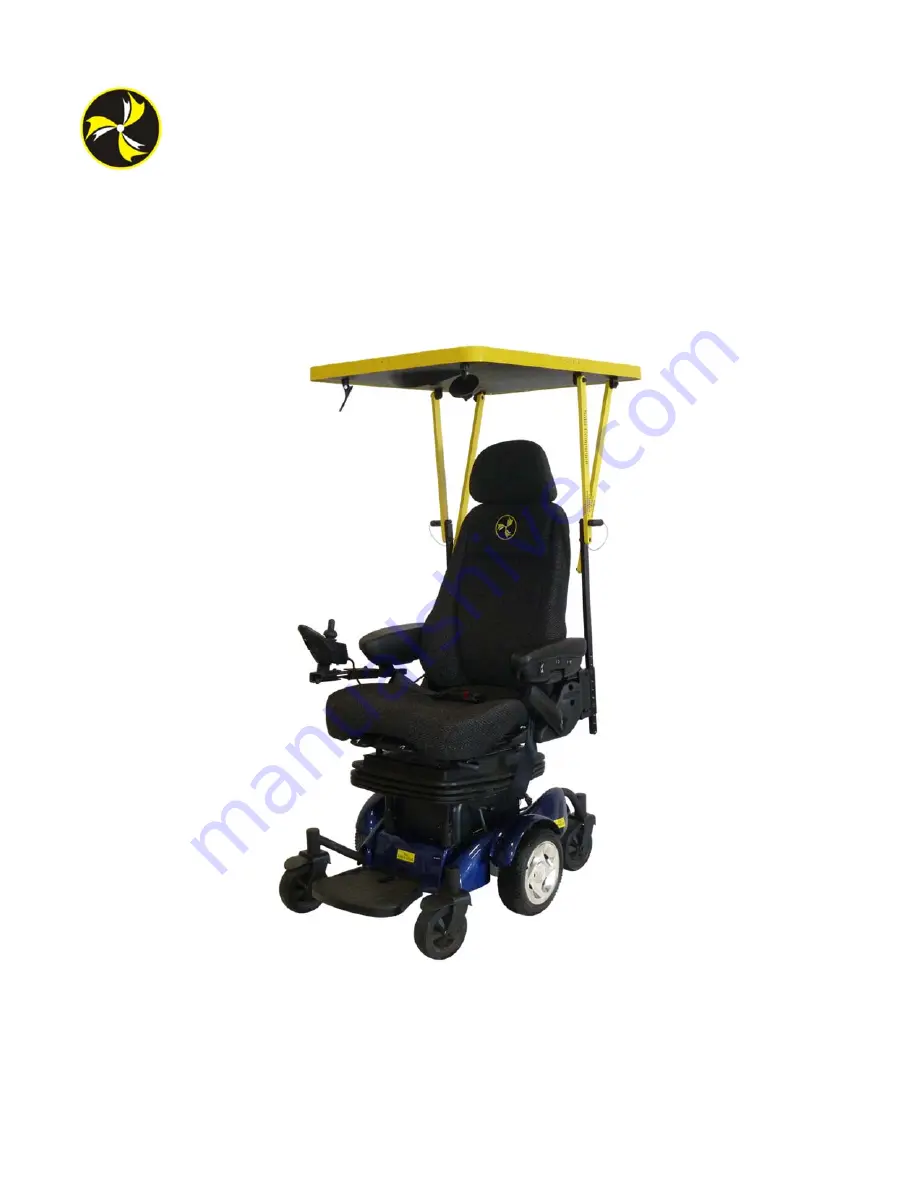
The Liberator 

Service Guide


This Service Guide contains: 

Troubleshooting Replacement 

Instructions Illustrated Parts 

Diagrams 

Summary of Contents for liberator

Page 1: ...Solar Mobility LLC The Liberator Service Guide This Service Guide contains Troubleshooting Replacement Instructions Illustrated Parts Diagrams ...

Page 2: ...s solarmobilityinc com PAGE 2 www solarmobilityinc com Contact Information Solar Mobility LLC 1426 East 3rd Ave Kennewick WA 99336 Phone 509 851 3611 Fax 509 396 9051Email E mail sales solarmobilityinc com ...

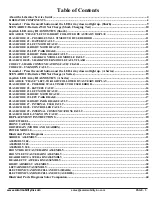
Page 3: ...14 SCENARIO 2 Batteries Will Not Charge A Series 15 Joystick LED Array DIAGNOSTICS A Series 16 LED ARRAY CHASE LEFT TO RIGHT FOLLOWED BYA STEADY DISPLAY 16 FLASH CODE 1 POSSIBLE STALL TIMEOUT OR USER ERROR 16 FLASH CODE 2 BATTERY FAULT 16 FLASH CODE 3 LEFT MOTOR FAULT 16 FLASH CODE 4 RIGHT MOTOR FAULT 16 FLASH CODE 5 LEFT PARK BRAKE 17 FLASH CODE 6 RIGHT PARK BRAKE FAULT 17 FLASH CODE 7 INTERNAL U...

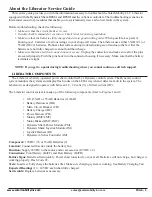
Page 4: ...ery terminals are tight NOTE If you get to a point during troubleshooting where you cannot continue call tech support LIBERATOR COMPONENTS The Liberator is battery operated power chair controlled by a Dynamic control system The Dynamic control system monitors the systems and display flash codes on the LED Array when it detects a fault in the system The Liberator was designed to operate with betwee...

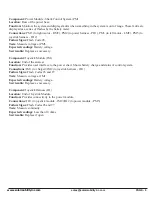
Page 5: ...1 and CB2 Also check for continuity across the harnesses connect the circuit breaker to the battery CB3 and CB4 and across CB5 and CB6 Expected reading Less than 10 ohms Serviceable Circuit breaker must be replaced with exact current rating Replace wires as necessary Component Battery Charger BC Location Stored inside a pouch on the seatback Function Recharges batteries Connections C1 connects to ...

Page 6: ...attery voltage Serviceable Replace as necessary Component Joystick Module JM Location End of the armrest Function Provides user interface to the power chair Shows battery charge and status of control system Connections JM1 to charger JM2 to joystick harness JH1 Failure Signs Flash Codes 6 and 7 Tests Measure voltage at JM1 Expected readings Battery voltage Serviceable Replace as necessary Componen...

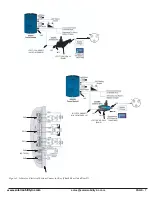
Page 7: ...tyinc com JH2 JM1 JOYSTICK HARNESS 8 FROM PAGE 36 JH1 JM2 JOYSTICK MODULE REMD JH2 JM1 PM1 JOYSTICK HARNESS 10 FROM PAGE 36 JH1 JM2 JOYSTICK MODULE REMA PM2 PM3 PM4 NOT USED PM5 Figure 1 Liberator Electrical System Connector Key Shark Rem A and Rem D ...

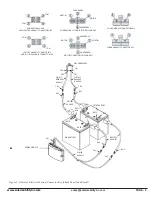
Page 8: ... COM POWER HARNESS CONNECTOR PH1 JOYSTICKHARNESS CONNECOR JH2 AND JOYSTICK MODULE CONNECTOR JM2 PARK BRAKE MOTOR CONNECTORS LMT AND RMT CIRCUITBREAKER CB2 CB1 CB5 CB3 CIRCUIT BREAKER HARNESS CIRCUIT BREAKER HARNESS CB6 CB4 BH3 BH1 BATTERY HARNESS BATF BH4 BH2 FRONTBATTERY BATF BH5 BATR BH7 BATR PH1 REARBATTERY BH8 BATTERY HARNESS POWERMODULE POWER HARNESS PH2 PH3 BH6 Figure 2 Liberator Electrical ...

Page 9: ...ck harness JH1 from the joystick module 4 Measure voltage across pin 1 and pin 4 on the joystick harness JH1 0VDC Go to the next step 18 25VDC or battery voltage Replace the joystick module 5 Remove the seat 6 Remove the battery box cover 7 Disconnect the joystick module JM2 from the power module 8 Measure voltage across pin 1 and pin 4 on the power module PM5 0VDC Go to the next step 18 25VDC or ...

Page 10: ...tery cover lid Check the batteries and cables for loose or corroded terminals Clean and tighten if necessary 4 Measure voltage across the rear battery positive terminal BATR the front battery negative terminal BATF These are the two battery terminals opposite the circuit breaker Less than 18VDC Load test and replace batteries as necessary More than 18VDC Go to next step 0VDC Go to step 9 5 Unplug ...

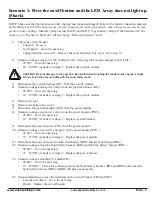
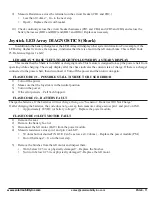
Page 11: ...rrent state of charge If there is a charger connected to the power chair then disconnect it Turn off the power and then turn it on again FLASH CODE 1 POSSIBLE STALL TIMEOUT OR USER ERROR 1 Turn off the power 2 Make sure that the Joystick is in the neutral position 3 Turn on the power 4 If the error persists Call Tech Support FLASH CODE 2 BATTERY FAULT Charge the batteries If the batteries will not...

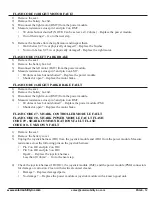
Page 12: ...SH CODE 6 RIGHT PARK BRAKE FAULT 1 Remove the seat 2 Remove the battery box lid 3 Disconnect the right motor RMT from the power module 4 Measure resistance across pin 3 and pin 4 on RMT 80 ohms or less but not shorted Replace the power module PM Shorted or open Replace the motor brake FLASH CODE 7 SHARK CONTROLLER MODULE FAULT FLASH CODE 8 SHARK POWER MODULE FAULT FLASH CODE 9 SHARK COMMUNICATIONS...

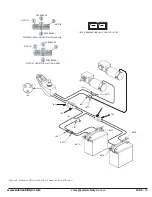
Page 13: ...R PARK BRAKE POWER MODULE CONNECTORS JM3 and JM4 CIRCUIT BREAKER HARNESS CONNECTOR CB5 PARK BRAKE MOTOR PARK BRAKE MOTOR CONNECTORS LMT1 AND RMT2 JM4 JM1 RMT1 JM2 JM3 LMT1 CB4 CB5 CB1 BATR1 CB3 CB2 BATF BATR BATF1 BATF BATR Figure 3 Liberator Electrical System Connector Key A Series ...

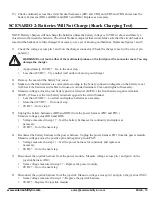
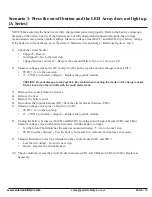
Page 14: ...lace the joystick module CAUTION Prevent damage to the Joystick Be careful when touching the leads on the charger socket Do not touch the other pin 3 with the multi meter leads 3 Remove the joystick from the armrest 4 Remove the Seat 5 Remove the battery cover 6 Disconnect the joystick harness JH1 from the circuit breaker harness CB5 7 Measure voltage across pins 1 and pin 2 on CB5 0VDC Go to the ...

Page 15: ...d terminals Clean and tighten if necessary 4 Measure voltage across the rear battery positive terminal BATR the front battery negative terminal BATF These are the two battery terminals opposite the circuit breaker Less than 18VDC Load test and replace batteries as necessary More than 18VDC Go to next step 0VDC Go to step 9 5 Unplug the battery harnesses BATF1 and BATR1 from the circuit breaker har...

Page 16: ... to Scenario 2 Batteries Will Not Charge If after charging the batteries the code does not go away then measure voltage across pin 1 and pin 2 on JM1 Approximately 24VDC or battery voltage Replace the power module FLASH CODE 3 LEFT MOTOR FAULT 1 Remove the seat 2 Remove the battery box lid 3 Disconnect the left motor LMT1 from the joystick module 4 Measure resistance across pin 1 and pin 2 on LMT1...

Page 17: ...lid 3 Disconnect the right motor RMT1 from the joystick module 4 Measure resistance across pin 3 and pin 4 on RMT1 80 ohms or less but not shorted Replace the joystick module Open or shorted Replace the motor brake FLASH CODE 7 INTERNAL USER FAULT FLASH CODE 8 CONTROLLER FAULT FLASH CODE 9 INTERNAL COMMUNICATIONS FAULT FLASH CODE 10 UNKNOWN FAULT 1 Remove the seat 2 Remove the battery cover 3 Chec...

Page 18: ...r chair in drive mode 3 Place a support under the frame so that the drive wheel is off of the ground 4 Remove the drive wheel Make sure to retain the axle key See figure 4 5 Install the new drive wheel Make sure that the axle key is installed correctly in the axle slot 6 Remove the frame support 7 Power on and test the power chair AXLE KEY Figure 4 Liberator Drive Wheel Assembly ...

Page 19: ...e power chair in drive mode 3 Place a support under the frame so that the caster wheel is off of the ground 4 Remove the cap from caster arm See figure 4 5 Remove the nut that fastens the caster wheel to the caster arm See figure 5 Make sure you retain the washer 6 Install the new caster assembly 7 Remove the frame support 8 Power on and test the power chair CAP NUT WASHER Figure 5 Front Caster As...

Page 20: ...gure 6 10 Disconnect the circuit breaker from the frame 11 Unfasten the battery shroud from the frame See figure 6 12 Unfasten the drivetrain from the frame See figure 7 13 Lift up the battery shroud enough to pull the motor harness through the frame 14 Install the new drivetrain onto the frame 15 Connect the drivetrain to the power module 16 Reinstall the battery shroud to the frame 17 Reinstall ...

Page 21: ...sales solarmobilityinc com PAGE 21 www solarmobilityinc com AXLE KEY DRIVEWHEEL DRIVETRAIN Figure 7 Liberator Drivetrain Assembly ...

Page 22: ...t 5 Remove the battery cover 6 Disconnect the motors LMT and RMT the power harness PH1 and the joystick harness JH2 from the power module 7 Remove the power module from the battery box See figure 8 8 Install the new power module onto the battery box 9 Reconnect the motors LMT and RMT the power harness PH1 and the joystick harness JH2 10 Reinstall the battery box cover 11 Reinstall the seat 12 Conn...

Page 23: ...www solarmobilityinc co sales solarmobilityinc com PAGE 23 Illustrated Parts Diagrams SHROUD ASSEMBLY ...

Page 24: ...roud Green Right Rear for Liberator 1 5 MBB CORRRF Shroud Red Right Rear for Liberator 1 6 MBB COBLLFF Shroud Small Black Left Front for Liberator 1 6 MBB COBLFF Shroud Blue Small Left Front for Liberator 1 6 MBB COGLFF Shroud Small Green Left Front for Liberator 1 6 MBB CORLFF Shroud Red Left Small Front for Liberator 1 7 MBB COBLRFF Shroud Small Black Right Front for Liberator 1 7 MBB COBRFF Shr...

Page 25: ...www solarmobilityinc com sales solarmobilityinc co PAGE 25 ASSEMBLY 100 ...

Page 26: ...www solarmobilityinc com sales solarmobilityinc co PAGE 26 ASSEMBLY 200 ...

Page 27: ...S PAN HD TYPE A HI LO 2 21 06SOl33 WASHER FLAT 3441D x 6880D x 0 07THK 4 22 S33271 SL I DE LOCK I NG 611 W HANDLE 1 23 Sl7685 SLIDE SLAVE 6 11 1 24 52SOl21 NUT FLANGE M8 X I 25 4 25 42SOI04 5 16 18 UNC X 50 LONG SOCKET HEAD CAP 4 26 SA36 I 66 ASSY SUSP LPA 40 SER I ES 1 27 MBH CORSR Receiver Rear Seat for Liberator 14 1 28 MBH CORECS Receiver Front 3 Notch Seat for Liberator 15 1 29 MBE BATTU1 BAT...

Page 28: ...www solarmobilityinc com sales solarmobilityinc co PAGE 28 ASSEMBLY 300 NOTE DETAIL 1UPTO SERIALNUMBER CW0750200 ...

Page 29: ...IDE SUPPORT 2 14 MBK COAAHW CASTER ARM ADJUSTMENT BRACKET WASHER 2 15 MBK COAAHW SCREW MACHINE PHILLIPS HEAD FLAT 10 mm Could not remove 2 16 MBK COAAHW BUSHING 10MM X 6MM X 13MM 2 17 PIN 19 MILLIMETER X 150 MILLIMETER 2 18 MBB COMAINFR Frame Main for Liberator 1 19 PIN 19 MILLIMETER X 94 MILLIMETER 2 20 SNAP RING 19 MILLIMETER 8 21 MBH COFOOTPL Plate Foot for Liberator 1 22 MBW COCAFL1 Arm Front ...

Page 30: ...www solarmobilityinc com sales solarmobilityinc co PAGE 30 FRONT RIGHT CASTER ARM ASSEMBLY ...

Page 31: ...ud for Liberator 1 6 Nylock nut M8 1 7 Flat washer 8 5 ID x 15 8 OD x 1 5 mm TH 1 8 Flat washer 12 ID x 24 OD x 2 mm TH 2 9 MBB COFK Fork Caster Wheel for Liberator 1 10 SCREW PHILLIPS ROUND HEAD 6 Mmm Could not remove 2 11 SHCS M8 1 25 x 80 mm 1 12 Flat washer 8 5 ID x 15 8 OD x 1 5 mm TH 2 13 MBW COCAST Wheels Caster for Liberator 1 14 MBW COCAFR1 Arm Right Front Caster for Liberator 1 15 CASTER...

Page 32: ...www solarmobilityinc com sales solarmobilityinc co PAGE 32 FRONT LEFT CASTER ARM ASSEMBLY ...

Page 33: ...Flap Caster Mud for Liberator 1 6 Nylock nut M8 1 7 Flat washer 8 5 ID x 15 8 OD x 1 5 mm TH 1 8 Flat washer 12 ID x 24 OD x 2 mm TH 2 9 MBB COFK Fork Caster Wheel for Liberator 1 10 SCREW PHILLIPS ROUND HEAD 6 Mmm Could not remove 2 11 SHCS M8 1 25 x 80 mm 1 12 Flat washer 8 5 ID x 15 8 OD x 1 5 mm TH 2 13 MBW COCAST Wheels Caster for Liberator 1 14 MBW COFLCA MBW COCAFL1 1 15 CASTER WHEEL BEARIN...

Page 34: ...www solarmobilityinc com sales solarmobilityinc co PAGE 34 REAR RIGHT CASTER ARM ASSEMBLY ...

Page 35: ...Mud for Liberator 1 6 Nylock nut M8 1 7 Flat washer 8 5 ID x 15 8 OD x 1 5 mm TH 1 8 Flat washer 12 ID x 24 OD x 2 mm TH 2 9 MBB COFK Fork Caster Wheel for Liberator 1 10 SCREW PHILLIPS ROUND HEAD 6 Mmm Could not remove 2 11 SHCS M8 1 25 x 80 mm 1 12 Flat washer 8 5 ID x 15 8 OD x 1 5 mm TH 2 13 MBW COCAST Wheels Caster for Liberator 1 14 MBW COCARR1 Arm Right Rear Caster for Liberator 1 15 CASTER...

Page 36: ...www solarmobilityinc com sales solarmobilityinc co PAGE 36 REAR LEFT CASTER ARM ASSEMBLY ...

Page 37: ...Mud for Liberator 1 6 Nylock nut M8 1 7 Flat washer 8 5 ID x 15 8 OD x 1 5 mm TH 1 8 Flat washer 12 ID x 24 OD x 2 mm TH 2 9 MBB COFK Fork Caster Wheel for Liberator 1 10 SCREW PHILLIPS ROUND HEAD 6 Mmm Could not remove 2 11 SHCS M8 1 25 x 80 mm 1 12 Flat washer 8 5 ID x 15 8 OD x 1 5 mm TH 2 13 MBW COCAST Wheels Caster for Liberator 1 14 MBW COCARL1 Arm Left Rear Caster for Liberator 1 15 CASTER ...

Page 38: ...www solarmobilityinc com sales solarmobilityinc co PAGE 38 RIGHT ARMREST ASSEMBLY ...

Page 39: ...AD RH 1 4 SA37509 ASSY ARMREST RH 1 5 S9437 PAD ROLLER 2 6 12SOl25 SCREW SELF DR I 4 X 75LG TYPE AB TH 2 7 S21993 KNOB HEIGHT ARMREST 1 8 63SOl51 BTN HD SKT CAP SCR M8 X I 25 X 25mm LG 2 9 S26002 COVERS SIDE 5500 RH 1 10 06SOl35 WASHER FLAT 3901D x I 1200D 2 Sold with MBH CORAA Arm Complete Right for Liberator Sold with MBB CORAA24 Arm Complete Right 24W for Liberator ...

Page 40: ...www solarmobilityinc com sales solarmobilityinc co PAGE 40 LEFTARMREST ASSEMBLY ...

Page 41: ...26672 ASSY ARM BRKT L H 1 5 28SOI02 SWITCH COOL AIR HEAT SELECTER 1 6 S3 I 260 SWITCH COOL HEAT FAN CONTROL 1 7 S20952 SWITCH VALVE 1 8 63SOl51 BTN HD SKT CAP SCR M8 X I 25 X 25mm LG 4 9 S26001 COVERS SIDE 5500 LH 1 10 12SOl25 SCREW SELF DR I 4 X 75LG TYPE AB TH 2 Sold with MBB COLAA24 Arm Complete Left 24W for Liberator Sold with MBH COLAA Arm Complete Short Left 14 for Liberator GP600M ...

Page 42: ...22 55ah 1 3 MBE COBCAC Harness Circuit Break 17 Battery 1 4 MBE COBCAR Harness Rear Battery for Liberator 2 5 MBE COBCBH Harness Circuit Breaker 1 6 MBE COCBCAC Cable Jumper 1 0 1 7 MBC DYNSJ1 Joystick Dynamic DK REM D01 1 8 MBE DYNSBC2 Cable Dynamic Shark 1 5m Jumper Use with MBC DYNSJ1 1 9 MBC DYNSJ Joystick Dynamic DK REM D3V 1 10 MBC DYNS12 Cable Dynamic 1 2m Jumper Use with MBC DYNSJ 1 Shown ...

Page 43: ...NICS AND MISCELLANEOUS A SERIES Ref Part Description Qty 1 MBC DYNA50 CONTOLLER DYNAMIC A SERIES 50A 1 2 MBE COCBH HARNESS CIRCUIT BREAKER 1 3 MBE COBCS SET BATTERY CABLE 1 4 MBE COBCS SET BATTERY CABLE 1 5 MBD COMAL MOTOR LEFT 1 6 MBD COMAR MOTOR RIGHT 1 6 5 1 2 3 4 ...

Page 44: ...ong R 1 6 Yellow Arm Short R 1 7 Black Mount Leg R 1 8 Universal Mount R 1 9 Universal Mount L 1 10 Black Mount Leg L 1 11 Yellow Arm Short L 1 12 Yellow Arm Long L 1 13 R Review Mirror 1 14 L Review Mirror 1 15 Strobe Controller 1 16 12 V Power Port 1 17 20 1 Socket Screws 8 18 20 1 Socket Screws 4 19 20 Nylock Nuts 12 20 Nylon Flat Washer 8 21 Flat Washer 12 22 Rivet Aluminum Black 17 22 Rivet A...

Page 45: ...www solarmobilityinc com sales solarmobilityinc co PAGE 45 ...

Page 46: ...yinc com sales solarmobilityinc co PAGE 46 Solar Mobility LLC Solar Mobility LLC 1426 East 3rd Ave Kennewick WA 99336 Phone 509 851 3611 Fax 509 396 9051 E mail kurt solarmobilityinc com E mail bob solarmobilityinc com ...

Reviews: