8
3.
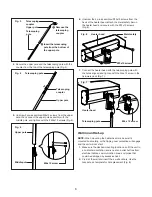
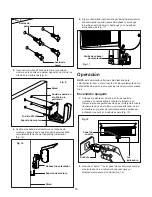
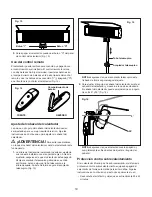
To switch off the heater, press the O button on the control
panel of the heater (Fig. 13).
Using the Remote Control
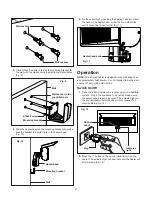
The heater can also be switched on and off with the equipped
remote control. The remote control is powered by two AAA
batteries (not included). Insert the batteries in the battery
compartment on the back of the remote control and use the O
button and I button on the front to control the heater (Fig. 14).
Adjusting the Heating Head
The position and angle of the heating head can be adjusted for
better heating result. Follow the instructions below to adjust
the heating head.
m
WARNING!
To avoid burns, do not touch the
heater head when the heater is working.
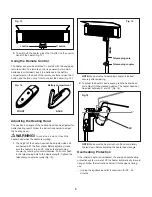
1. The height of the heater head can be adjusted when it's
connected with the floor stand. Before adjusting, make
sure the heater is turned off. Loosen the telescoping
coupler by twisting it counterclockwise. Pull out or push
in the telescoping pole to the desired length. Tighten the
telescoping coupler securely (Fig. 15).
NOTE:
Make sure the telescoping coupler is locked
securely after adjusting.
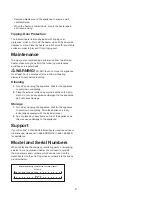
2. To adjust the heater head's angle, grab the heater head
and adjust it to the desired position. The heater head can
be adjust between 0º and 25º (Fig. 16).
NOTE:
Make sure the heater is shut off and completely
cooled down before adjusting the heater head's angle.
Overheating Protection
If the infrared heater is overheated, the equipped overheating
protection system will shut off the heater automatically to avoid
danger. Follow the instructions below if this happens during
use:
• Unplug the appliance and let it cool down for 30 - 45
minutes.
Fig. 13
O button
I button
R
Fig. 14
FRONT
Battery compartment
BACK
Fig. 15
Telescoping coupler
Telescoping pole
Fig. 16
0º
25º


