7
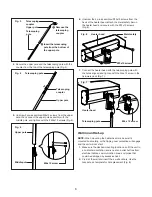
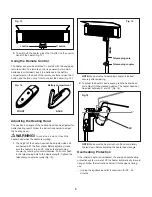
Fig. 8
Wall anchors
Wall anchors
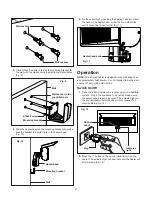
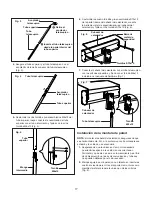
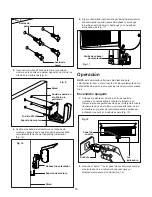
3. Use 4 ST4x30 screws to fasten the mounting bracket to
the wall with the wall anchors inside the pre-drilled holes
(Fig. 9).
4. Slide the heater head on the mounting bracket and make
sure the bracket is inserted fully in the heater head
(Fig. 10).
5. Fix the assembly by inserting the heating head knob from
the back of the heater head, screw the knob clockwise
until it cannot be turned further (Fig. 11).
Operation
NOTE: This infrared heater is designed for spot heating or as
a supplementary heat source. It's not intended to be the main
source of heat during cold months.
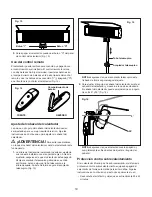
Switch On/Off
1. Place the infrared heater on a level and non-combustible
surface. Plug in the appliance to an outlet, making sure
the power supply is same as rated. The indicator light on
the control panel will start flashing, which means it's in
standby status (Fig. 12).
2. Press the "I" button on the control panel to turn on the
heater. The indicator light will illuminate and the heater will
start working (Fig. 13).
Fig. 9
Wall
Wall-anchor in the
pre-drilled hole
ST4x30 screw
Mounting bracket
Fig. 10
Wall
Mounting bracket
Heater head
Fig. 11
Heater head knob
Fig. 12
Plug
Control
panel
Indicator
light


