background image


IMPORTANT SAFETY INSTRUCTIONS 

 
WARNING: This powerful cutting machine is capable of amputating hands and feet and can throw objects that 
can cause injury and damage! Failure to comply with the following SAFETY instructions could result in serious 
injury or death to the operator or other persons. The owner of the machine must understand these instructions 
and must allow only persons who understand these instructions to operate machine. Each person operating the 
machine must be of sound mind and body and must not be under the influence of any substance, which might 
impair vision, dexterity or judgment. If you have any questions pertaining to your machine which your dealer 
cannot answer to your satisfaction, call or write the Customer Service Department at SNAPPER, McDonough, 
Georgia 30253. Phone: (1-800-935-2967). 
 

PROTECTION FOR CHILDREN 

Tragic accidents can occur if the operator is not 
alert to the presence of children. Children are often 
attracted to the machine and the mowing activity. 
Never assume that children will remain where you 
last saw them. 

1.  KEEP children out of the mowing area and 

under the watchful care of a responsible adult. 

2.   DO NOT allow children in yard when machine is 

operated and turn machine OFF if anyone 
enters the area.
 

3.   DO NOT allow pre-teenage children to operate 

machine. 

4.  ALLOW only responsible adults & teenagers 

with mature judgment under close adult 
supervision to operate machine.
 

5. 


DO NOT pull mower backwards unless 
absolutely necessary. LOOK and SEE behind 
and down for children, pets and hazards before 
and while backing.
 

6. 

 USE EXTRA CARE when approaching blind 

corners, shrubs, trees, or other objects that may 
obscure vision.


SLOPE OPERATION


1.   Slopes are a major factor related to slip and fall 

accidents, which can result in severe injury. All 
slopes require extra caution. If you feel uneasy 
on a slope, DO NOT mow it. 

2. 


Mow across slopes, never up-and-down. 
Exercise extreme CAUTION when changing 
directions on slopes. DO NOT mow steep 
slopes or other areas where stability or traction 
is in doubt. 

3.  Use extra care with grass catchers or other 

attachments; these affect the handling and the 
stability of the machine.


PREPARATION 

1.   Read, understand, and follow instructions and 

warnings in this manual and on the mower, 
engine and attachments. Know the controls and 
the proper use of the mower before starting. 

2.   Only mature, responsible persons shall operate 

the machine and only after proper instruction. 


PREPARATION 

(Continued From Previous Column) 

3.   Data indicates that operators age 60 and above, 

are involved in a large percentage of mower-
related injuries. These operators should 
evaluate their ability to operate the mower 
safely enough to protect themselves and others 
from serious injury. 

4.   Handle fuel with extra care. Fuels are flammable 

and vapors are explosive. Use only an approved 
fuel container. DO NOT remove fuel cap or add 
fuel with engine running. Add fuel outdoors 
only with engine stopped and cool. Clean 
spilled fuel and oil from machine. DO NOT 
smoke.  

5.   Check the area to be mowed and remove all 

objects such as toys, wire, rocks, limbs and 
other objects that could cause injury if thrown 
by blade or interfere with mowing. Also note the 
location of holes, stumps, and other possible 
hazards.
 

6.   Keep people and pets out of the mowing area. 

Immediately, STOP Blade, Stop engine and Stop 
mower if anyone enters the area.
 

7. 

 Check shields, deflectors, switches, blade 

controls and other safety devices frequently for 
proper operation and location.
 

8.   Make sure all safety decals are clearly legible. 

Replace if damaged. 

9.   Protect yourself when mowing and wear safety 

glasses, long pants and substantial footwear. 
DO NOT mow barefooted or with sandals.
 

10.  Know how to STOP blade and engine quickly in 

preparation for emergencies. 

11.  Use extra care when loading or unloading the 

machine into a trailer or truck. 

12.  Check grass catcher components frequently for 

signs of wear or deterioration and replace as 
needed to prevent injury from thrown objects 
going through weak or torn spots.


Summary of Contents for FRP2167517BV

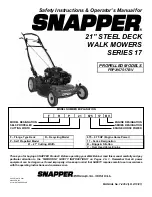
Page 1: ...elled Model 17 Series Designation 21 21 Cutting Width B Briggs Stratton V Over Head Valve Engine Thank you for buying a SNAPPER Product Before operating your Walk Behind read this manual carefully and...

Page 2: ...extreme CAUTION when changing directions on slopes DO NOT mow steep slopes or other areas where stability or traction is in doubt 3 Use extra care with grass catchers or other attachments these affect...

Page 3: ...rate engine in enclosed areas Engine exhaust gases contain carbon monoxide a deadly poison MAINTENANCE AND STORAGE 1 DO NOT store mower or fuel container inside where fumes may reach an open flame spa...

Page 4: ...ice Annually 11 Engine 11 Air Filter 11 Engine Oil 11 Storage Procedure 11 SECTION 4 ADJUSTMENTS AND REPAIR 12 18 Mower Blade Replacement 12 Blade Sharpening 12 13 Wheel Drive Control Adjustment 13 Dr...

Page 5: ...he nomenclature drawing above Figure 1 1 shows the essential parts of the SNAPPER WALK BEHIND MOWERS It is recommended that all operators of the mower become thoroughly familiar with the controls part...

Page 6: ...re cap is tightened after refueling Refer to Engine Owners Manual for specifications 2 1 6 Clean exterior surfaces of cutting deck and engine of any accumulation of spilled fuel dirt grass oil etc Kee...

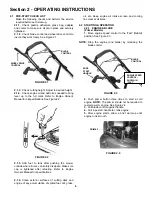
Page 7: ...n the lower nuts on each lower handle as shown in Figure 2 6 FIGURE 2 6 2 Move upper mower handle up or down until the desired position is achieved 3 Tighten the lower nuts on each lower handle to mai...

Page 8: ...n mulching some grass may blow out from under front of baffle This is normal but the amount of grass blowing out can be reduced Lower baffle slightly to reduce the amount of grass blow out 1 Stop engi...

Page 9: ...ll components to cool 2 8 INSTALLATION of DISCHARGE DEFLECTOR Optional accessory on some models 1 Remove front and rear nuts attaching recycling cover to deck See Figure 2 10 2 Install discharge defle...

Page 10: ...s allow sufficient time for all components to cool 1 Refer to Engine Manual for proper oil specifications and procedures 2 For simplest cleanest oil change loosen lower handle wing nuts and stand mowe...

Page 11: ...amaged replace belt before operating mower 3 2 5 CHECK TRANSMISSION POLY V BELT 1 Visually check poly v belt for cracking fraying severed or belt strands exposed If worn or damaged replace belt before...

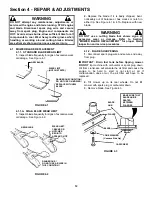
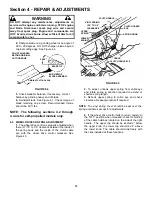
Page 12: ...e Figure 4 1 4 1A Replace with new blade WARNING DO NOT use a cutting blade that shows signs of excessive wear or damage Refer to Section MOWER BLADE REPLACEMENT for proper blade inspection and servic...

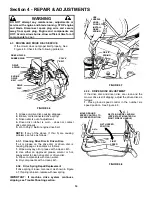
Page 13: ...earance between the inside of the spring hook and the inside of the clutch cable eye with the wheel drive control released See Figure 4 5 FIGURE 4 5 2 To adjust unhook upper spring from cable eye and...

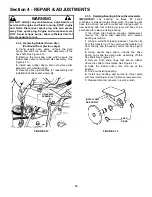
Page 14: ...c is causing slippage clean discs as follows 1 Wipe away any oil or grease with a clean cloth 2 Use either an approved grease solvent or hot soapy water to clean drive disc or driven disc 3 Rinse comp...

Page 15: ...ewed from operators position Then retighten the connector hex nut securely See Figure 4 10 Move ground speed control to the first speed position then back to the sixth speed position Recheck the 1 8 m...

Page 16: ...MPORTANT The bearing on these M series machines is staked into the thrust plate The bearing will have to be driven out with a mallet and a large punch A new bearing with four retaining screws will hav...

Page 17: ...ully install new O ring over the outside of the new bearing 6 Install bearing holder and secure with screws 7 Install 3 8 hex lock nut FIGURE 4 14 4 4 BELT SERVICE On self propelled mowers the engine...

Page 18: ...tion 5 Hold the slotted end of the drive disc bolt with a screwdriver and remove the nut and internal tooth lock washer See Figure 4 16 6 Remove the belt cover located under deck 7 Lift the drive disc...

Page 19: ...ifts Tighten to proper torque 4 Lumpy or frayed belt 4 Replace belt Mower Will Not Move 1 Damaged transmission 1 Contact authorized SNAPPER dealer Loss Of Traction 2 Traction drive belt requires repla...

Page 20: ...eck Grease Level Pages 10 X X Periodic Grease Check Pages 11 X Drive Disc Check for Wear Damage Replacement Page 13 16 X Change oil every 25 hours when operating under heavy load or high temperatures...

Page 21: ...ginal purchase date SNAPPER will not be responsible for any installation cost incurred The battery warranty only covers original equipment batteries and does not cover damage to the battery or machine...

Page 22: ...22 PRIMARY MAINTENANCE...

Page 23: ...23 PRIMARY MAINTENANCE...

Page 24: ...24 PRIMARY MAINTENANCE...

Page 25: ...25 PRIMARY MAINTENANCE...

Page 26: ...__ ___________________________________________________________________ ___________________________________________________________________ _____________________________________________________________...

Page 27: ...__ ___________________________________________________________________ ___________________________________________________________________ _____________________________________________________________...

Page 28: ...__ ___________________________________________________________________ ___________________________________________________________________ _____________________________________________________________...

Page 29: ...you have any questions about your Snapper product contact your local authorized Snapper dealer or contact Snapper Customer Service at Snapper McDonough GA 30253 Phone 1 800 935 2967 COPYRIGHT 2001 SN...

Reviews: